
Configuring SAML to use for user login can be a slightly challenging task. This page describes all the necessary steps from the client’s side.
Prerequisites
-
The final custom domain must be configured
-
Circularo application needs to be registered in client’s AD
Registering the application in client’s AD
Most client utilize the MS Entra ID (formerly Azure Active Directory):
-
Sign in to the Azure Portal
-
Open the Azure Portal and log in with your credentials.
-
-
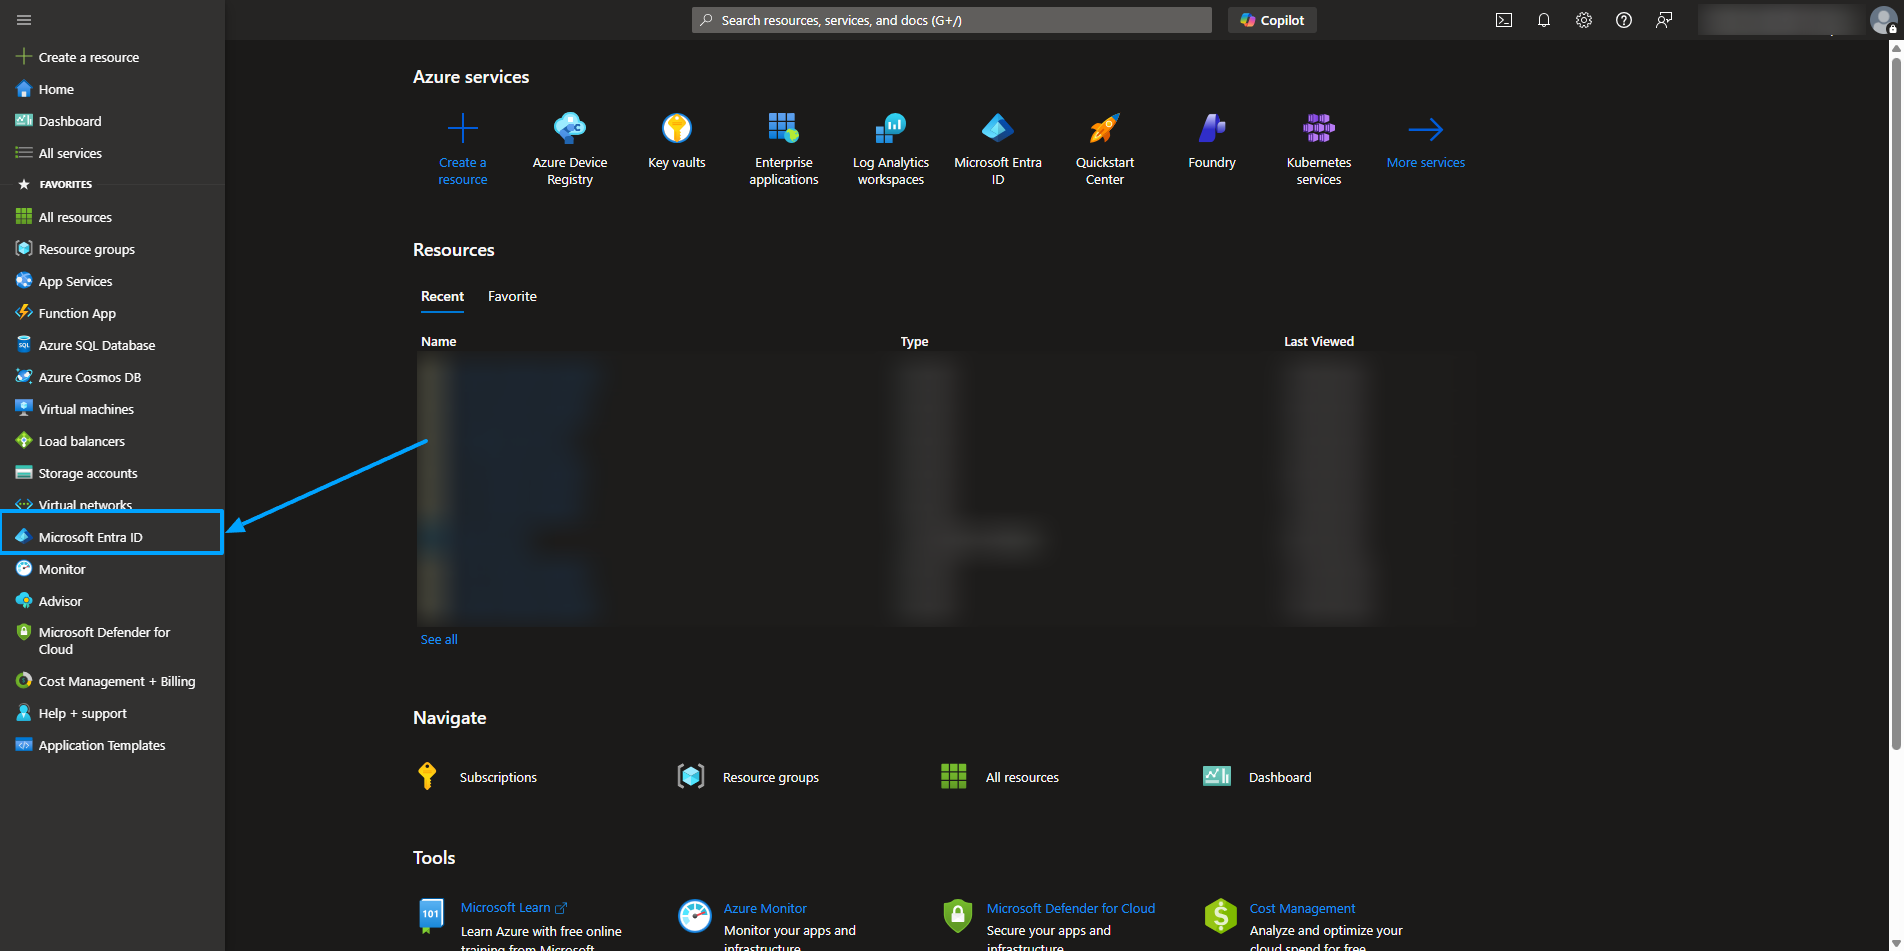
Access MS Entra ID
-
From the left-hand menu, select Microsoft Entra ID.
-
-
Create a New Application
-
Navigate to Enterprise applications.
-
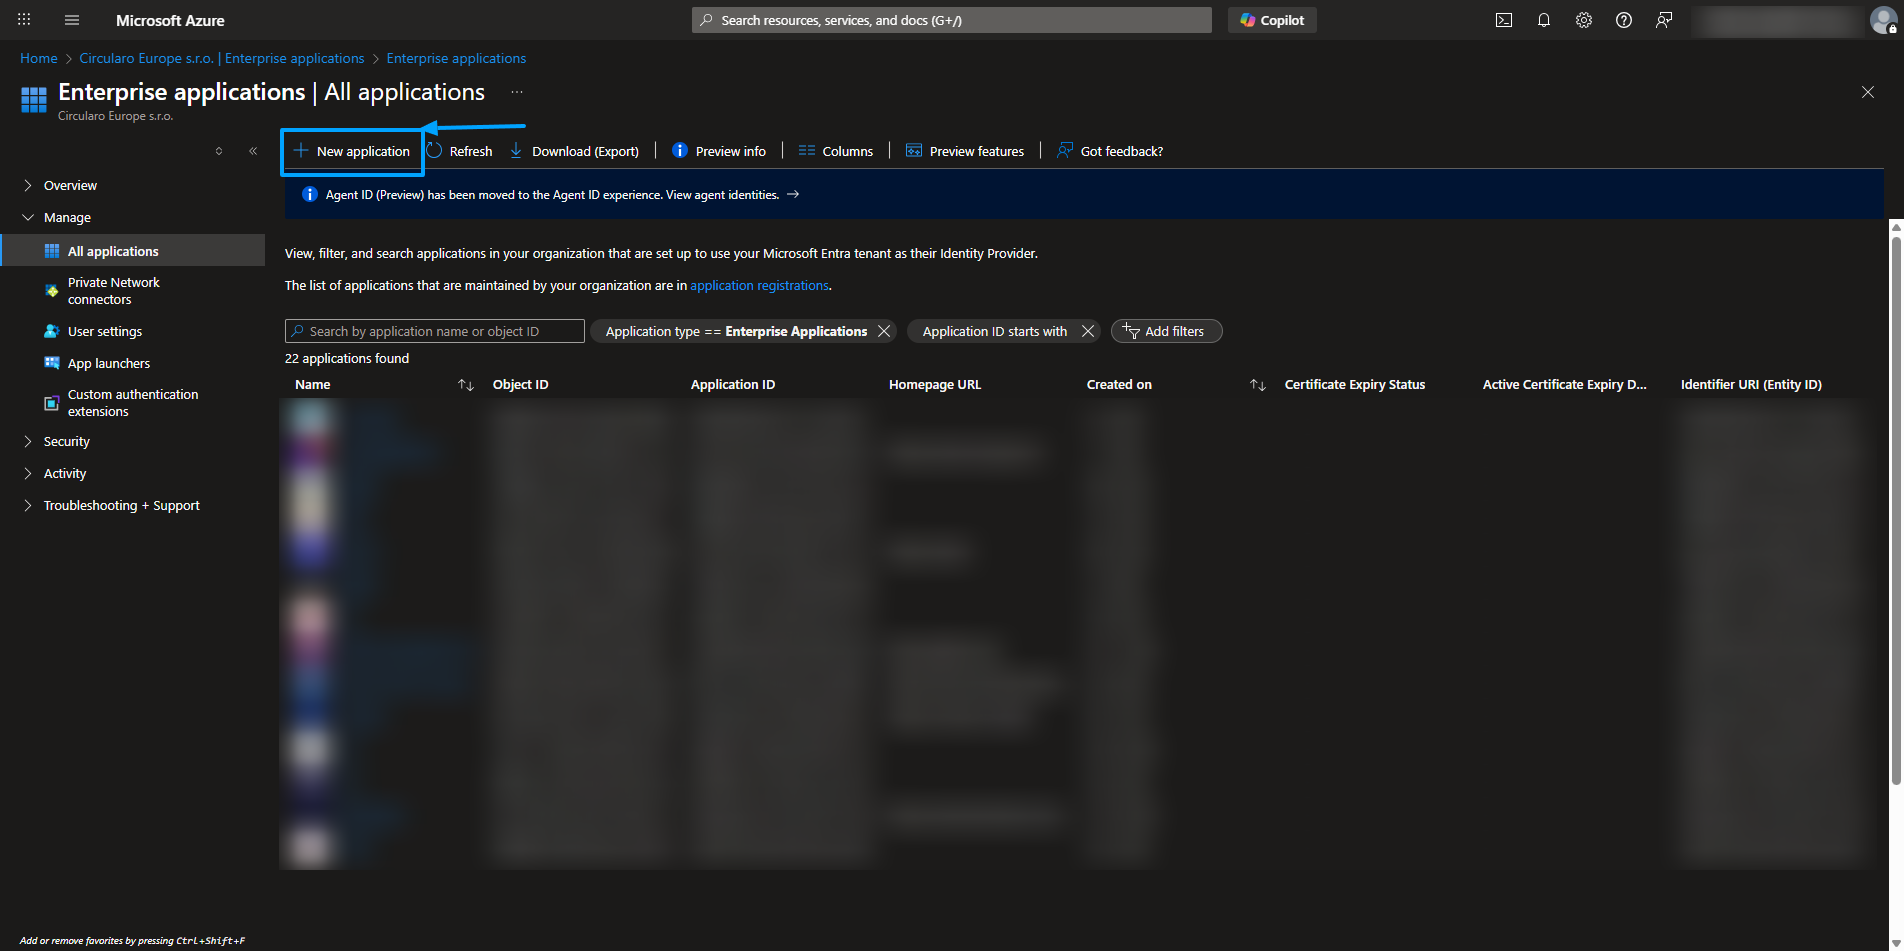
b. Click + New application and select Create your own application.
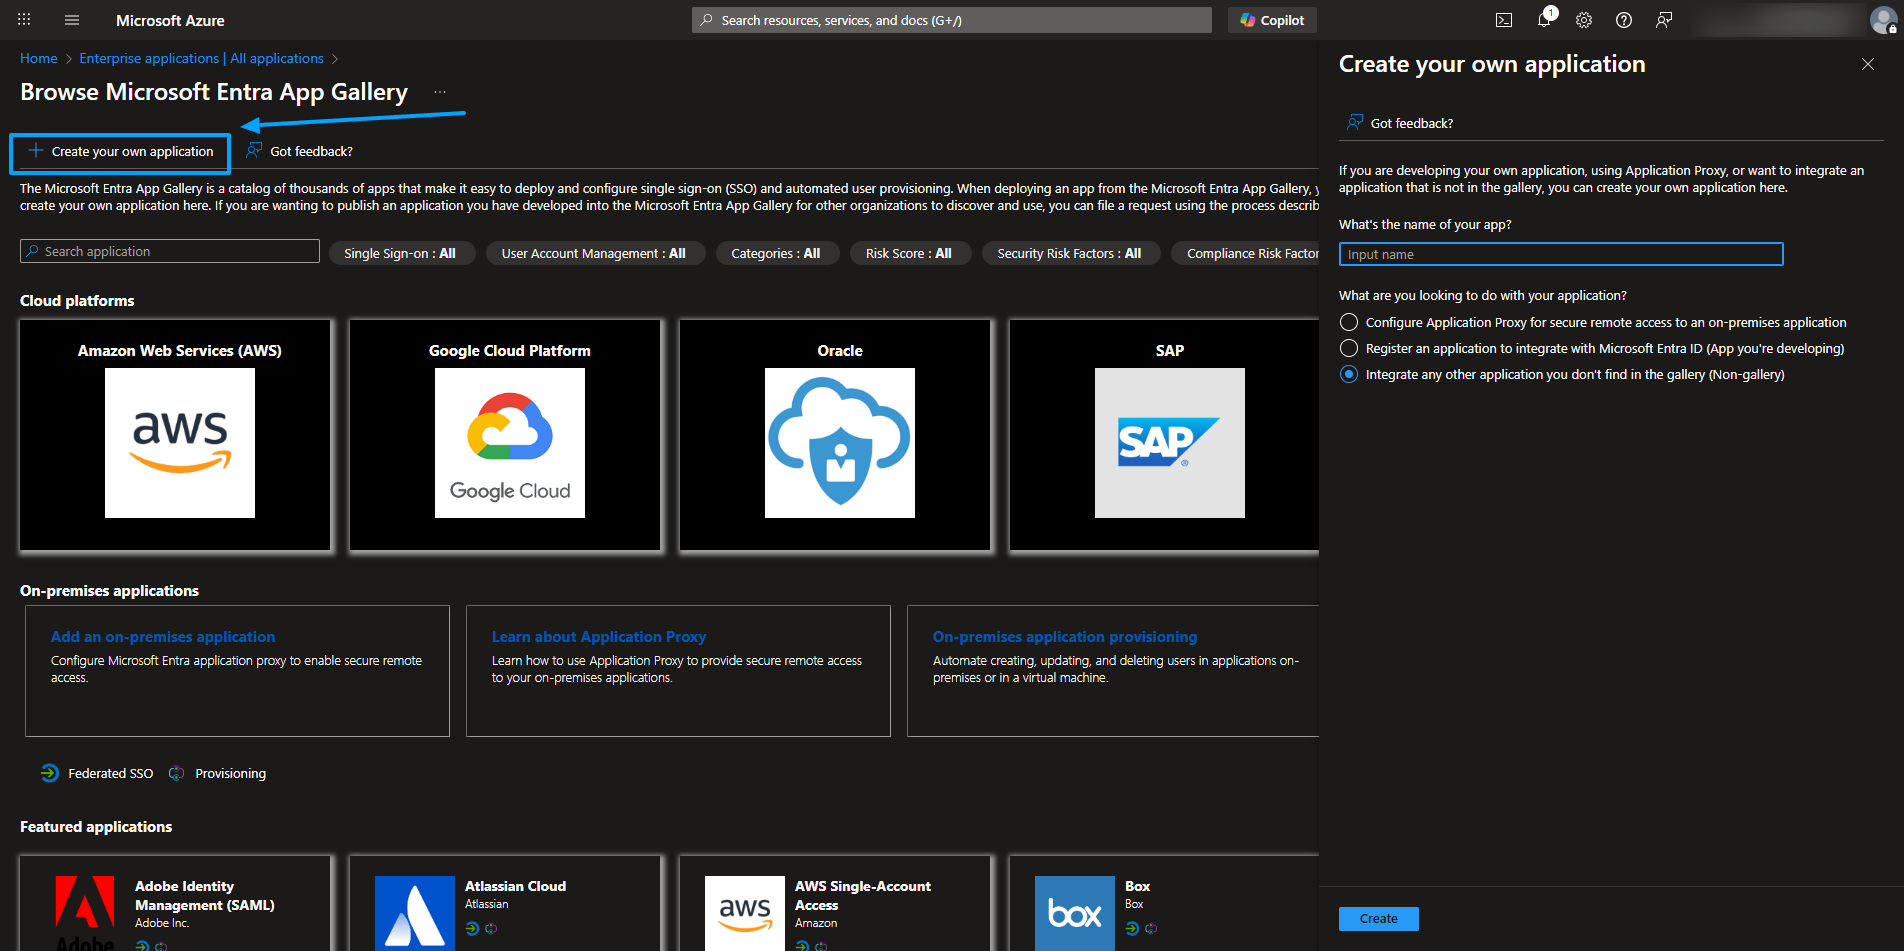
c. Enter a name for the application and proceed to register it as a custom-built app.
-
Configure the Application
-
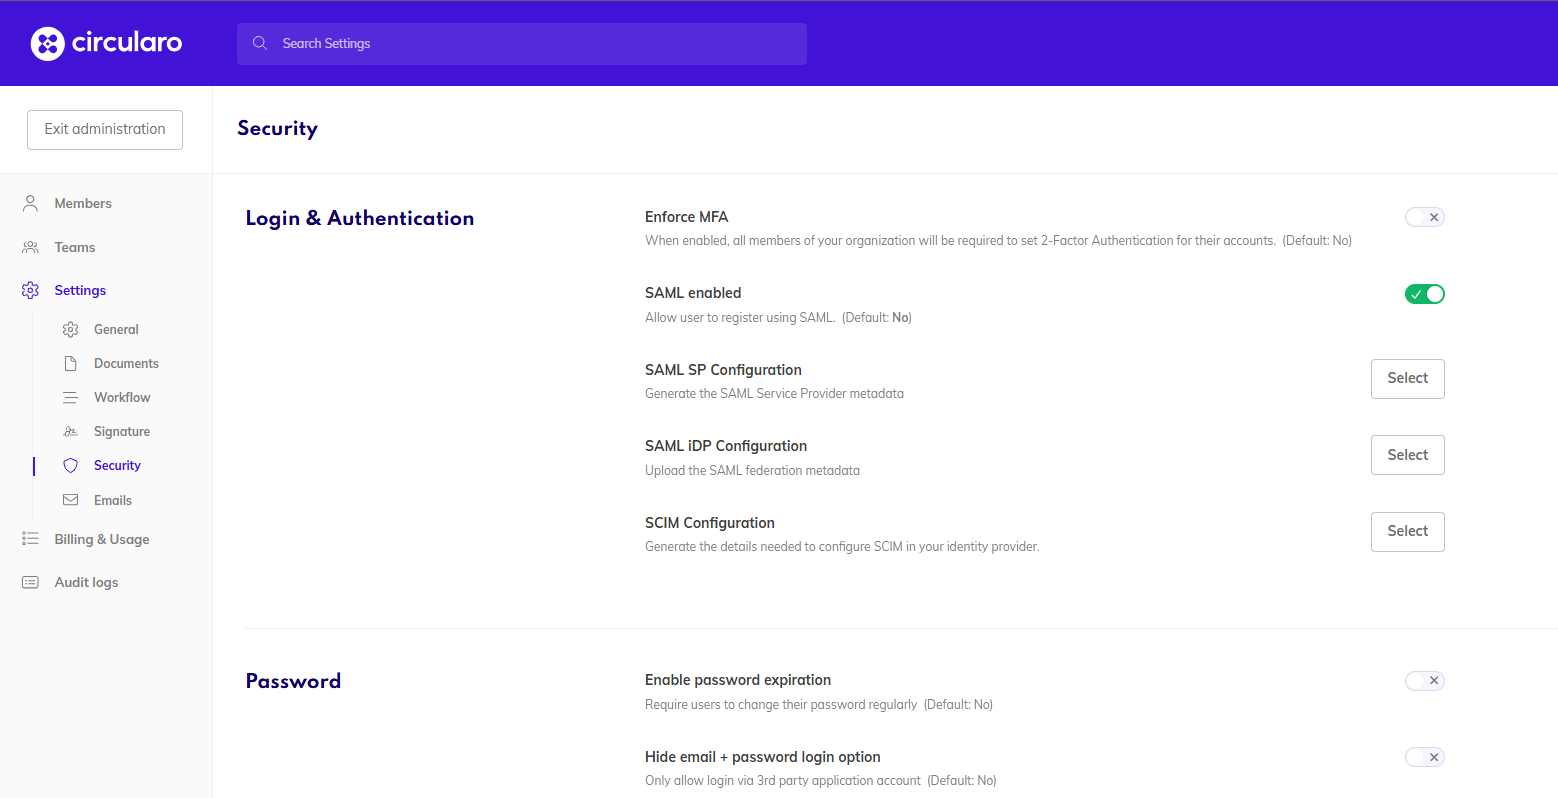
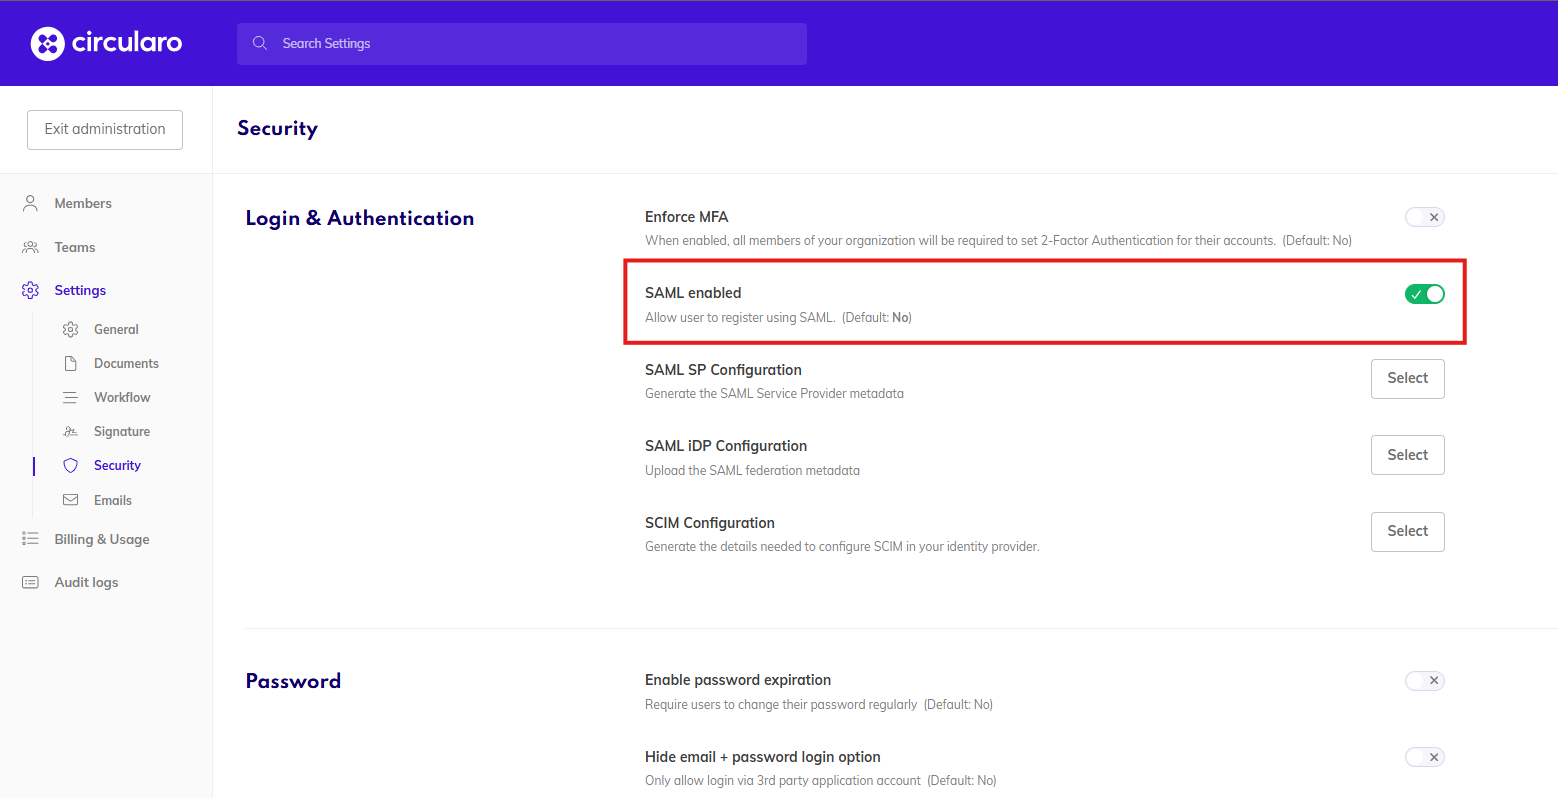
Navigate to Circularo Administration → Settings → Security → Login & Authentication.
-
Toggle the “SAML enabled” switch.
-
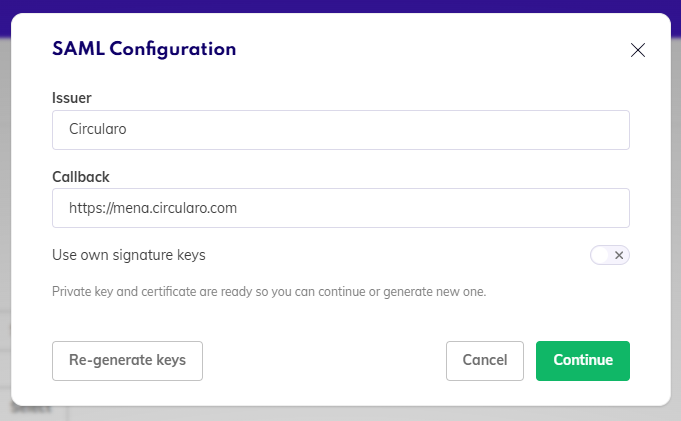
Go to “SAML SP Configuration”, ensure that the “Issuer” and “Callback” fields are filled and generate keys. Once the keys are generated, click on “Continue”.
-
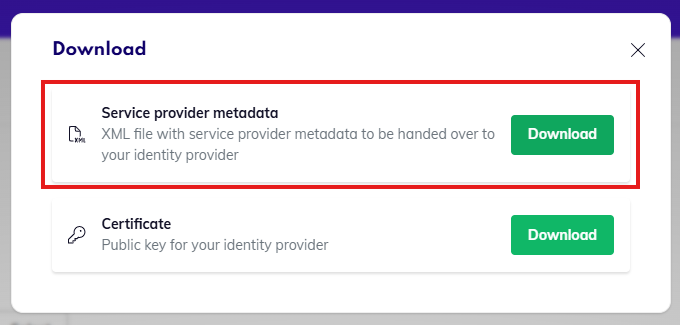
Download the Service provider metadata file.
-
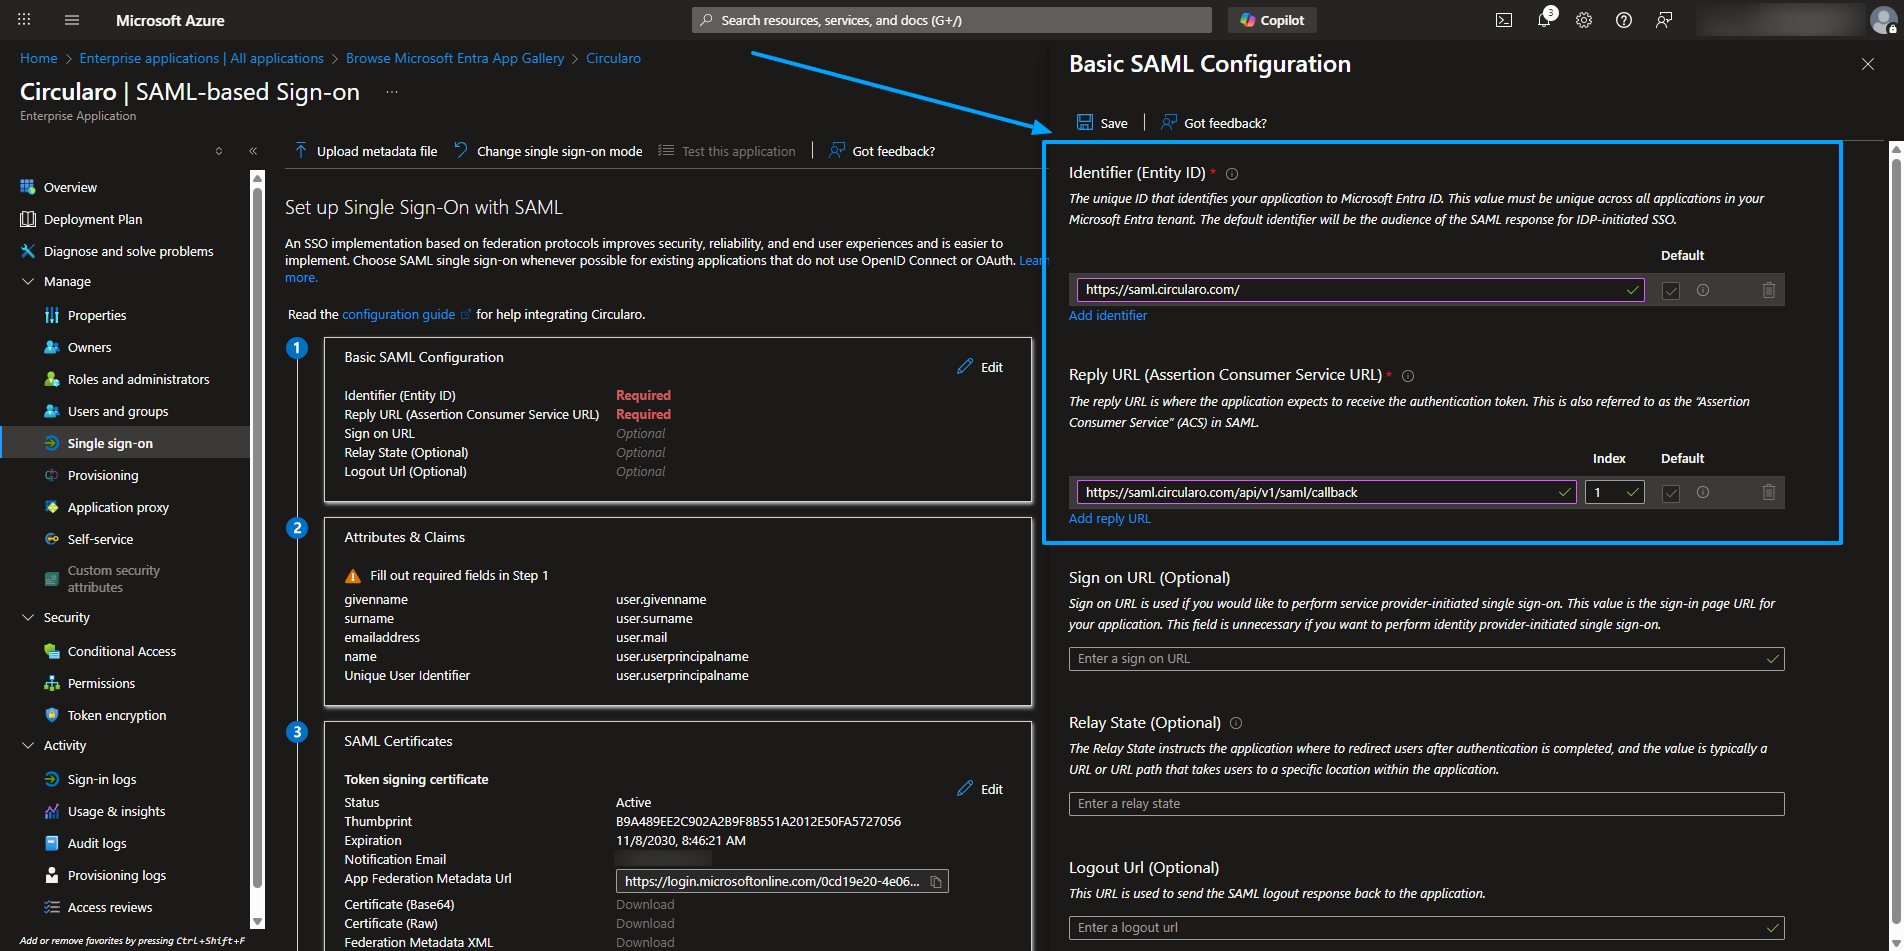
Navigate to your enterprise application in Entra ID → Single sign on → SAML and upload the SP metadata file.
-
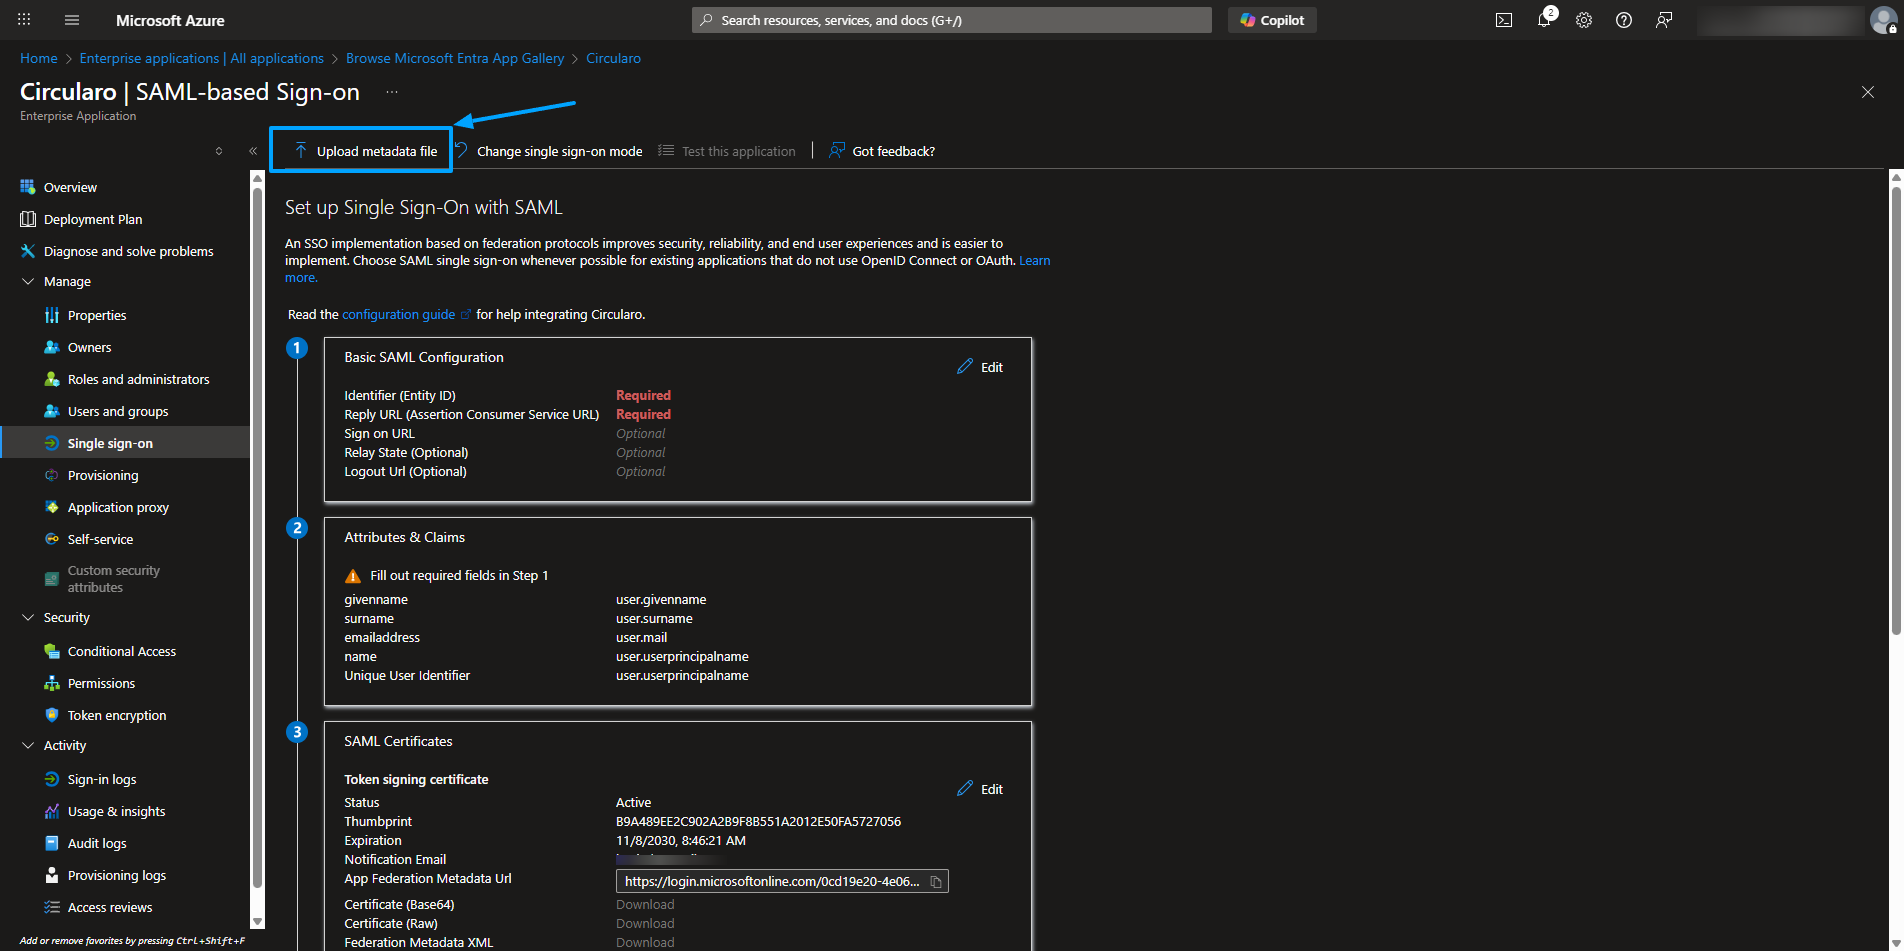
f. Set up Single Sign-On (SSO) with SAML - the Identifier and Reply URL at minimum.
-
Locate the Federation Metadata Document
-
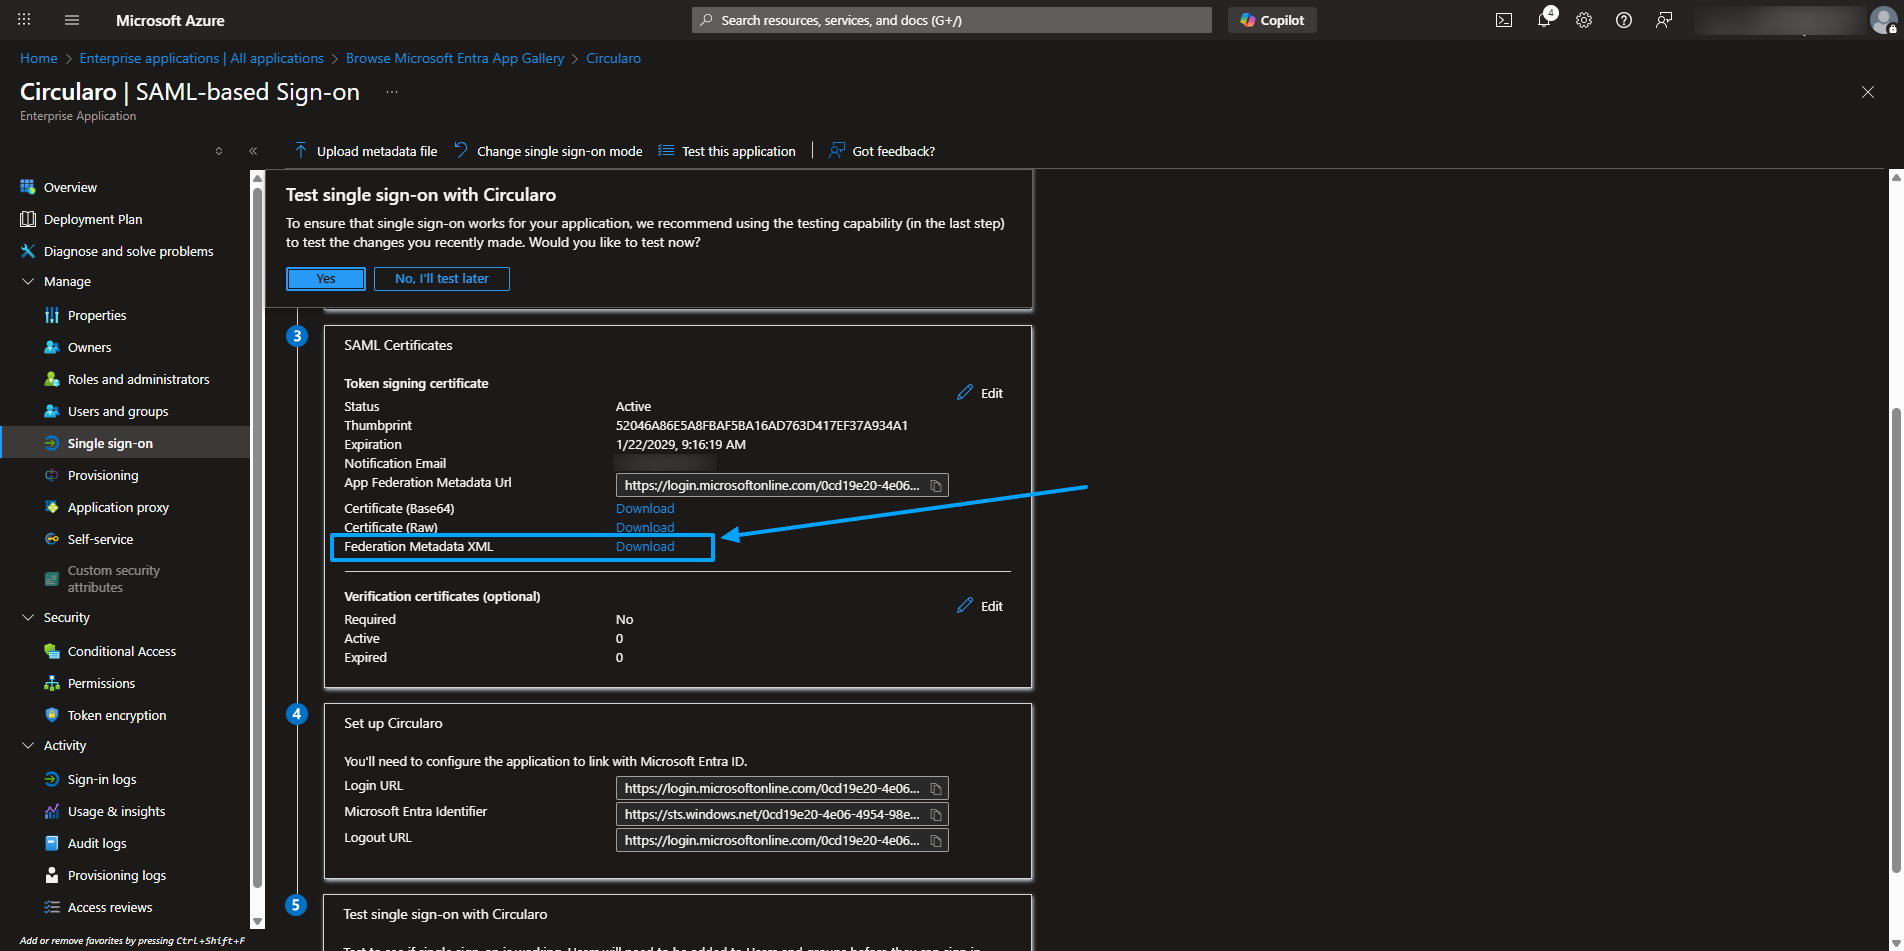
Go to the Set up Single Sign-On with SAML section.
-
Find the Federation Metadata XML link.
-
-
Download the Metadata File
-
Click the Federation Metadata XML link to open it in your browser.
-
Save the file to your device (e.g., right-click and choose Save As).
-
-
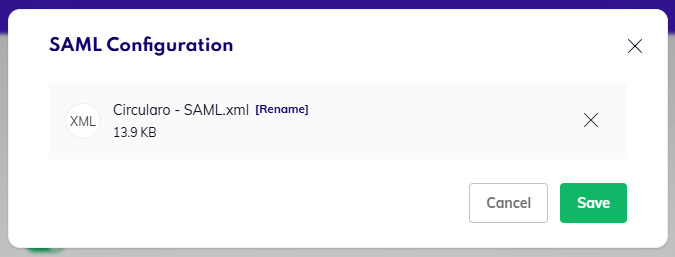
Upload the Federation Metadata XML file to Circularo
-
Go to Administration → Settings → Security → Login & Authentication → SAML IdP configuration
-
Upload the Federation Metadata XML and click “Save”
-
For other AD systems the configuration should be similar but we currently unfortunately don’t have any experience with these.