Context Menu
The Context Menu shows all actions you can perform with the currently selected document.
Not all of the actions listed below will always show in the menu, as some of them may not be available for your particular document - some actions are only available when the document is not in a signing process, and some are only available when you are the creator of the document, such as Edit details or Move to folder.
The contextual menu will only be visible if there is more than one action available for you. If there is only one action possible, the system will display the action button directly instead of a dropdown.
You can also access the context menu in the Document tab by right clicking on the document, or click on the drop down at the right edge of the document row, as well as from the Progress timeline page.
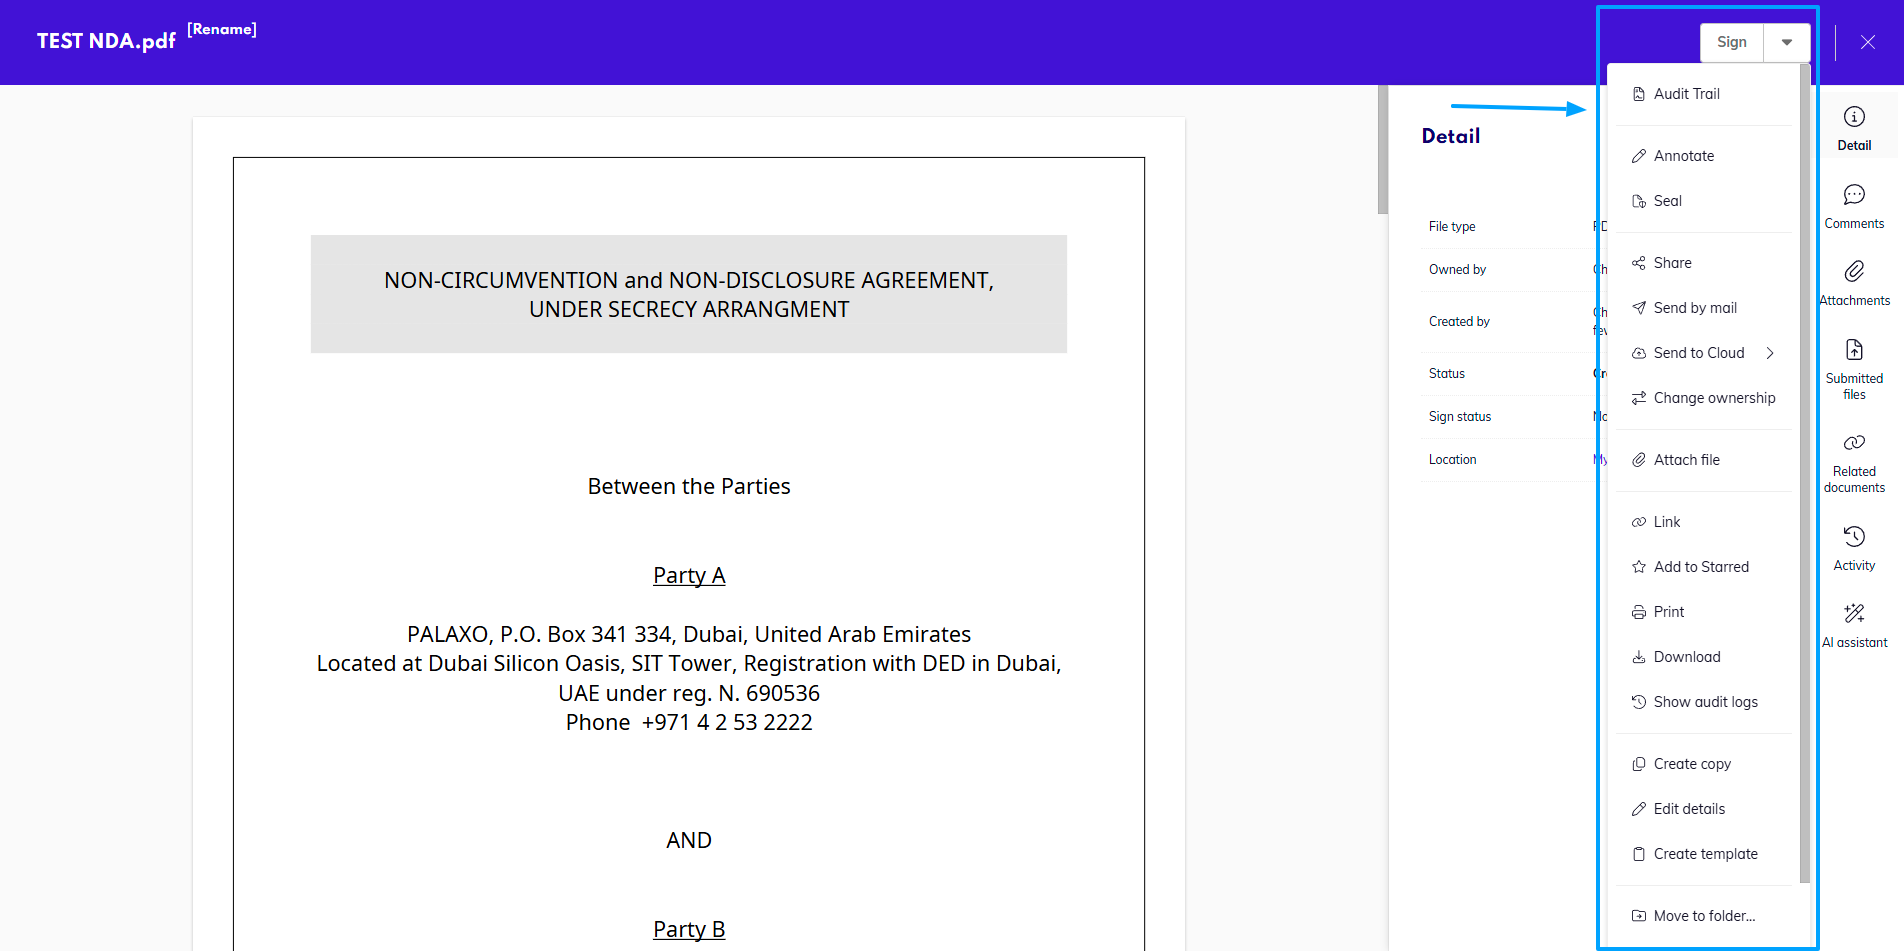
Opened Context Menu
Usually one option of the actions is visible as a big button and the rest are in the drop-down menu. For documents that have the Created status and those waiting for your signature, the button is usually Sign. For completed documents it is Download, and for documents in progress that are waiting for others it is Remind.
Sign
Sign the document.
Delegate
Forward the document to someone else to sign instead of you.
Fill out the email address of the person who will process the document instead of you. You can also leave a message to the new recipient.
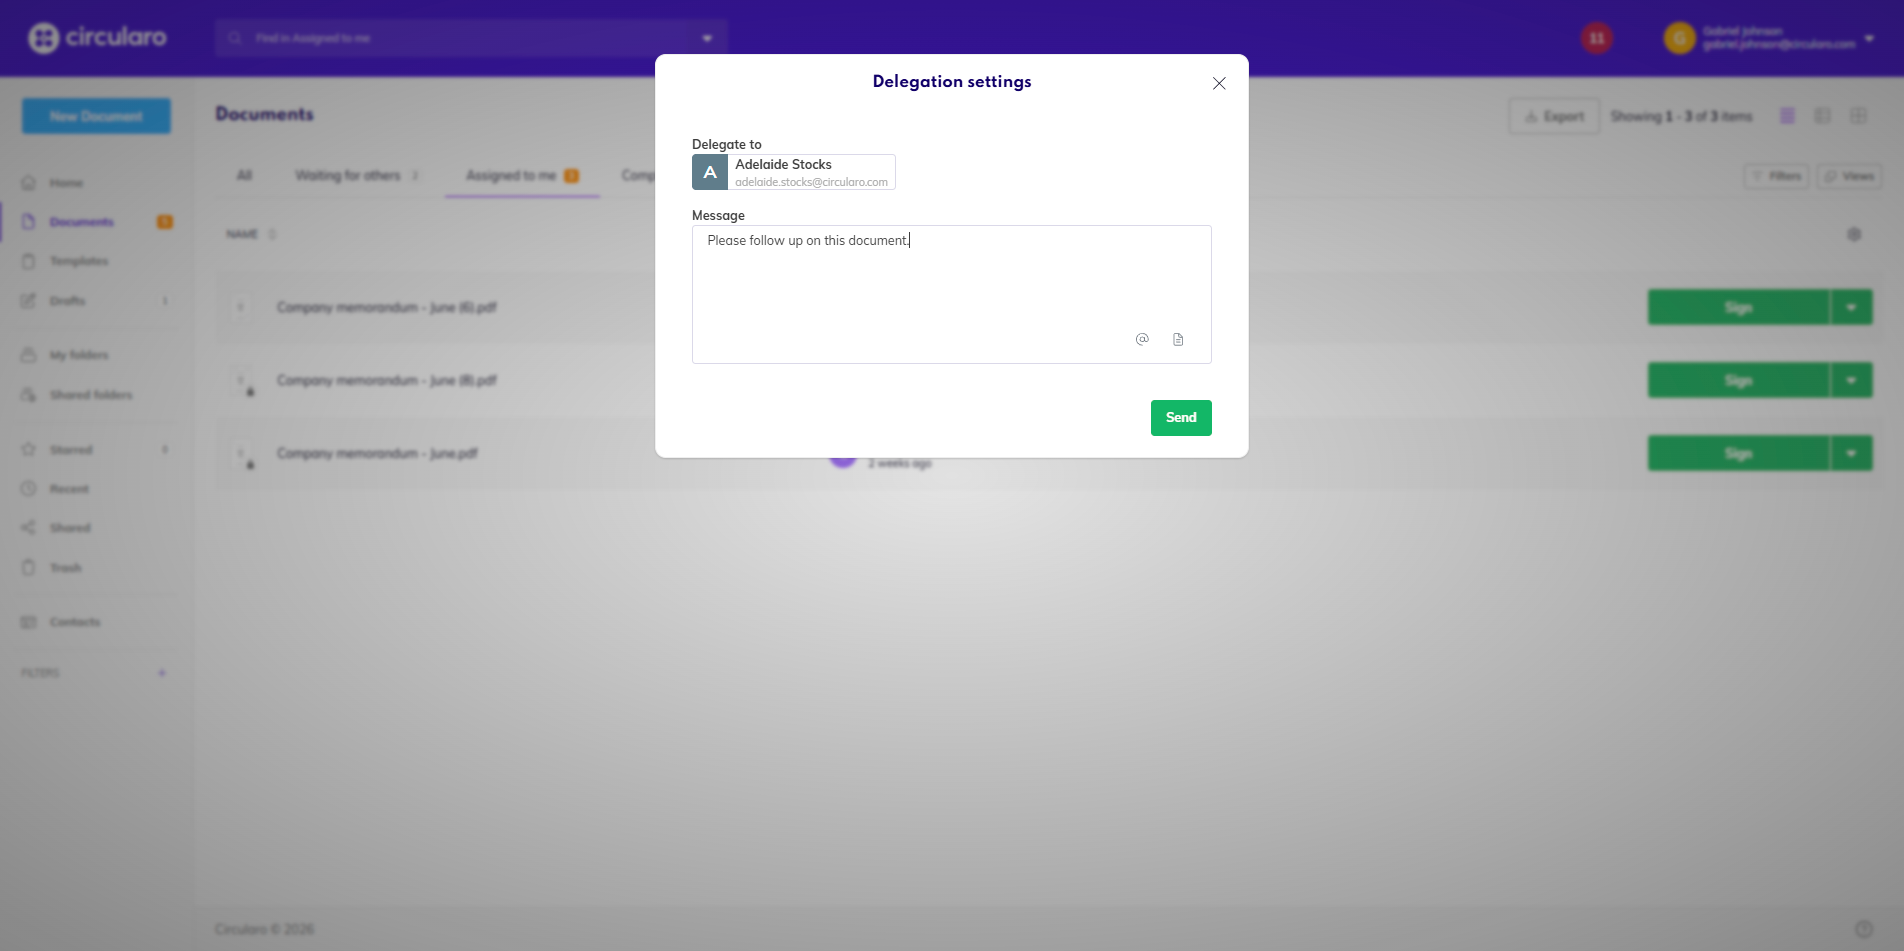
Delegate a document
Reject
Reject to process the document.
Remind
You will see the Remind button next to documents that are currently being processed.
Use it to send a reminder to all remaining recipients or the person whose action is required next, depending on the signing order.
Cancel transaction
You can cancel the workflow associated with a document, if you are the original sender of that document.
Seal
Availability: Business and Enterprise
Add an invisible electronic certificate without any visual indicator. This secures the document and makes it verifiable even with no visible signatures present.
Sealed documents can still be signed later, but signed documents (or any documents already containing a certificate) cannot be sealed. It is also not possible to seal documents that are currently being processed.
Edit transaction
Availability: Business and Enterprise
You can only edit a transaction when you are the owner of the document.
You can choose to edit specific details of a transaction - the recipients, permissions, protection, deadline or reminders. Editing is only possible if enabled in the administration, where it has two different levels. If you cannot see this option, or it is only available as long as no one has taken an action on the document, contact your admin.
Details and recipients can only be modified if the person has not yet finished their assigned task (for viewers as long as they have not yet opened the document).
Currently, recipients and viewers can only be changed for a different one, not added or removed.
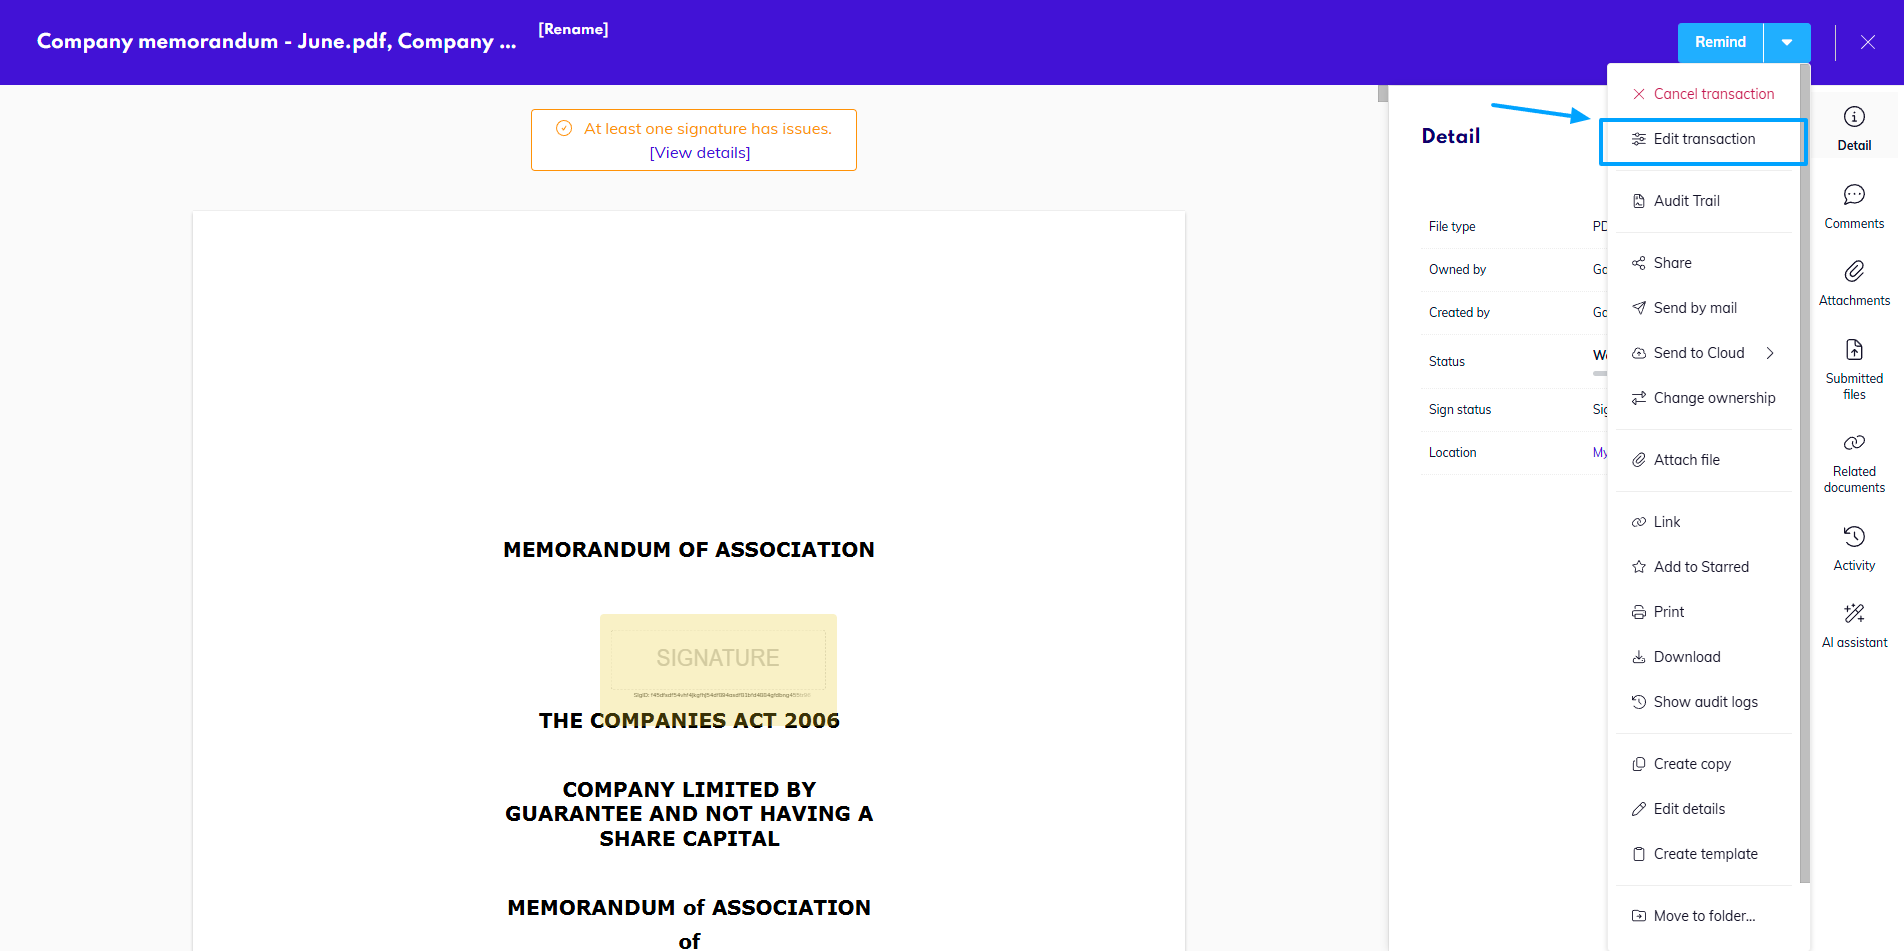
Edit transaction
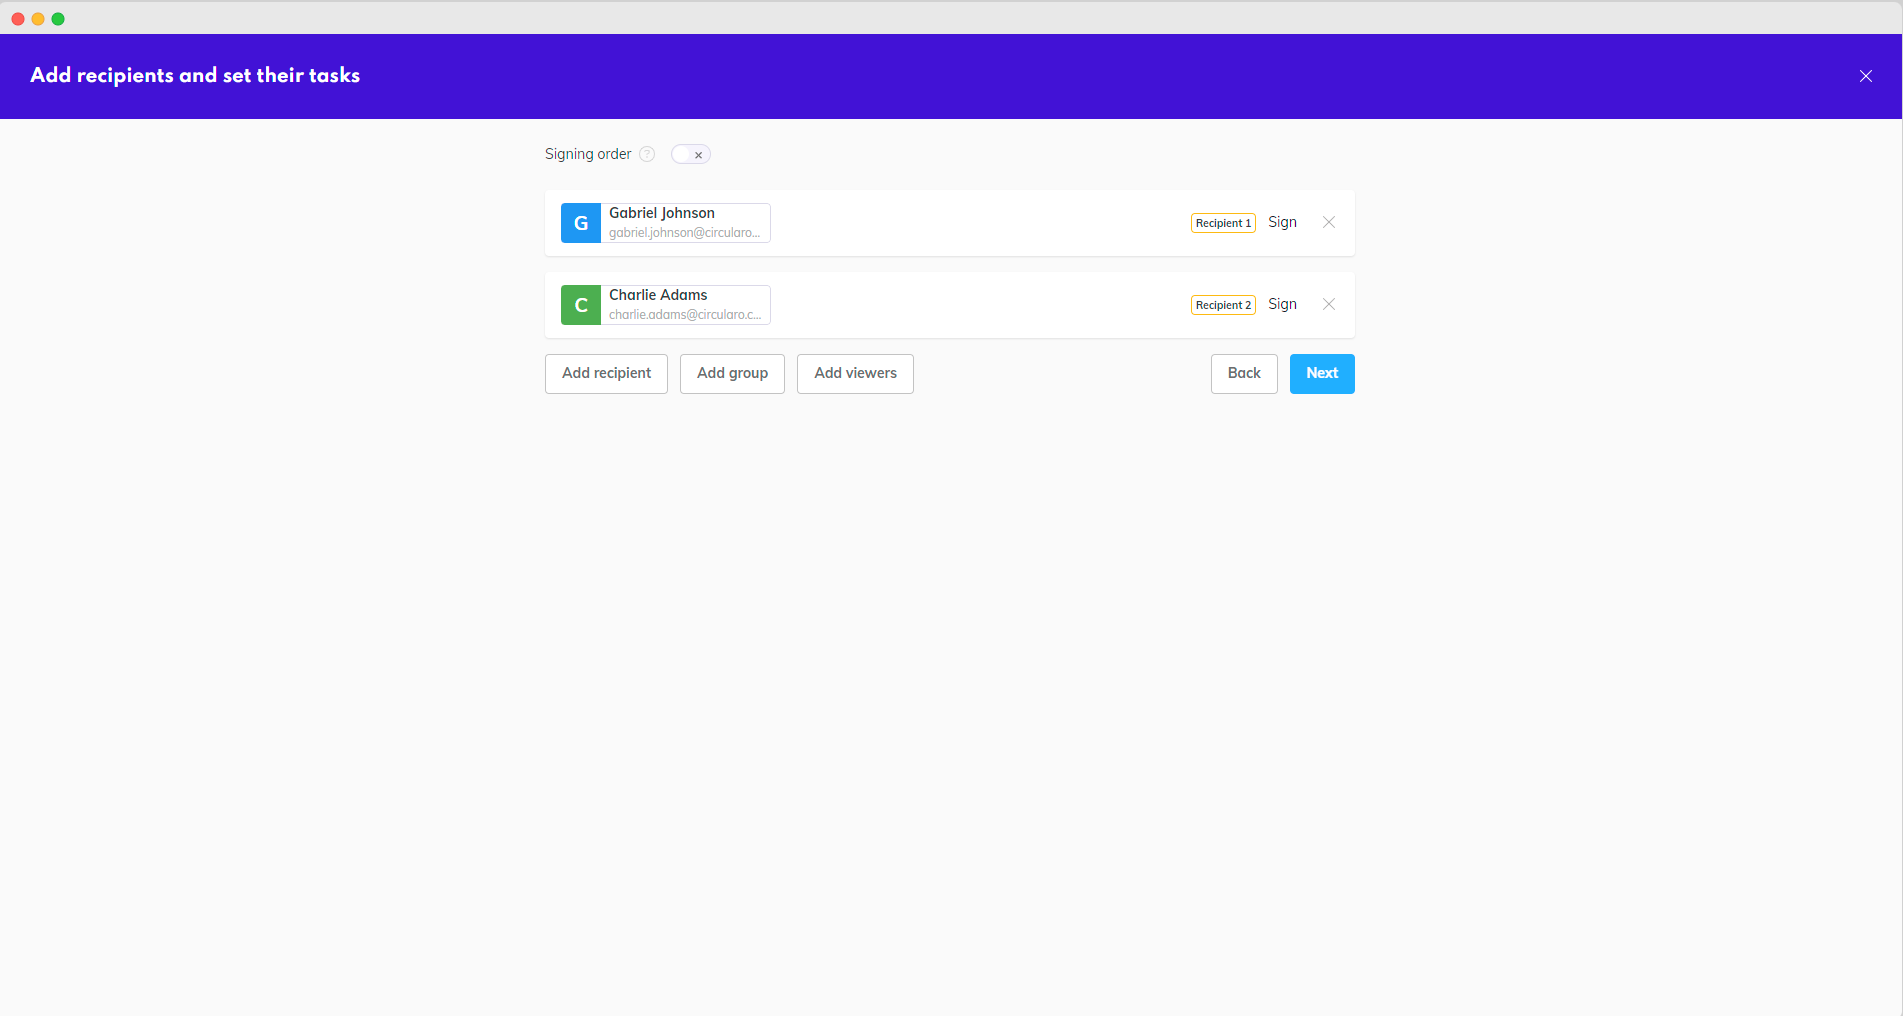
Once you click on the button, you will be taken to the Progress timeline page (unless you are already there) and all recipients that can be have the details edited or be changed to someone else will have a check box next to their name.
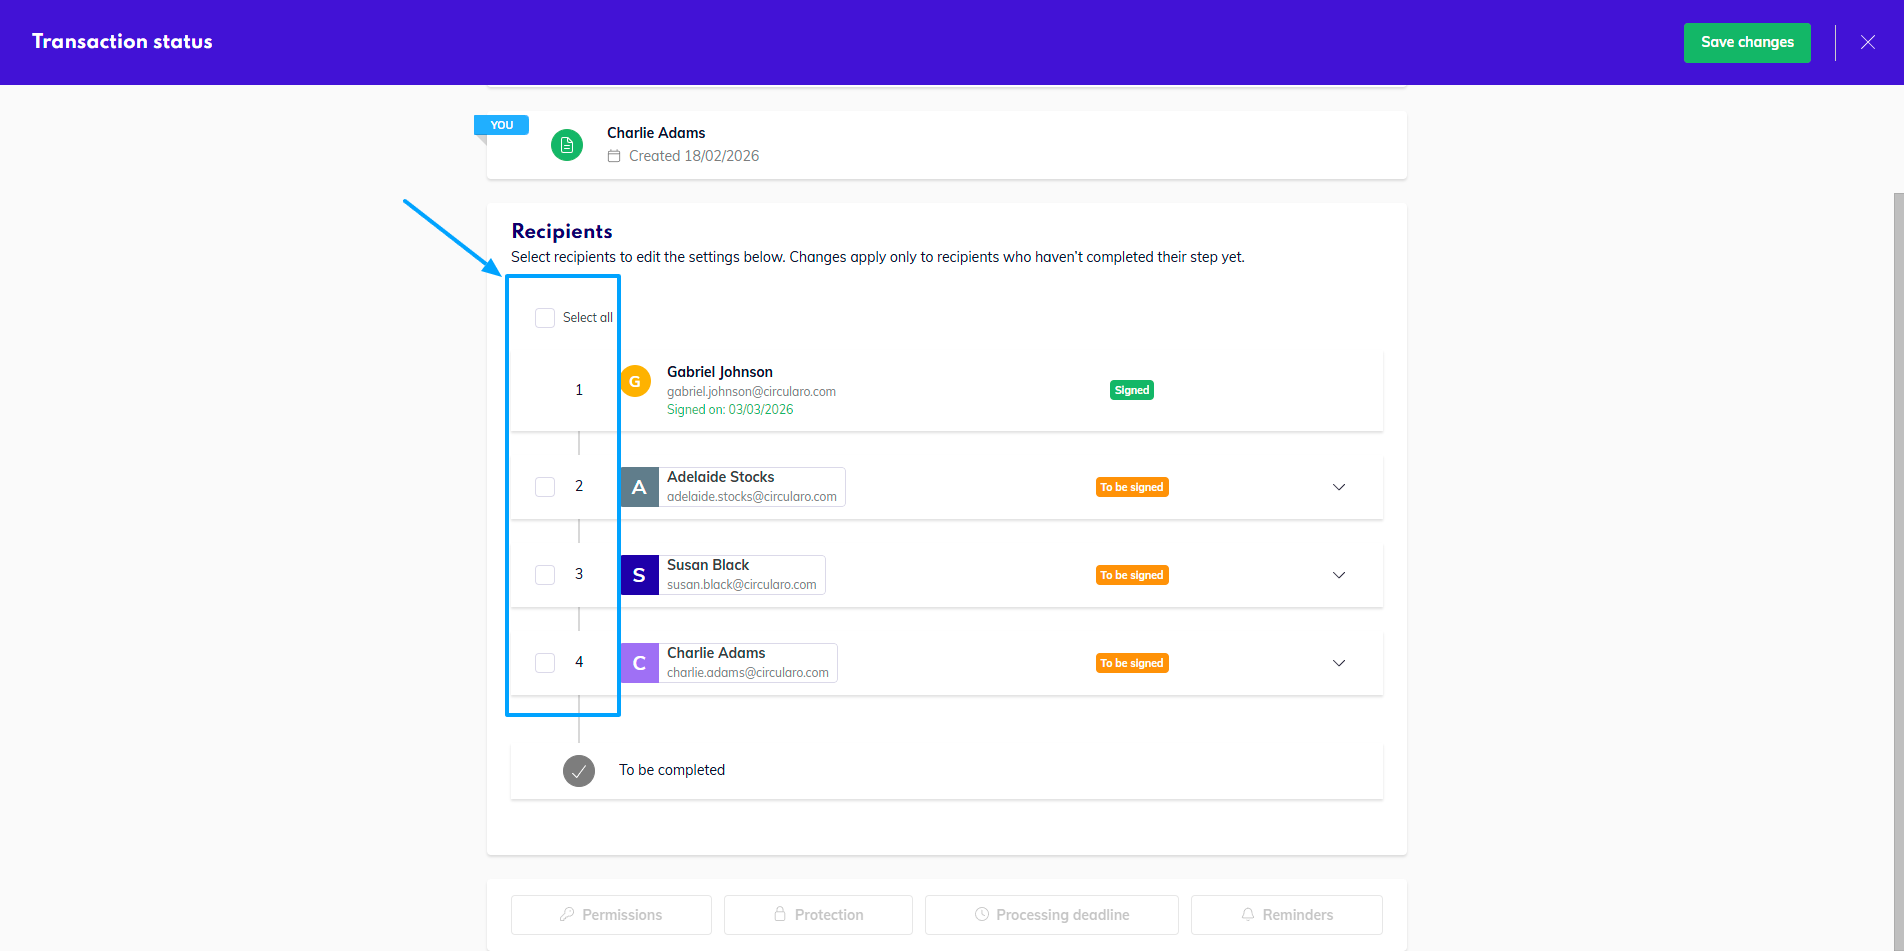
Select recipients
Editing recipients
To edit a recipient, simply click on any of the editable names. You can choose someone from your organization, from your contacts, or write in the email address manually for the new recipient.
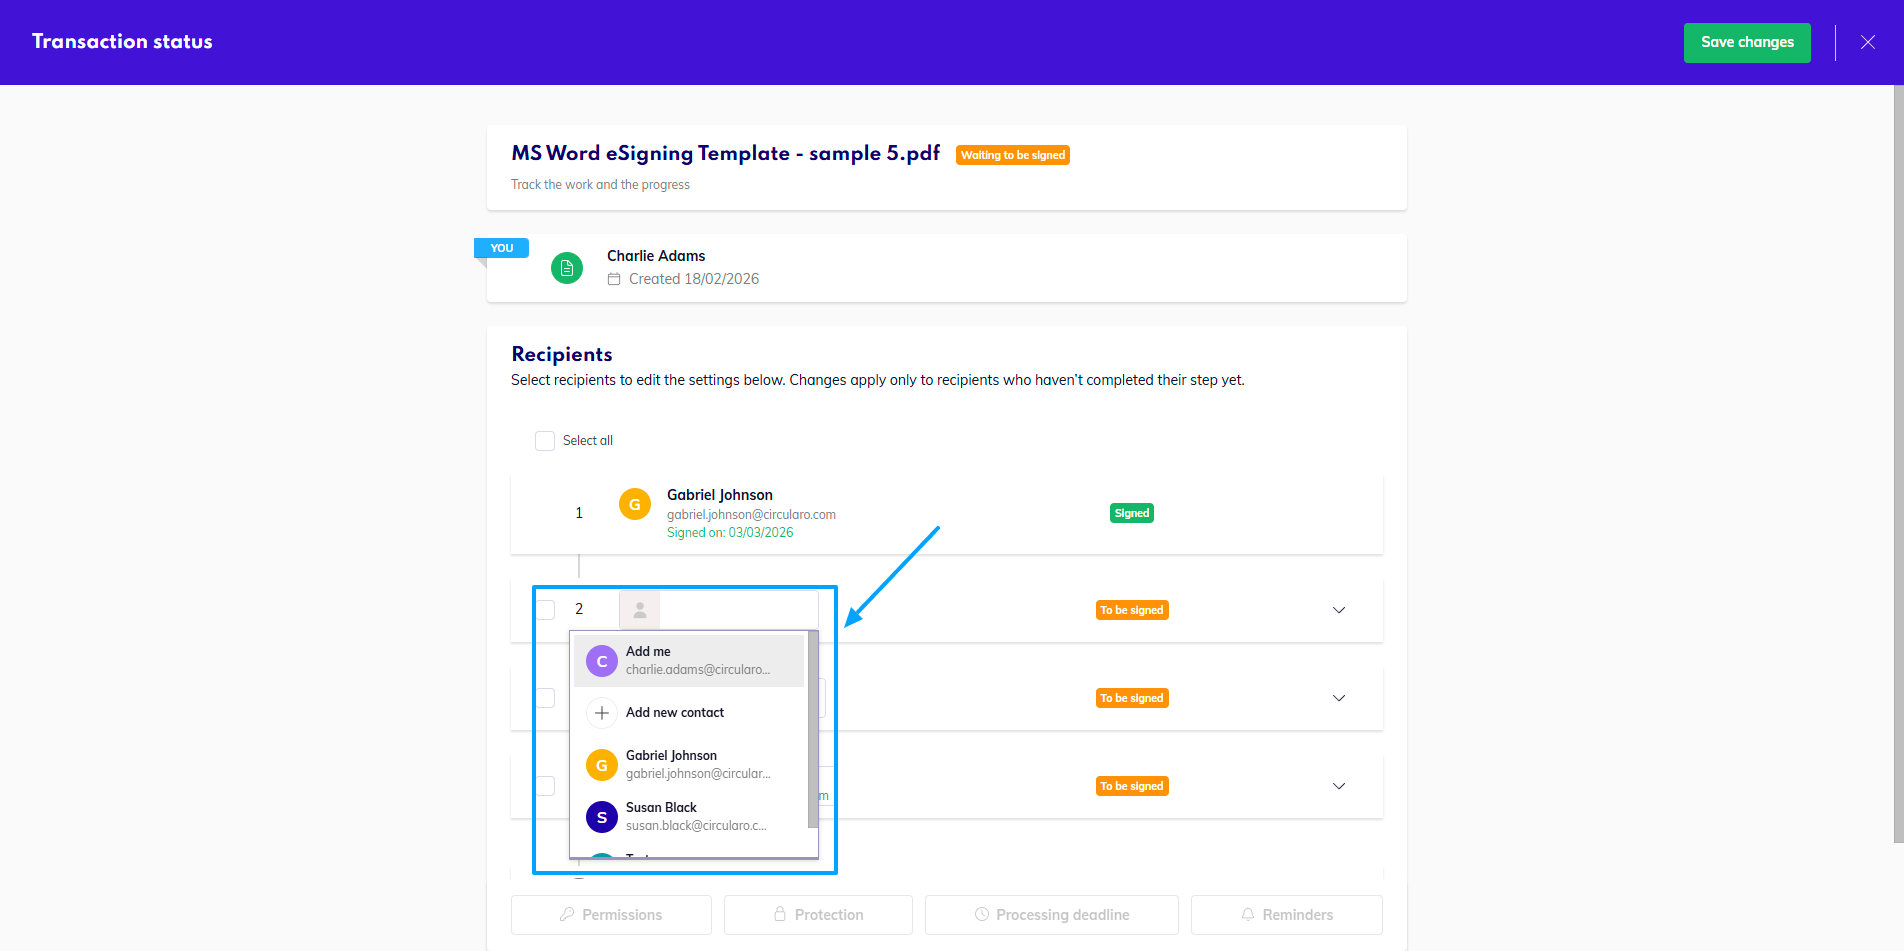
Change recipient
Changes to recipients will only be confirmed upon clicking Save changes in the top right corner, so you can also edit other details before saving.
Changing an external recipient with a set protection to an internal user will remove the set protection, as logging into their account is counted as verifying an internal user’s identity.
However, you can change an internal user to an external recipient and set a new protection at the same time.
Editing details
You have two ways to approach this - either you select multiple recipients (or all) and change the details for each of them to be the same, or you select a single recipient and change the settings individually, if they need to differ between the recipients.
Once at least one recipient is chosen, the buttons at the bottom will become active and you can set the new details - very similarly to how you set them when initiating a new transaction.
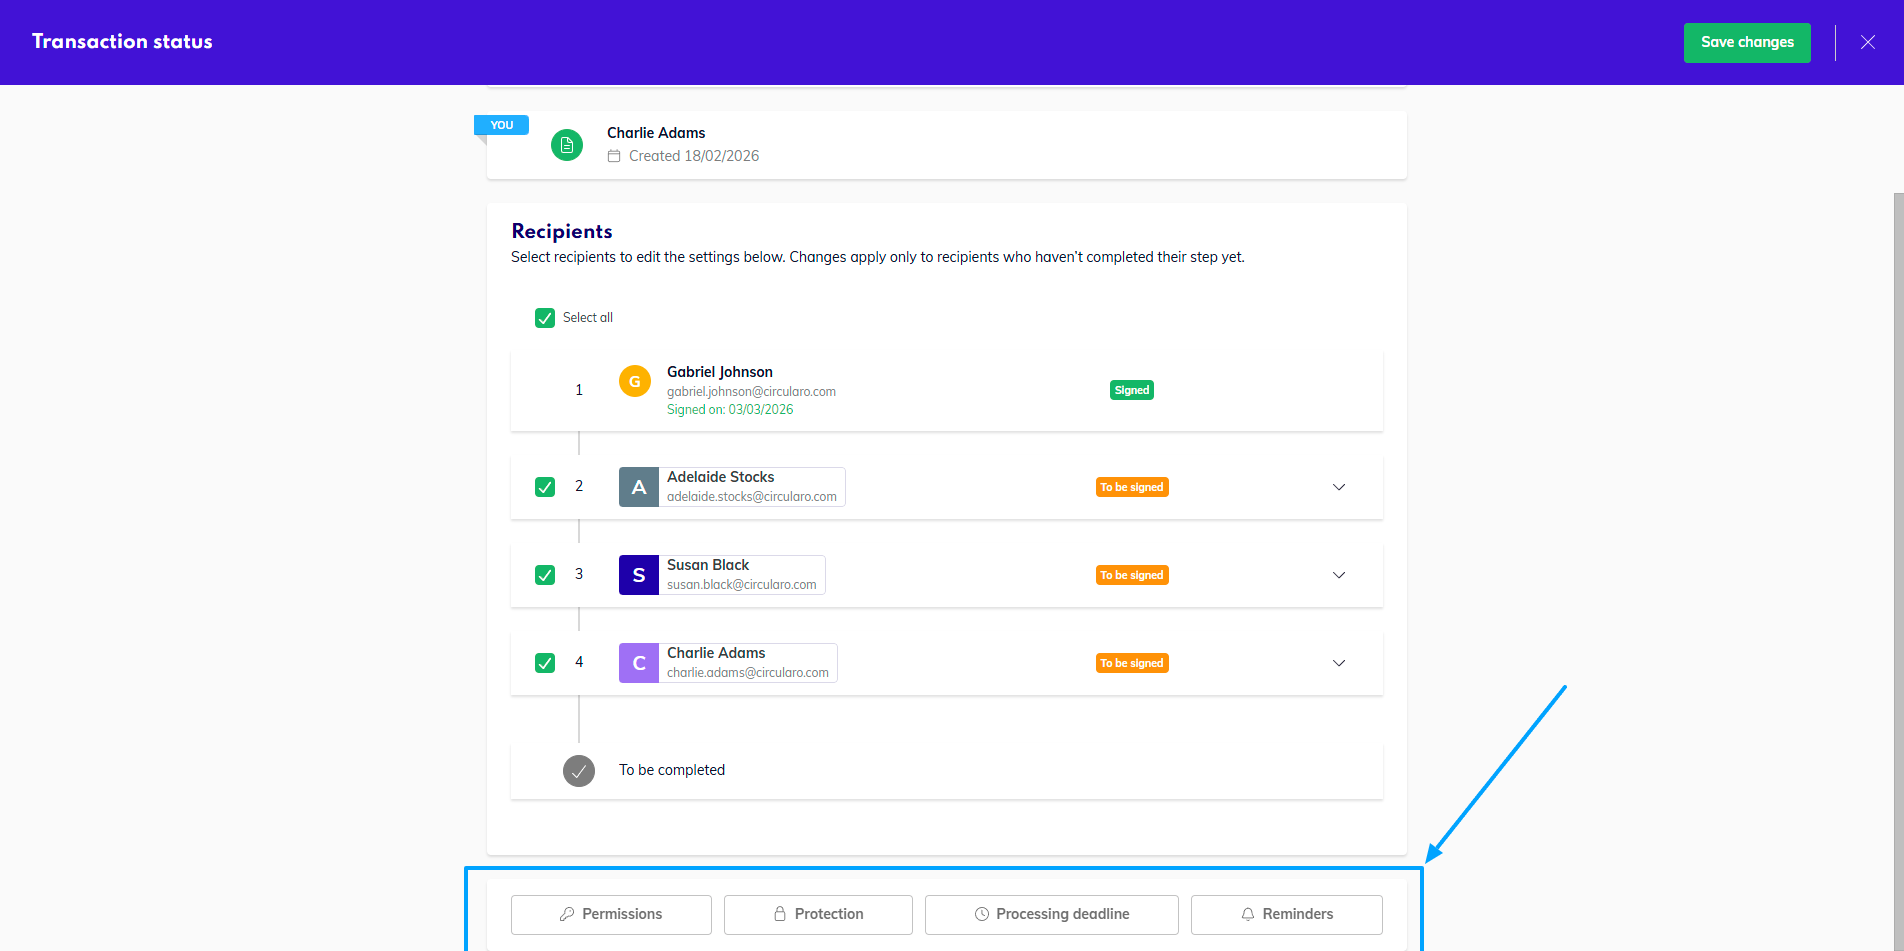
Active buttons
If you want to see what was already set for the recipients and what you set, you can open the details by clicking the downward arrow by the specific recipient.
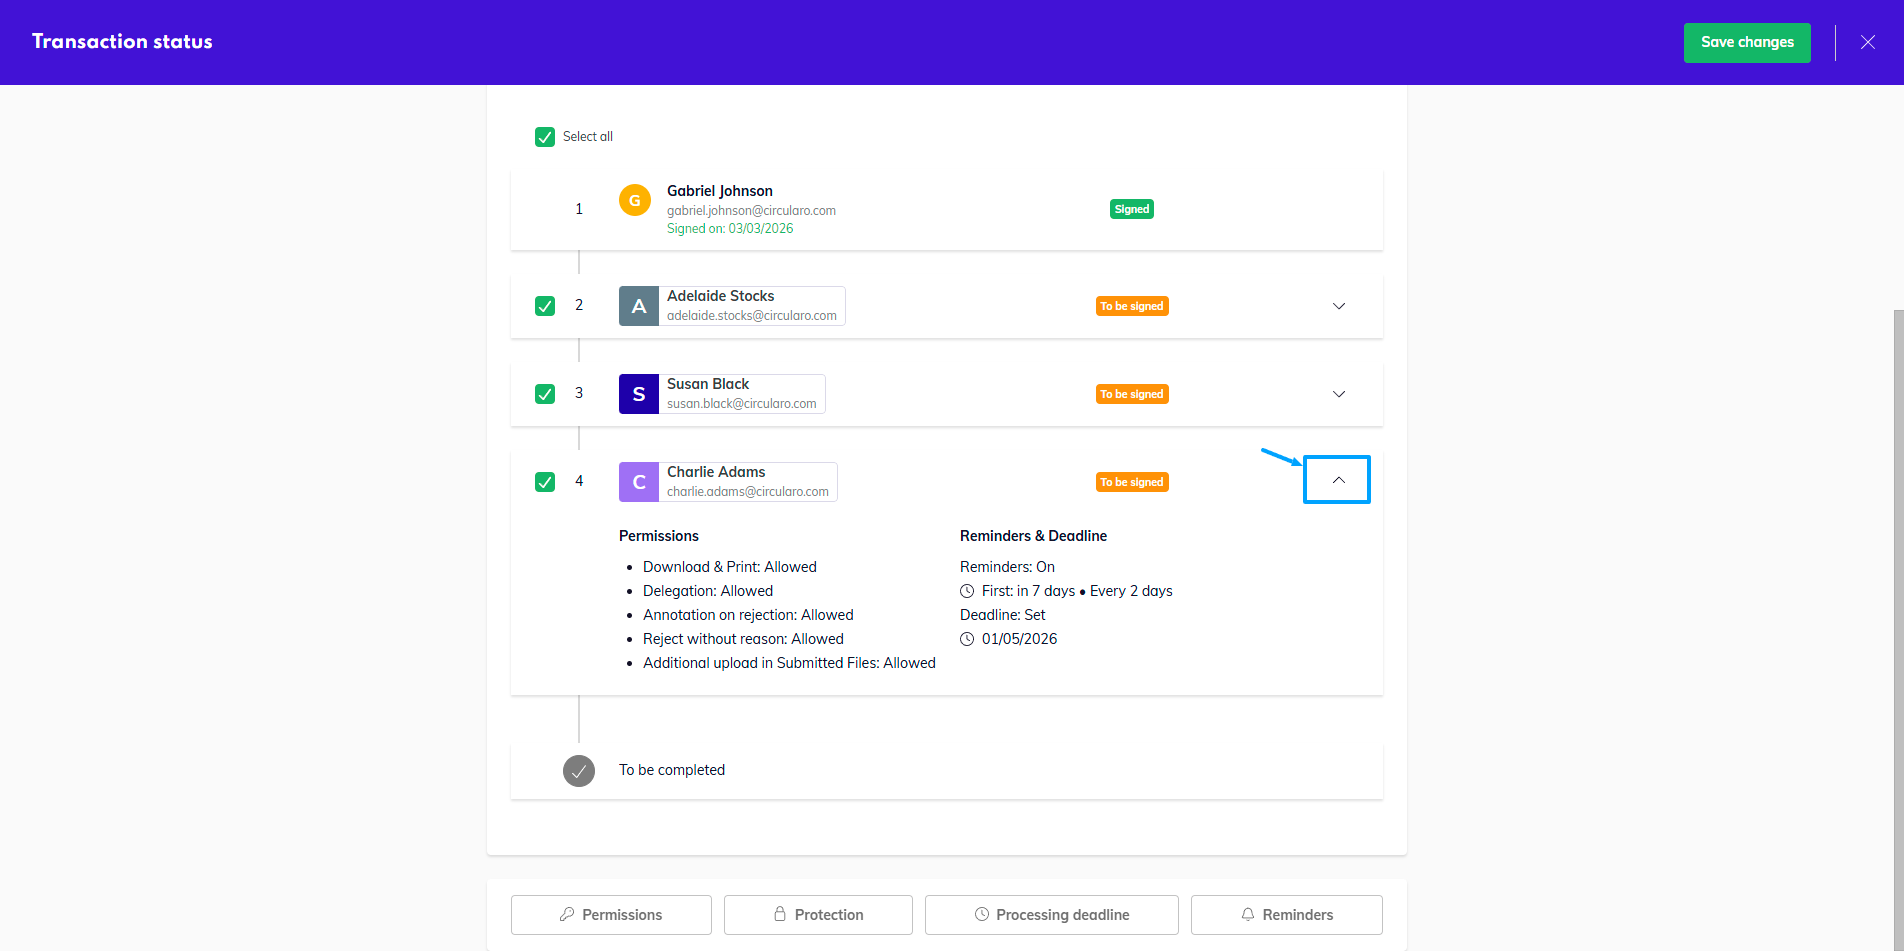
Show recipient details
You will see anything that has been allowed, set as reminders, or the chosen protection for external recipients.
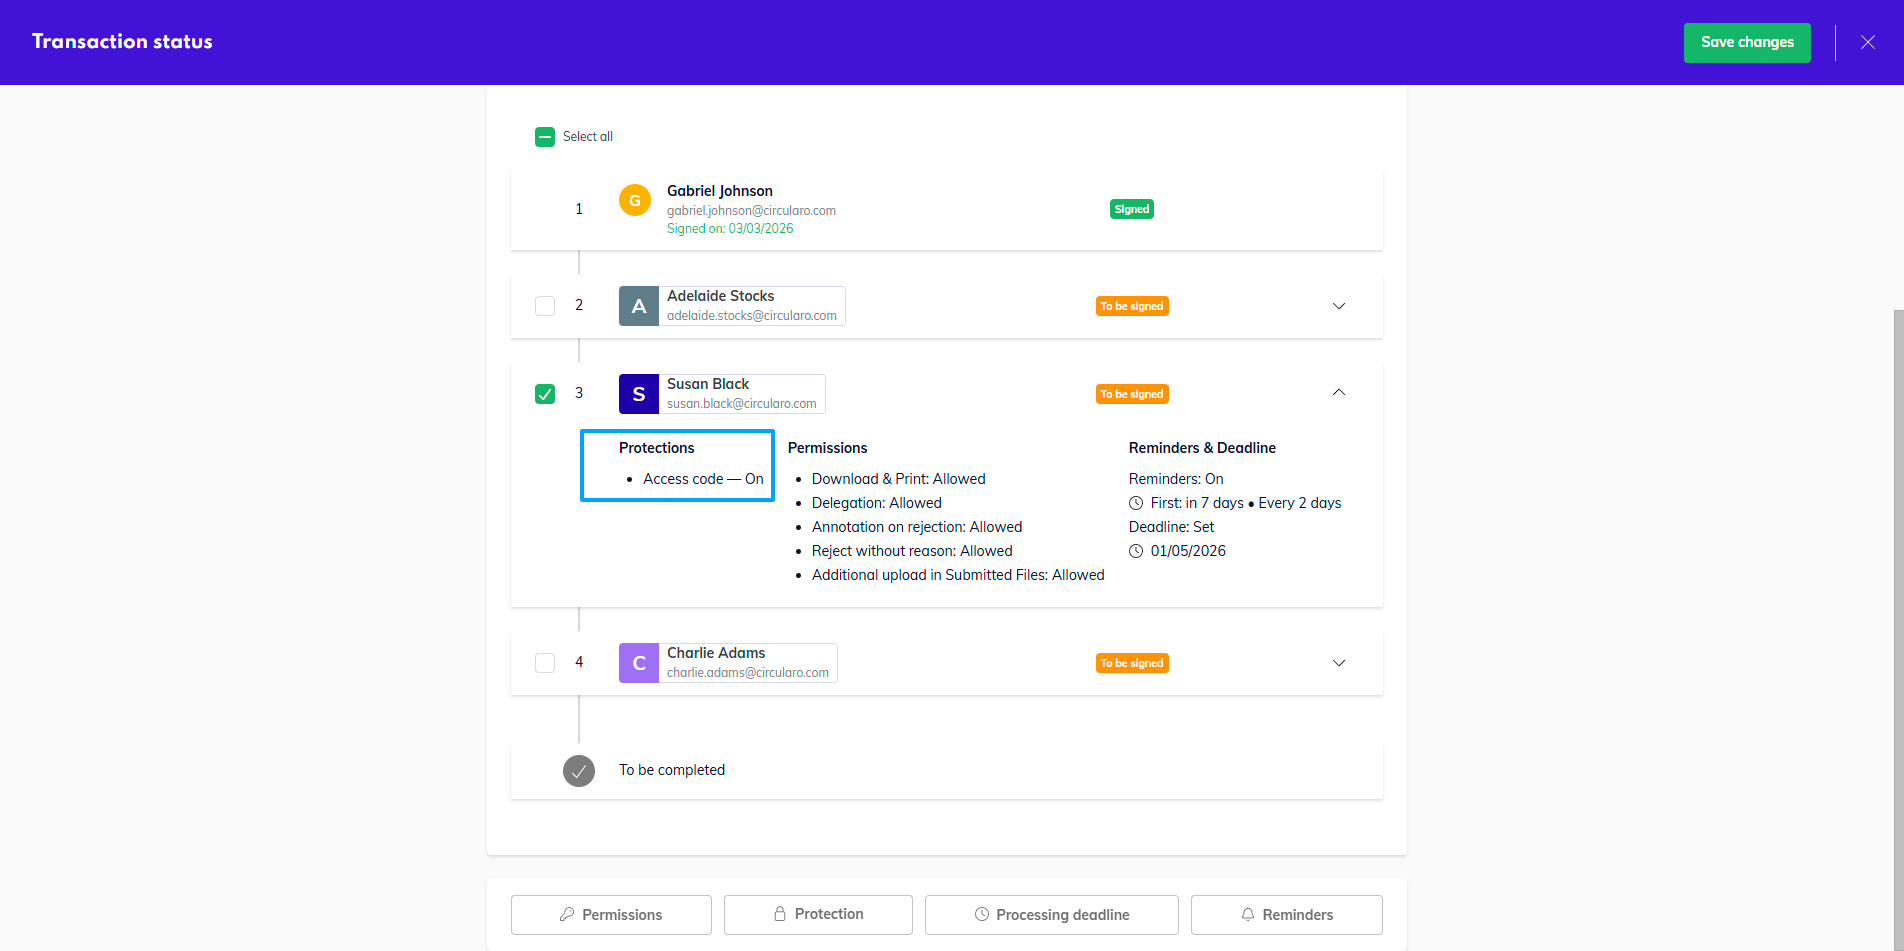
Set protection for external recipient
Once you have changed everything you needed, click on the green Save changes button in the top right corner. After you confirm the changes, a notification will be sent to any original recipients which you have edited, that they are no longer required to perform an action on the document, and to the new recipient about their role.
The record of these changes can be found in the activity tab, and the Audit trail and Certificate of fulfillment, stating who was the original recipient and who is the new recipient. For other details, the records simply state “Document sharing options modified”.
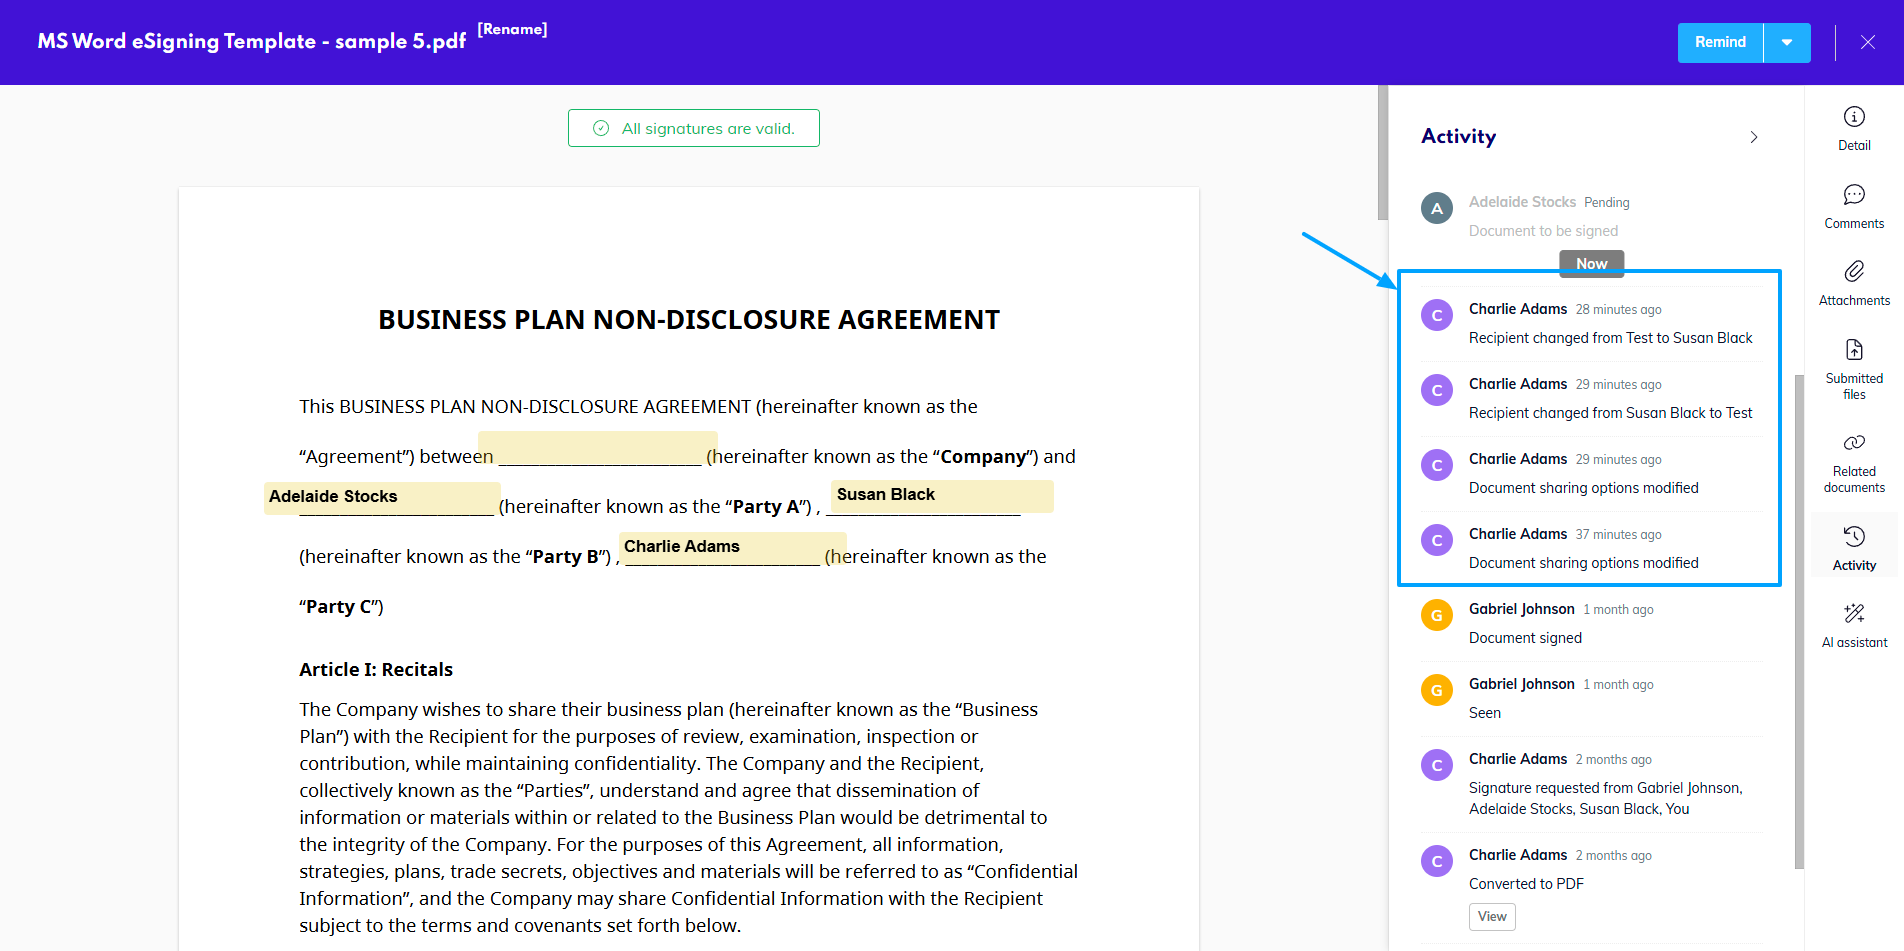
Changes recorded in Activity
Create copy
Completed and Failed documents can be easily reused in a single step with the New Request button.
This enables you to send the same document with the same configuration of eSigning fields to the same or a different recipient quickly without having to upload the document again or create a template first.
New request
Audit Trail / Compliance documents
All documents have an Audit trail. Documents whose transaction has finished (successfully or unsuccessfully) also have the Certificate of Fulfillment available alongside the Audit trail, in which case you will see the tab Compliance documents where you can choose which of the two you want to view. What each document contains can be found on the page dedicated to Audit trail and Certificate of Fulfillment.
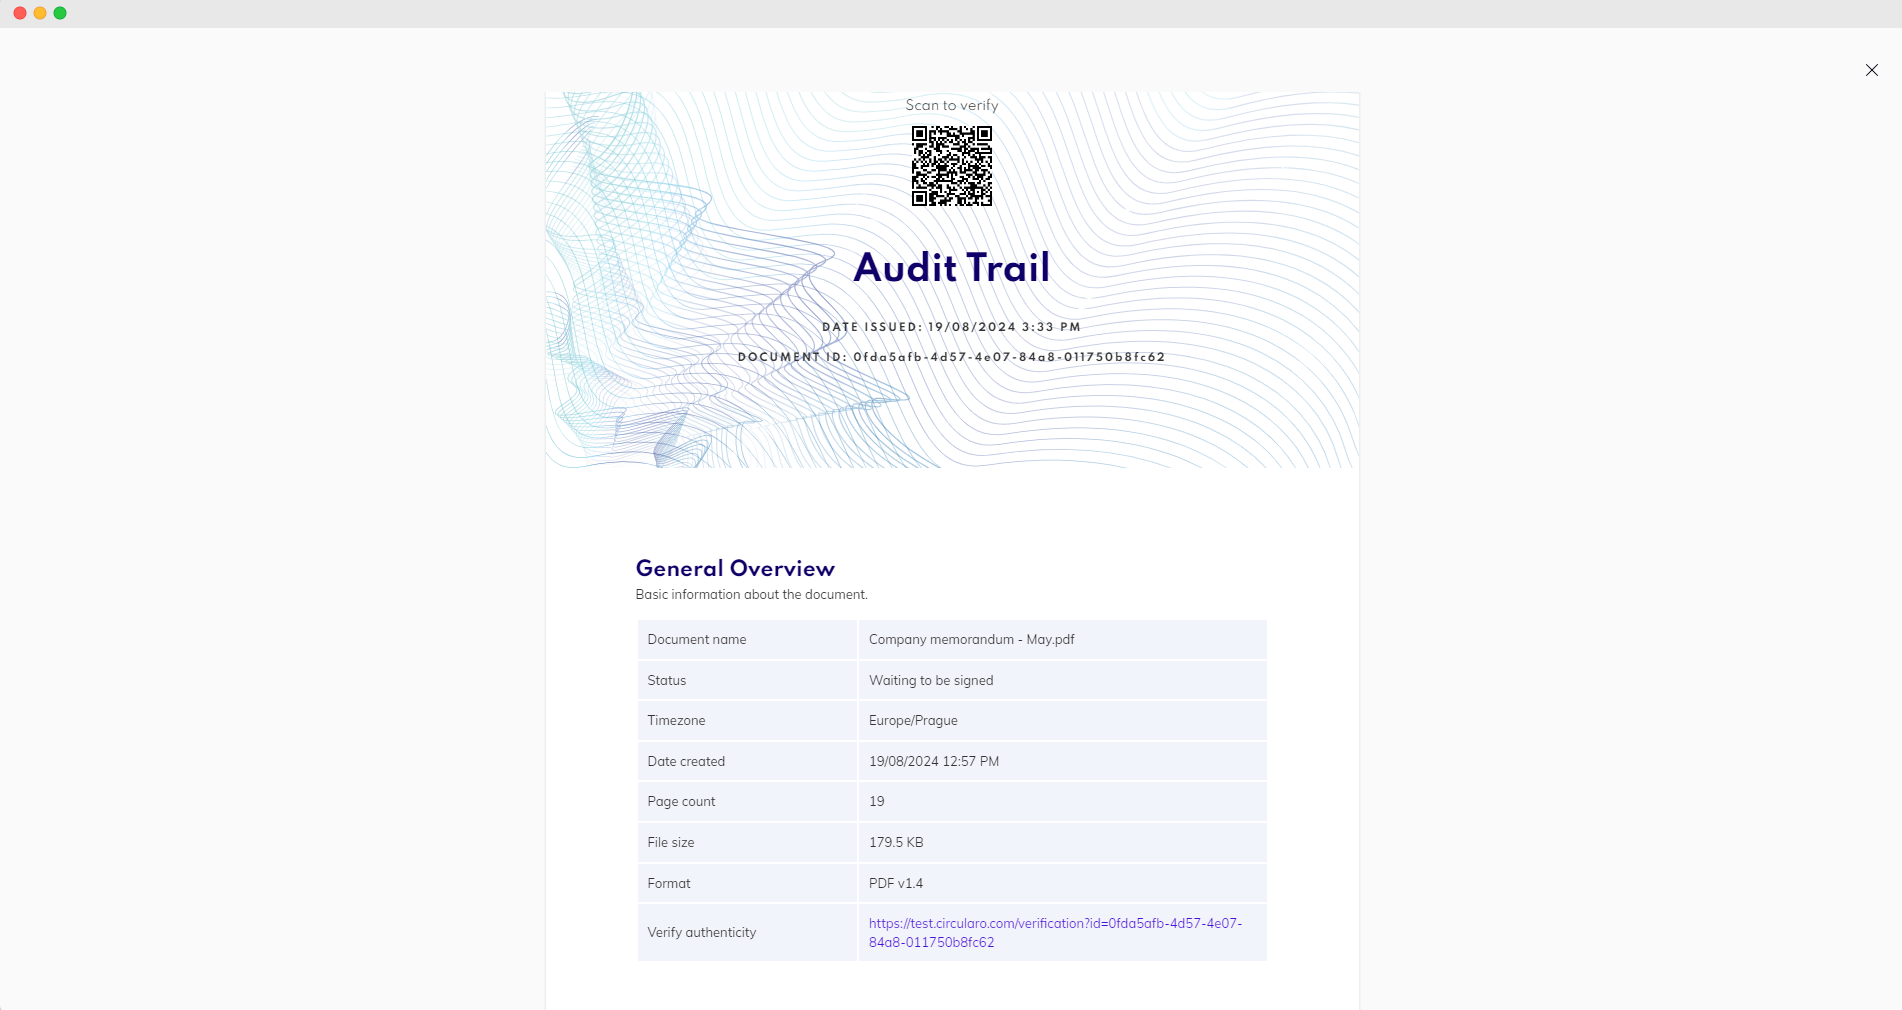
Audit trail
Share
Share a document internally or with external recipients. There are multiple different options for sharing.
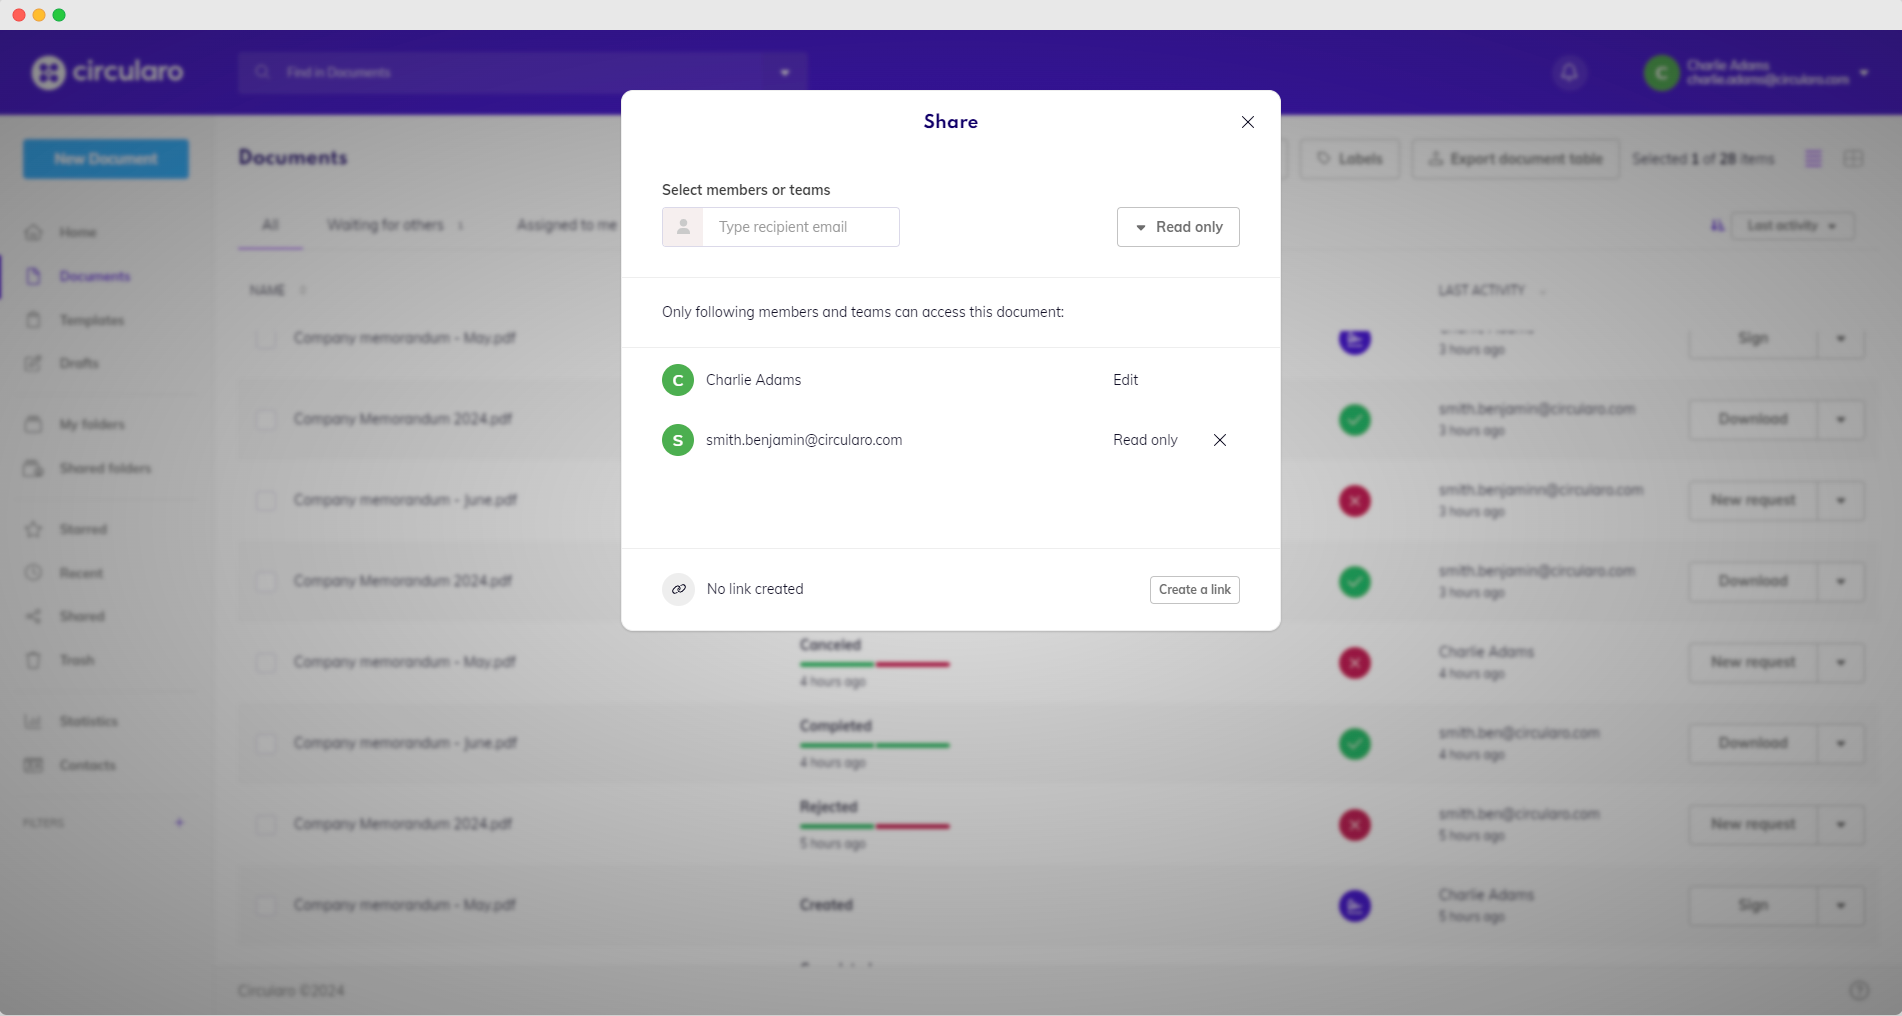
Share
Send by mail
Send the document to registered users or external recipients via email.
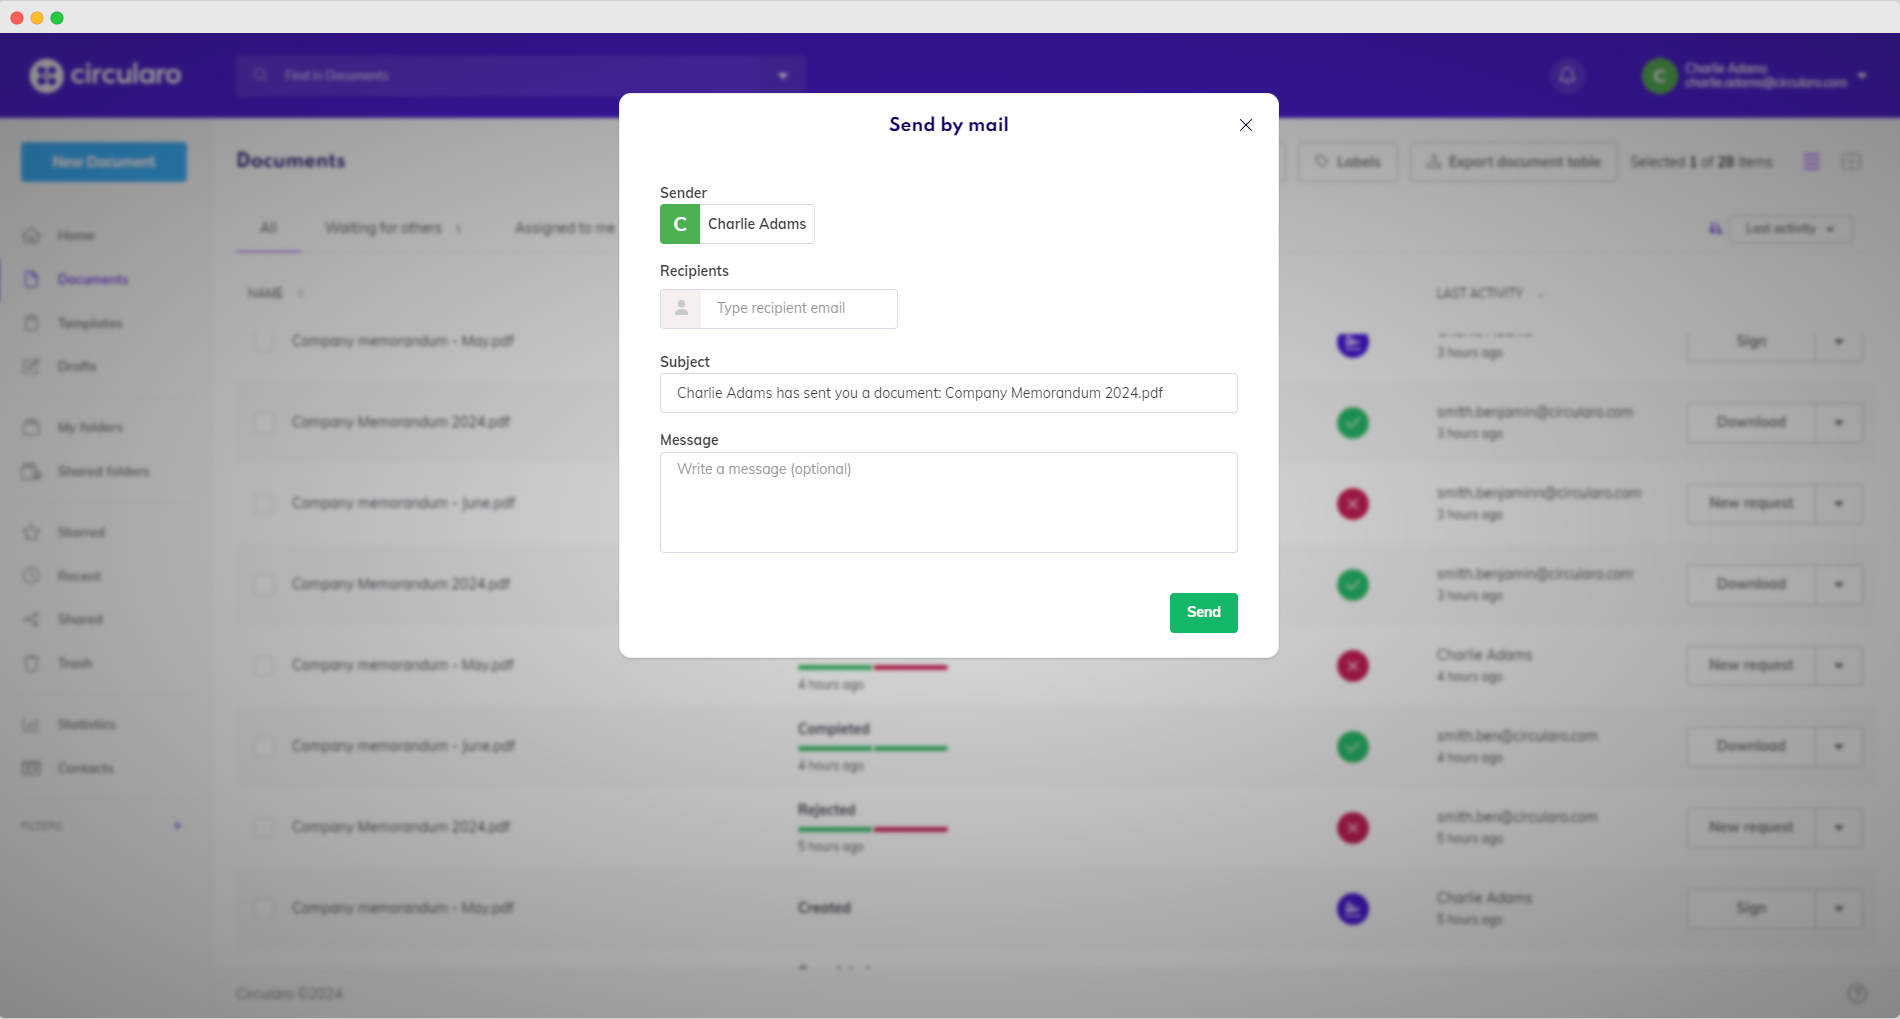
Send by mail
Send to Cloud
Send document directly to a cloud service of your choice.
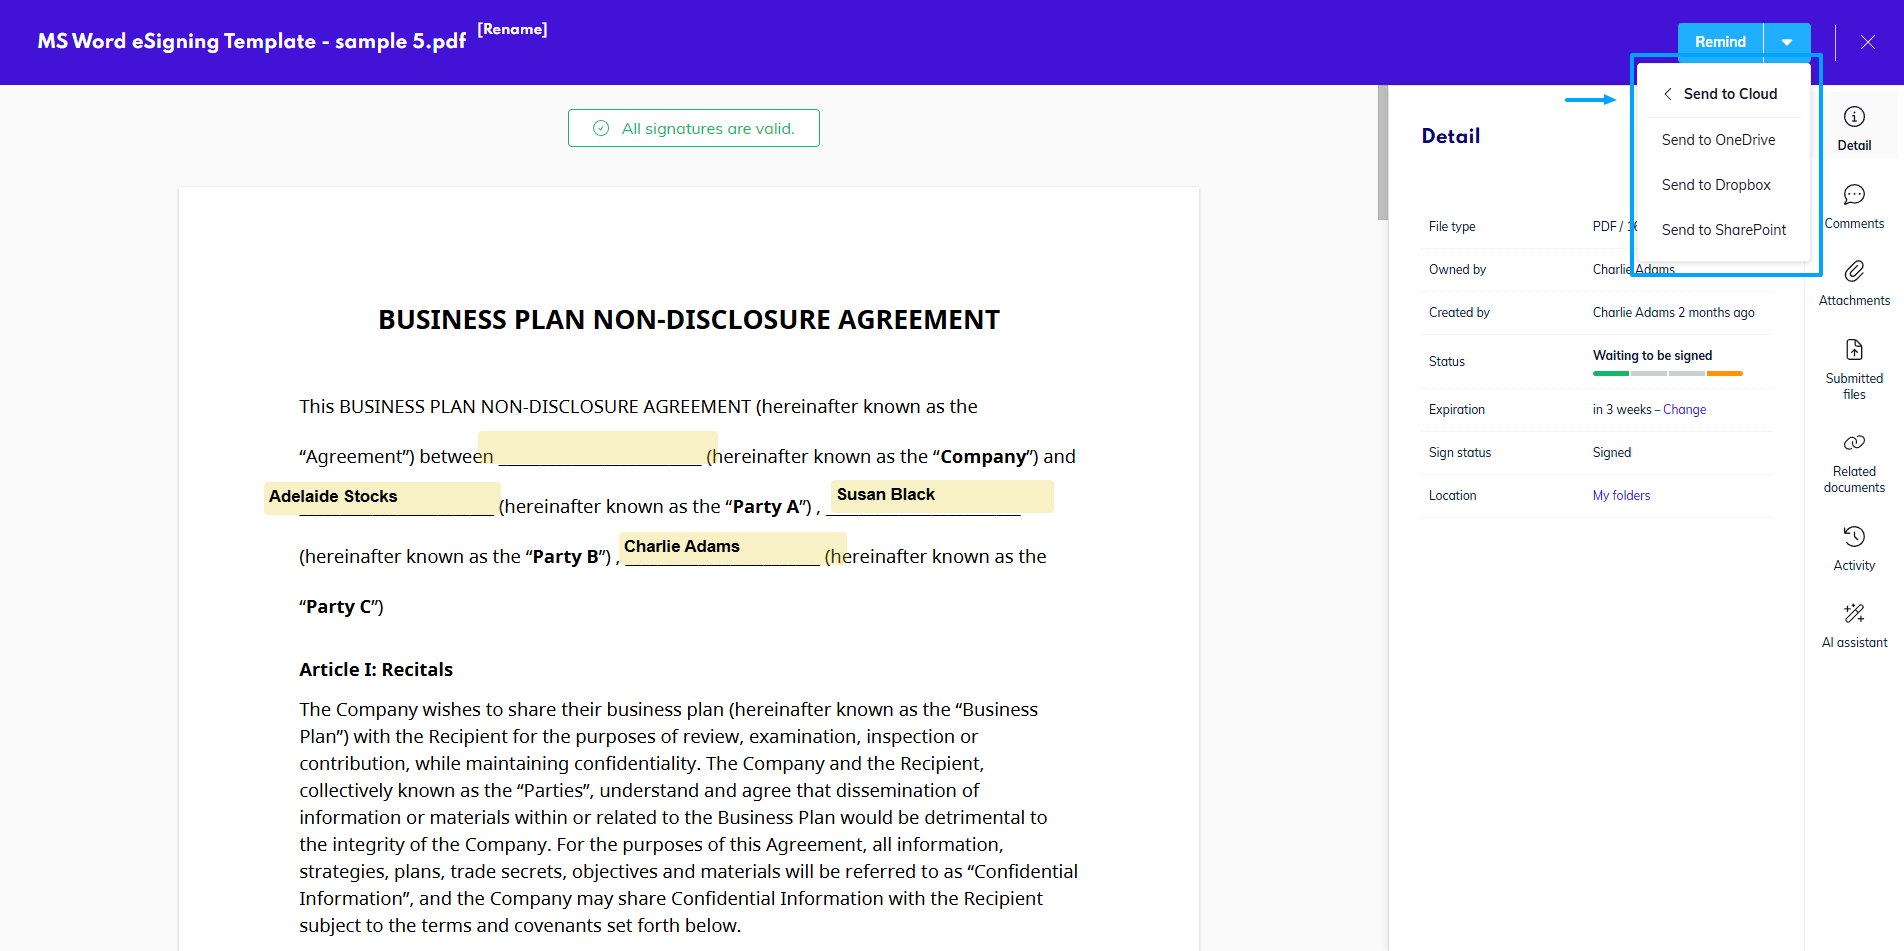
Send to a cloud storage
If you didn’t have the cloud account connected before (can be done in Your Account), you can do it when you choose the provider where you wish to send the document.
Change ownership
The ownership of a document is automatically assigned to its creator upon upload to the application. This gives the owner rights to edit details of the document and control the transaction it is/will be a part of - which is relevant when it comes to transaction modification. When necessary, ownership of a document can be transferred to a different user, and all the management rights, including the right to modify recipients of a transaction, will be transferred as well. The original owner will still be able to view the document.

Change ownership
Click on Change ownership.
In the pop-up window, select the new owner. You can send them a private message, which they will receive in their notification email. You can also mention a specific user, or reference a different document.
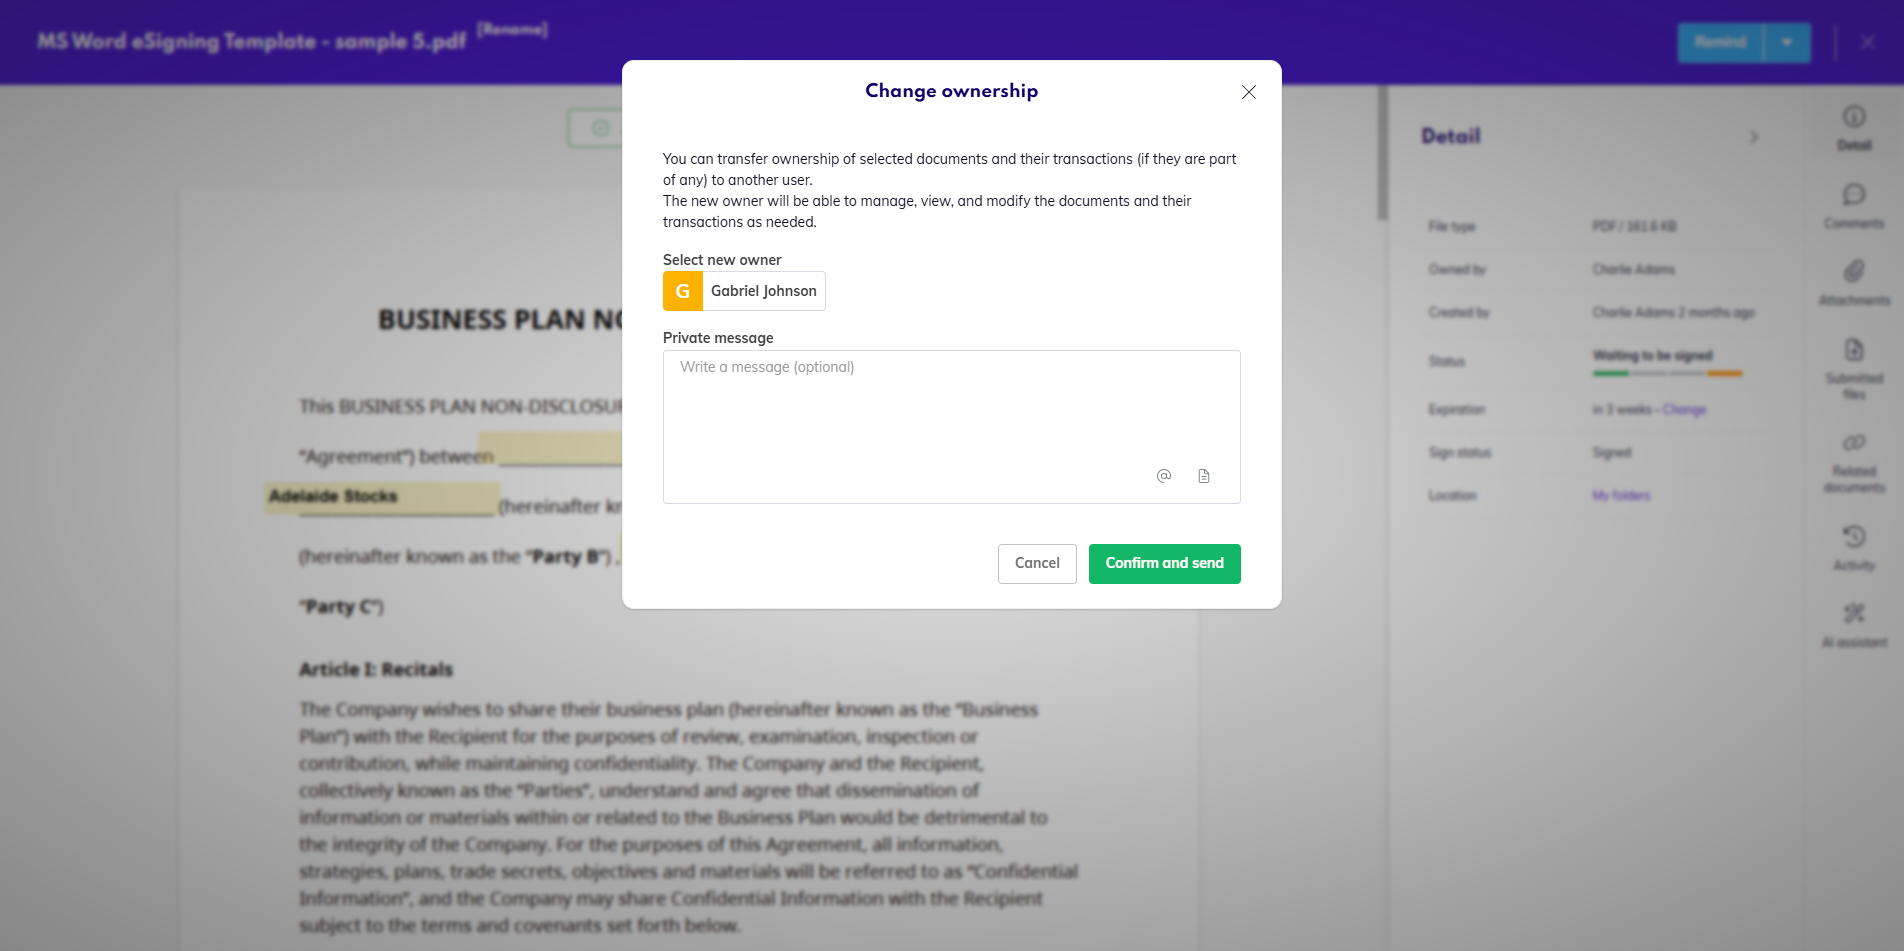
Assigning a new owner
Once all is read, click Confirm and send to transfer the ownership. This change will be visible in the Activity tab, as well as in the audit trail or Certificate of Fulfillment.
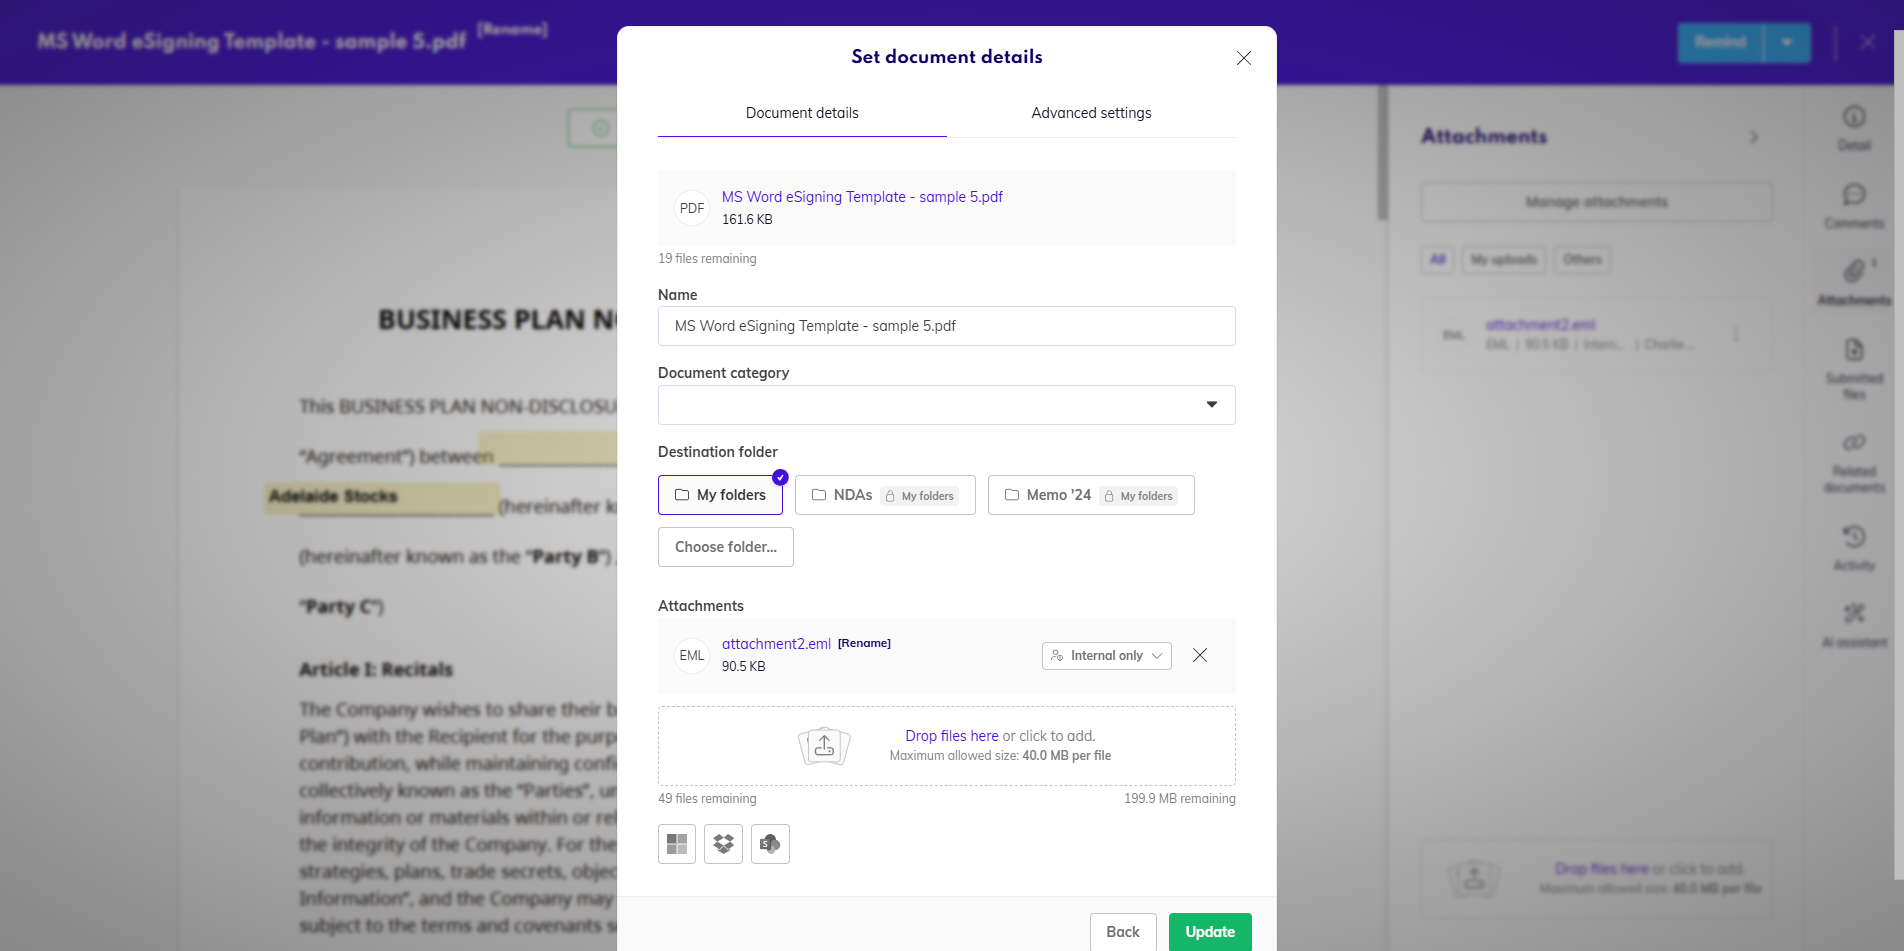
Attach file
Availability: Business and Enterprise
Attach a file (image, another document, anything you want) to the document you’re sharing.

Attach and manage file
When attaching a document, you can set its visibility - as Internal only, visible only to internal users in your organization, or Shared with all recipients, visible to everyone the document is shared with, even external recipients.
Each attachment can be set individually and the setting can be adjusted at any time.
Private attachments have a little lock icon and public attachments have a little world icon, so you can see its setting at a glance.
Email attachment
Circularo also offers the option to add and view your email conversation as an attachment to a document (.eml and .msg formats). After attaching an email message, you will see it in preview next to the document under Attachments.
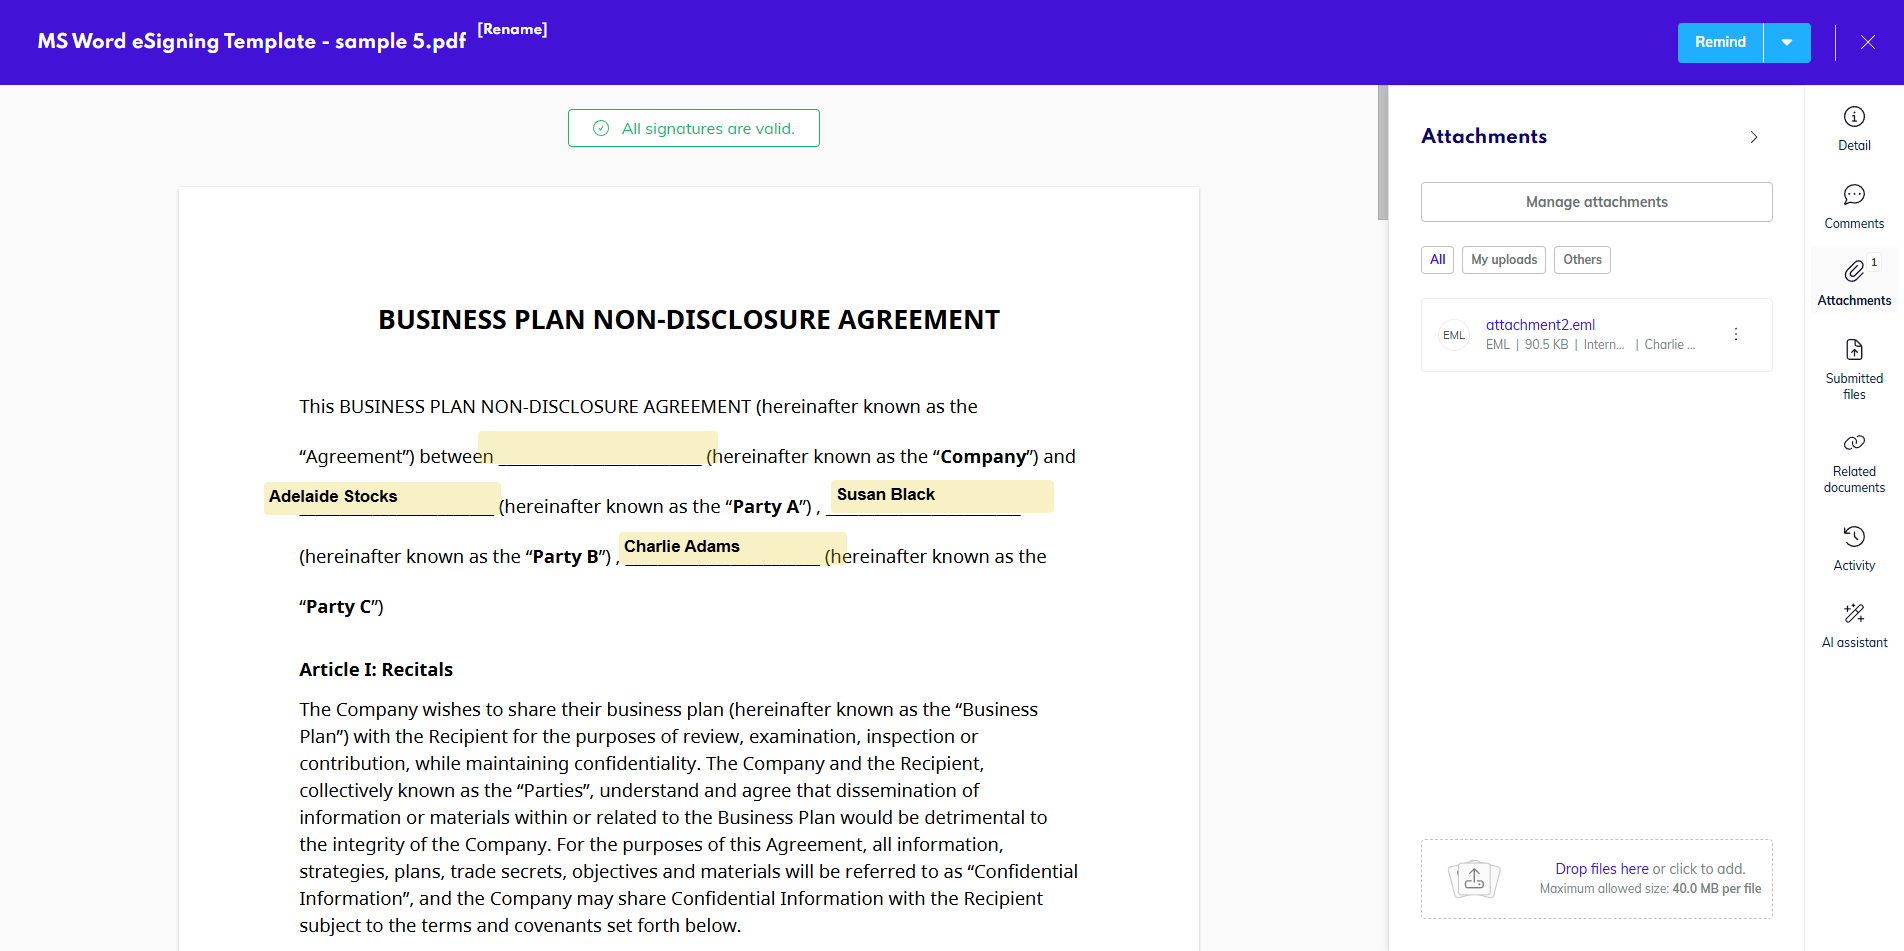
Email attachment
After clicking on the email attachment, a new window will open with the email preview.
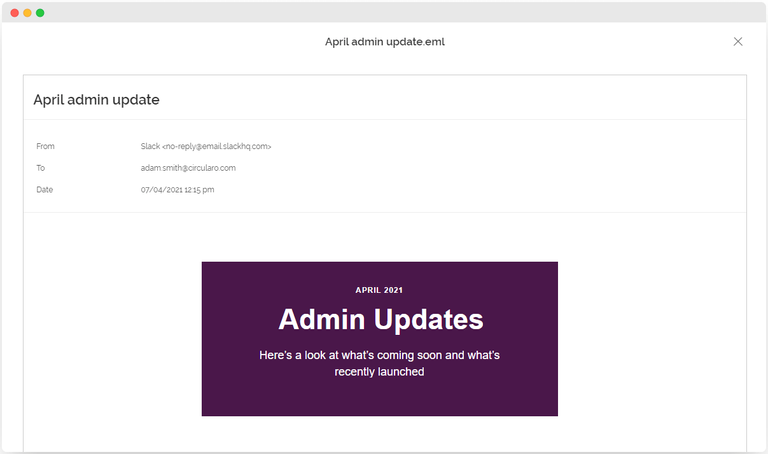
Attachment - preview
Link
Availability: Business and Enterprise
In Circularo, you have the option to link related documents to each other. Linked documents will show up in the document preview in the Related Documents tab.
Add a link
Navigate to the Related documents tab or the Context Menu
Click on Create link or select the Link action
Select files that should be linked to the document - you can use the search bar or navigate through folders
Finish by clicking the Finish button
Remove a link
Navigate to the Related Documents tab
Click on the X next to the document you want to unlink
Add to Starred
Same as adding a Star to the document. You will be able to find all the documents with a star in the Starred section.
Print the document directly from the app.
Download
Unsigned documents
There are two different options for downloading documents which have not had any action taken on them (Created status).
Download downloads the document in its original format (image format, MS Office format etc.)
This option is only available for documents which weren’t in a PDF format originally.
Download as PDF downloads the document in a PDF format regardless of its original format. For this type of download, you can also set up PDF protection.
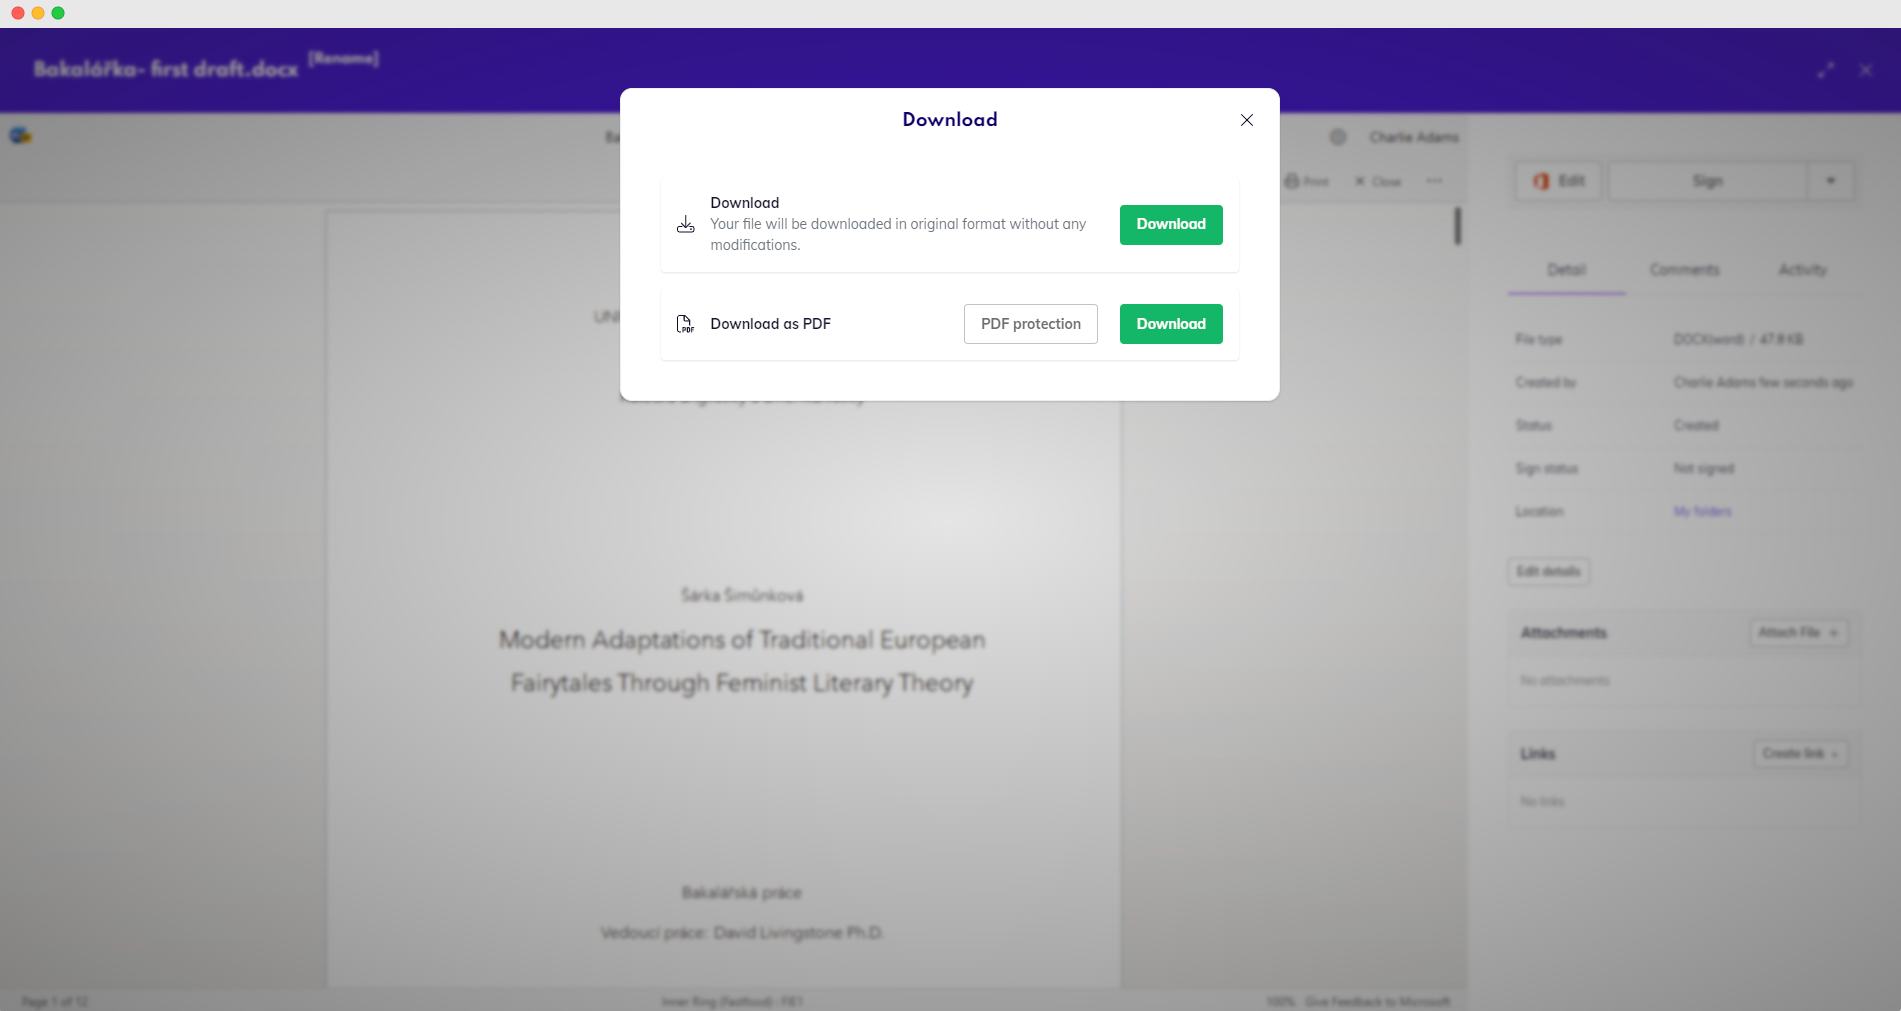
Download a document
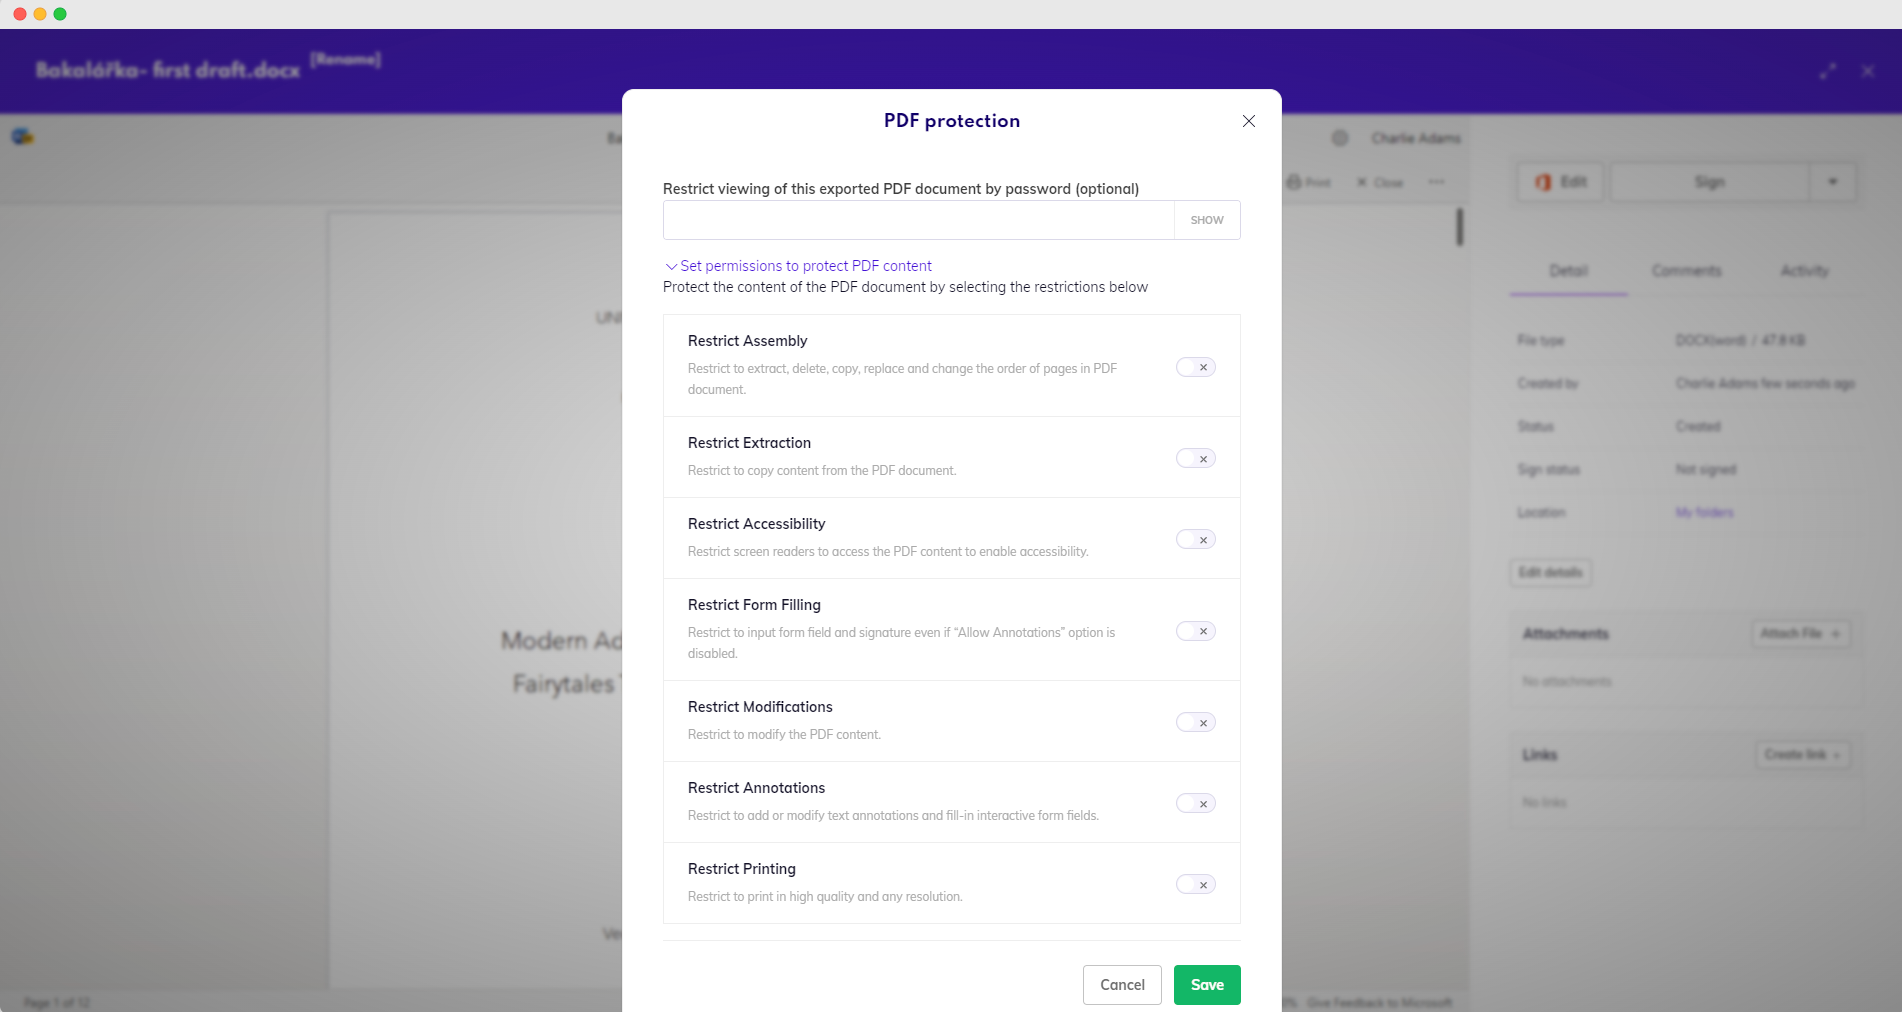
Set PDF protection
Other documents
Documents that have been used in any way and have any status other than Created (regardless of whether they’re completed or in progress) can be downloaded in a .pdf format together with their audit trails.
You will be asked whether you want to download the document, its audit trail, or both, and whether you would like to combine them into one file.
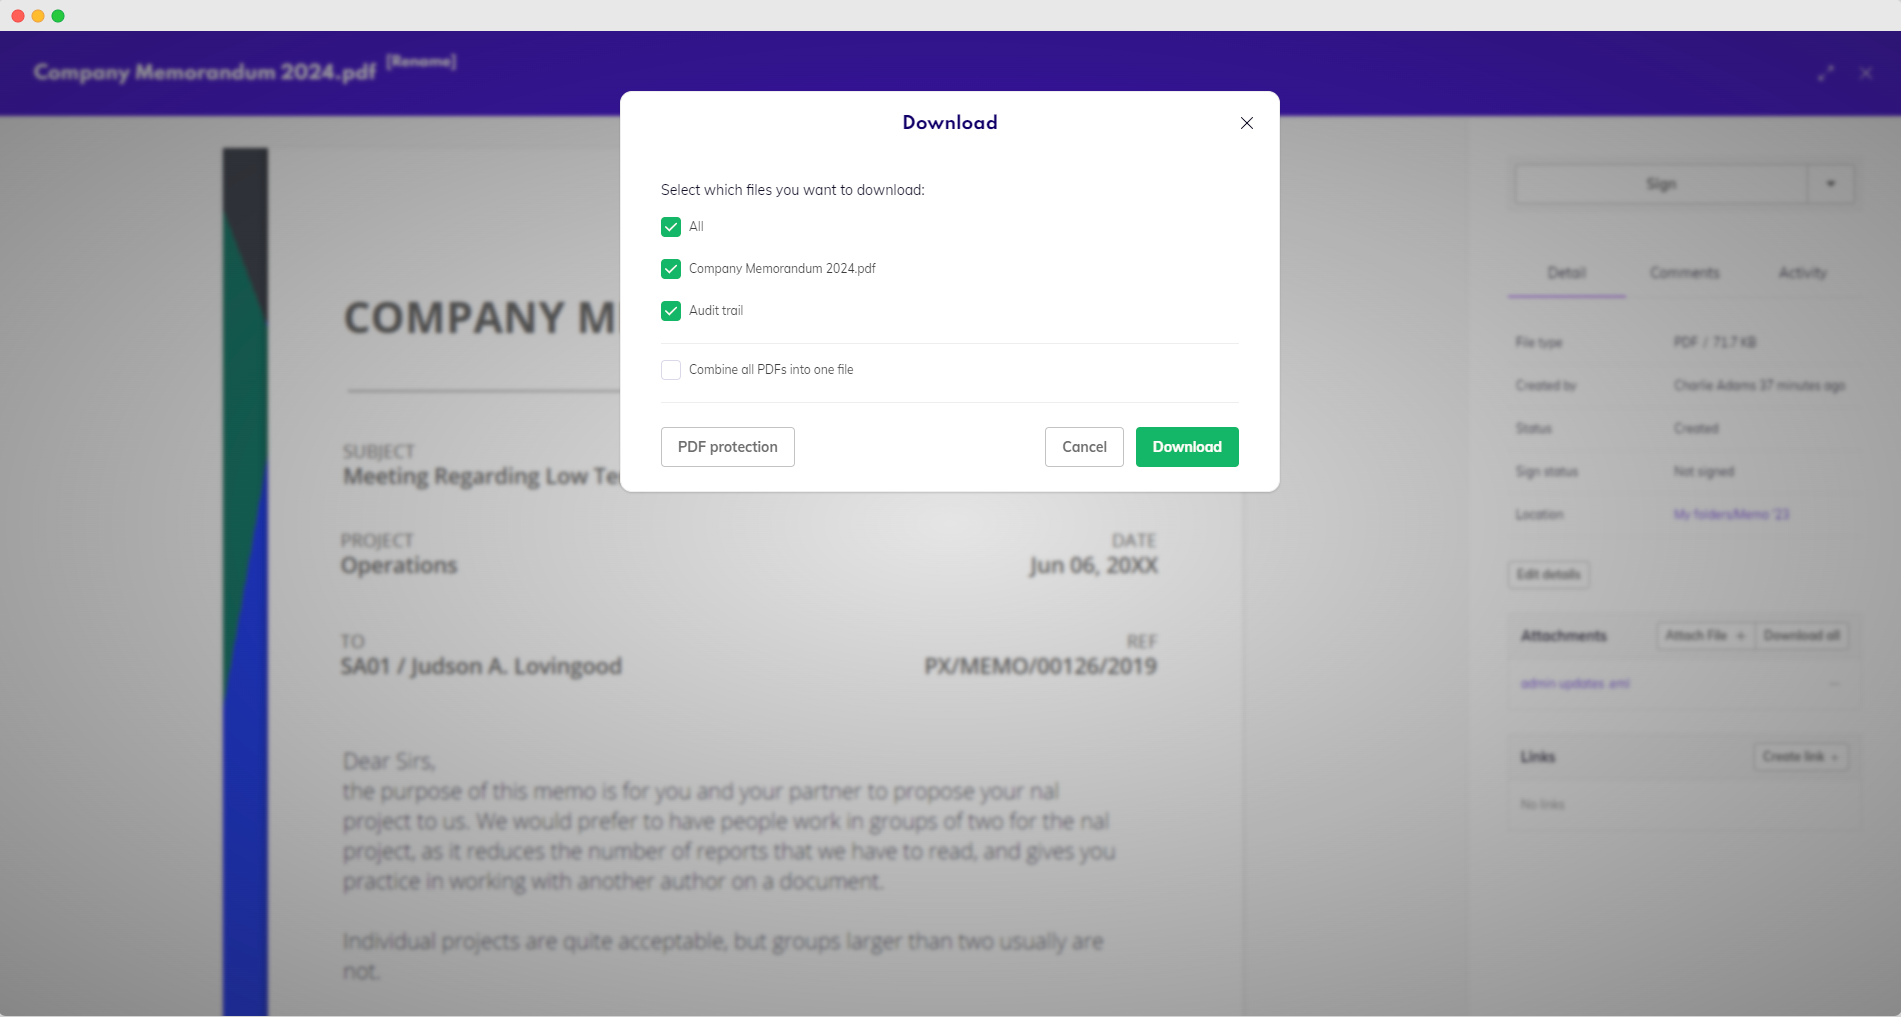
Download a PDF document
Merged document download
Availability: Business and Enterprise
In more advanced Circularo versions, it is possible to merge documents and then download them together or separately.
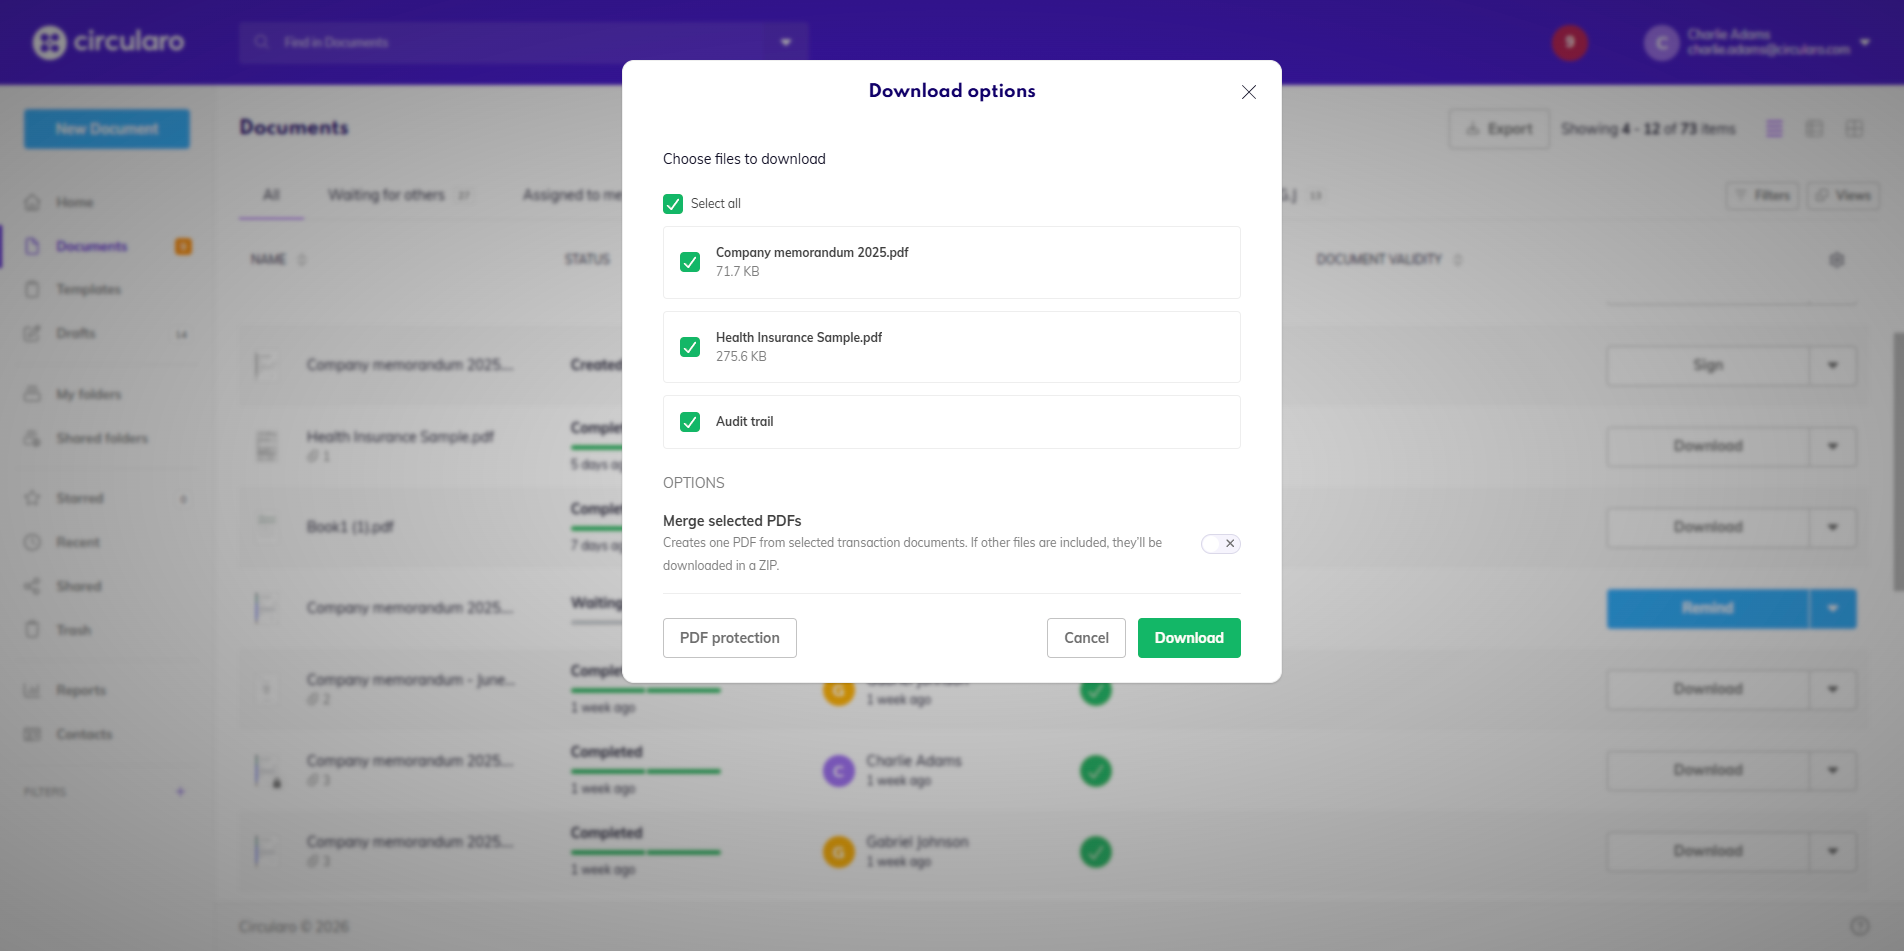
There are a couple of different options for downloading merged documents:
Select all - You can download all files within the merged document and the audit trail together in a .zip file
Choosing which partial documents you want to download separately
Merge selected PDFs - download the merged document as one PDF file
Create copy
Create a copy of the document which will be then stored in your Folders.
Edit details
Change all the document details you need to adjust.
Edit document details
Create template
You can use an existing document to create a template - if it is already part of a transaction, the template will be created with the same workflow, if not, you can specify the workflow from scratch.
Move to folder…
Move the document to a different folder.
Rename
Give your document a new name. The previous name of a renamed document will show in the document’s history.
Delete
Deleted documents and folders are moved to Trash, from where you can Restore them or Delete them forever.