Place Fields
After choosing the recipients and setting their roles and responsibilities, you will be taken to a page where you can place signing and other fields.
Types of fields
There are three types of fields that can be used on a document: signature fields, pre-filled fields and regular fillable fields.
Signature fields contain either a signature, initials or a stamp - personal or organizational.
Pre-filled fields work for recipients who have a Circularo account- the needed information is taken from the information saved to their account. The fields include name, company, email, phone and job title. Recipients who do not have a Circularo account will have to fill these fields in manually.
Regular fillable fields need to be filled in manually for every recipient.
Place fields
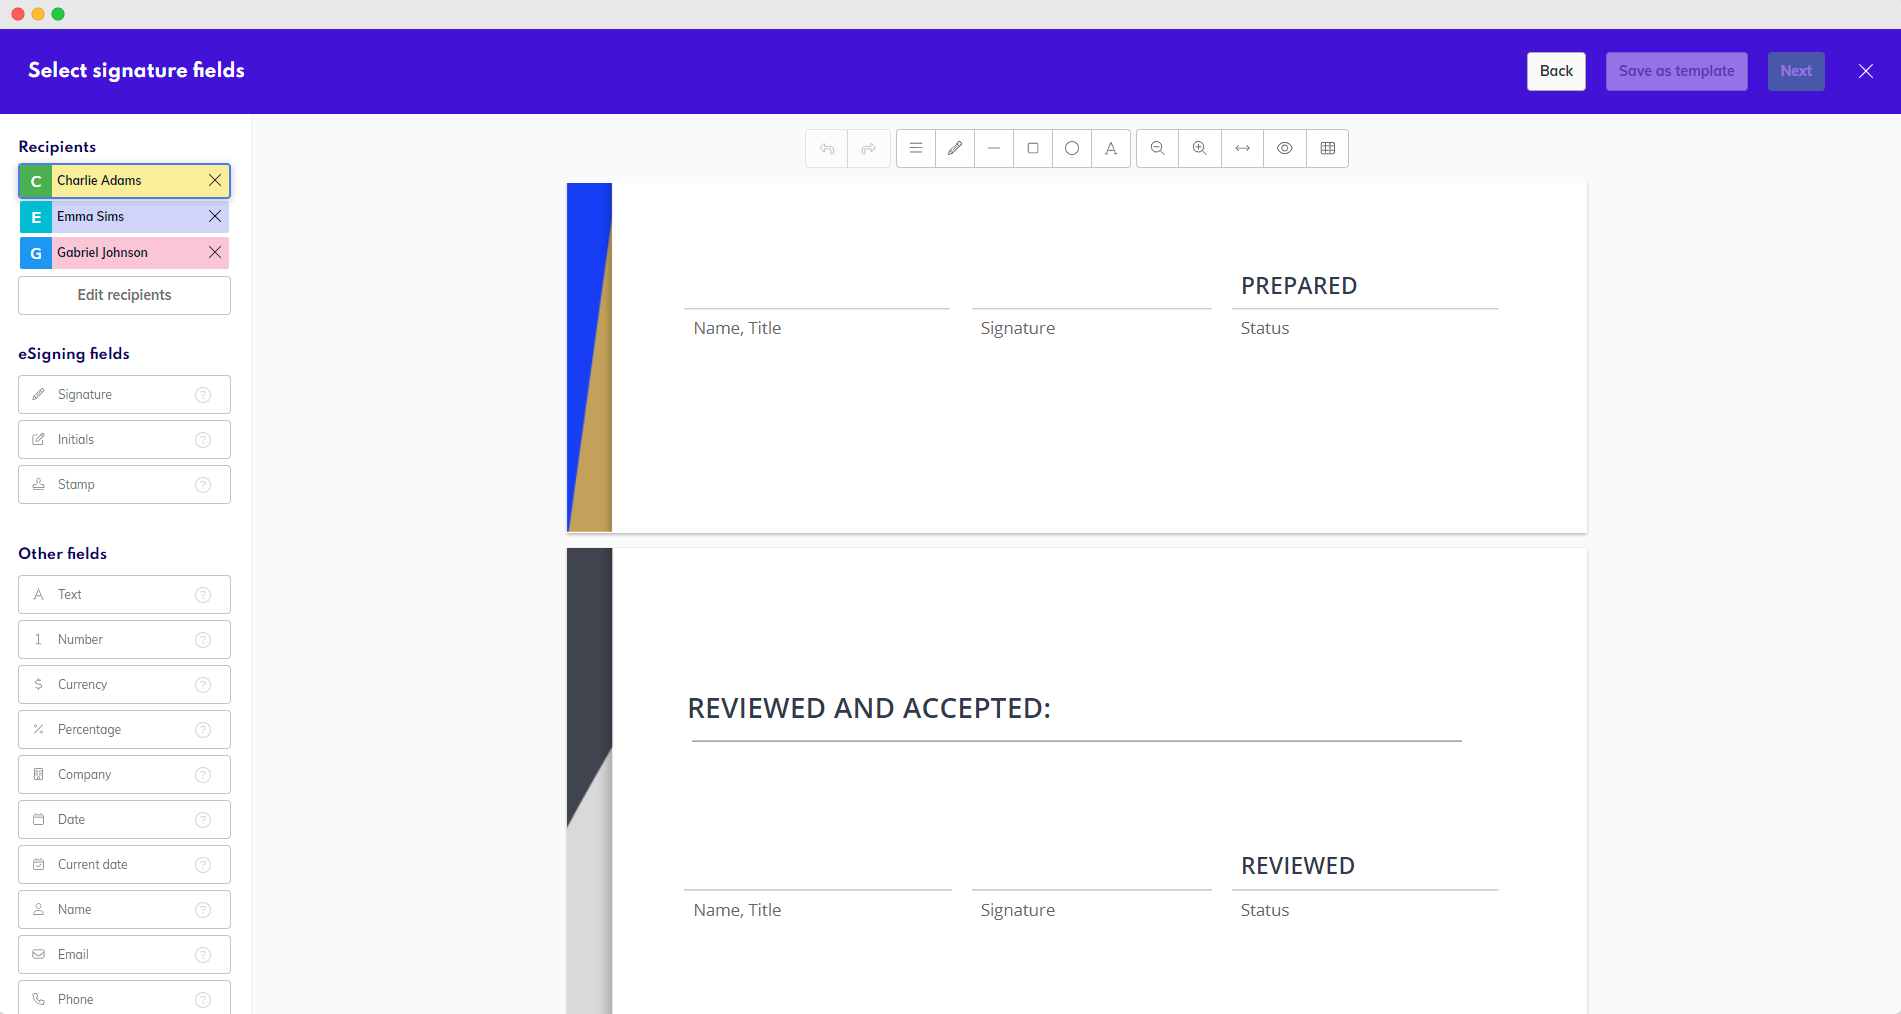
On the left side of the page, you will find a toolbox containing a variety of signing fields available to yourself and other recipients. These can be placed by clicking on them or dragging and dropping them onto the document.
You can then reposition all of the elements dragged from the toolbox to place them neatly onto their correct spots in the document.
Switch between recipients by clicking on their name.
Copy and paste fields
Copy and paste fields onto the document using the common Ctrl+C, Ctrl+V shortcuts. This is especially useful for documents requiring multiple signatures.
eSigning fields
Signature fields are all fields acting as a signature, containing an electronic certificate. They all have the same legal weight and you only need one per recipient on the document to sign it. Which of the fields you use is up to you. Following signature fields are currently available:
Wacom Signature
Availability: Business and Enterprise
Wacom biometric signatures are created using Wacom signature pads. Before using them to sign your documents, you need to install all the required Wacom device drivers.
Signature
Drag the Signature field onto the document and your default signature saved in your Preferences will be added. You can change the signature by clicking on the signature field and selecting the Change signature option on the right hand side directly during the signing process.
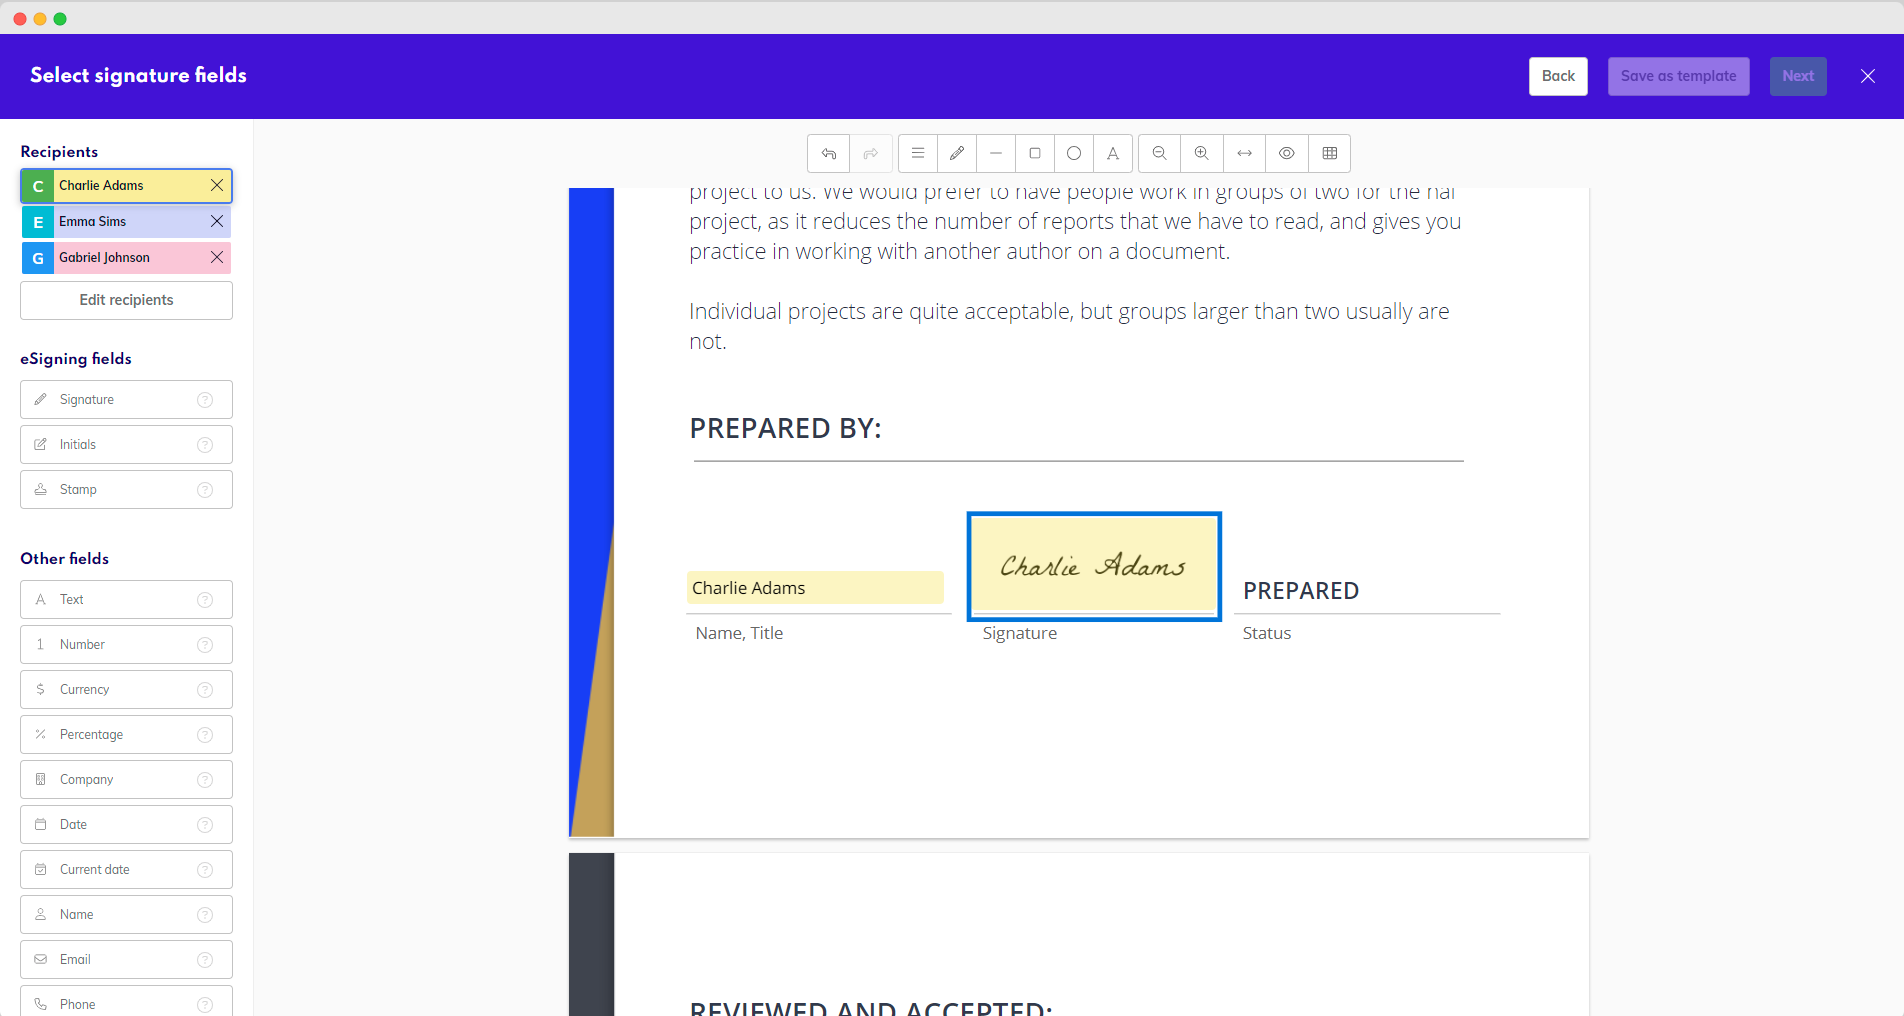
Signature field
If you don't have any default saved, you will be taken directly to the signature designing dialog.
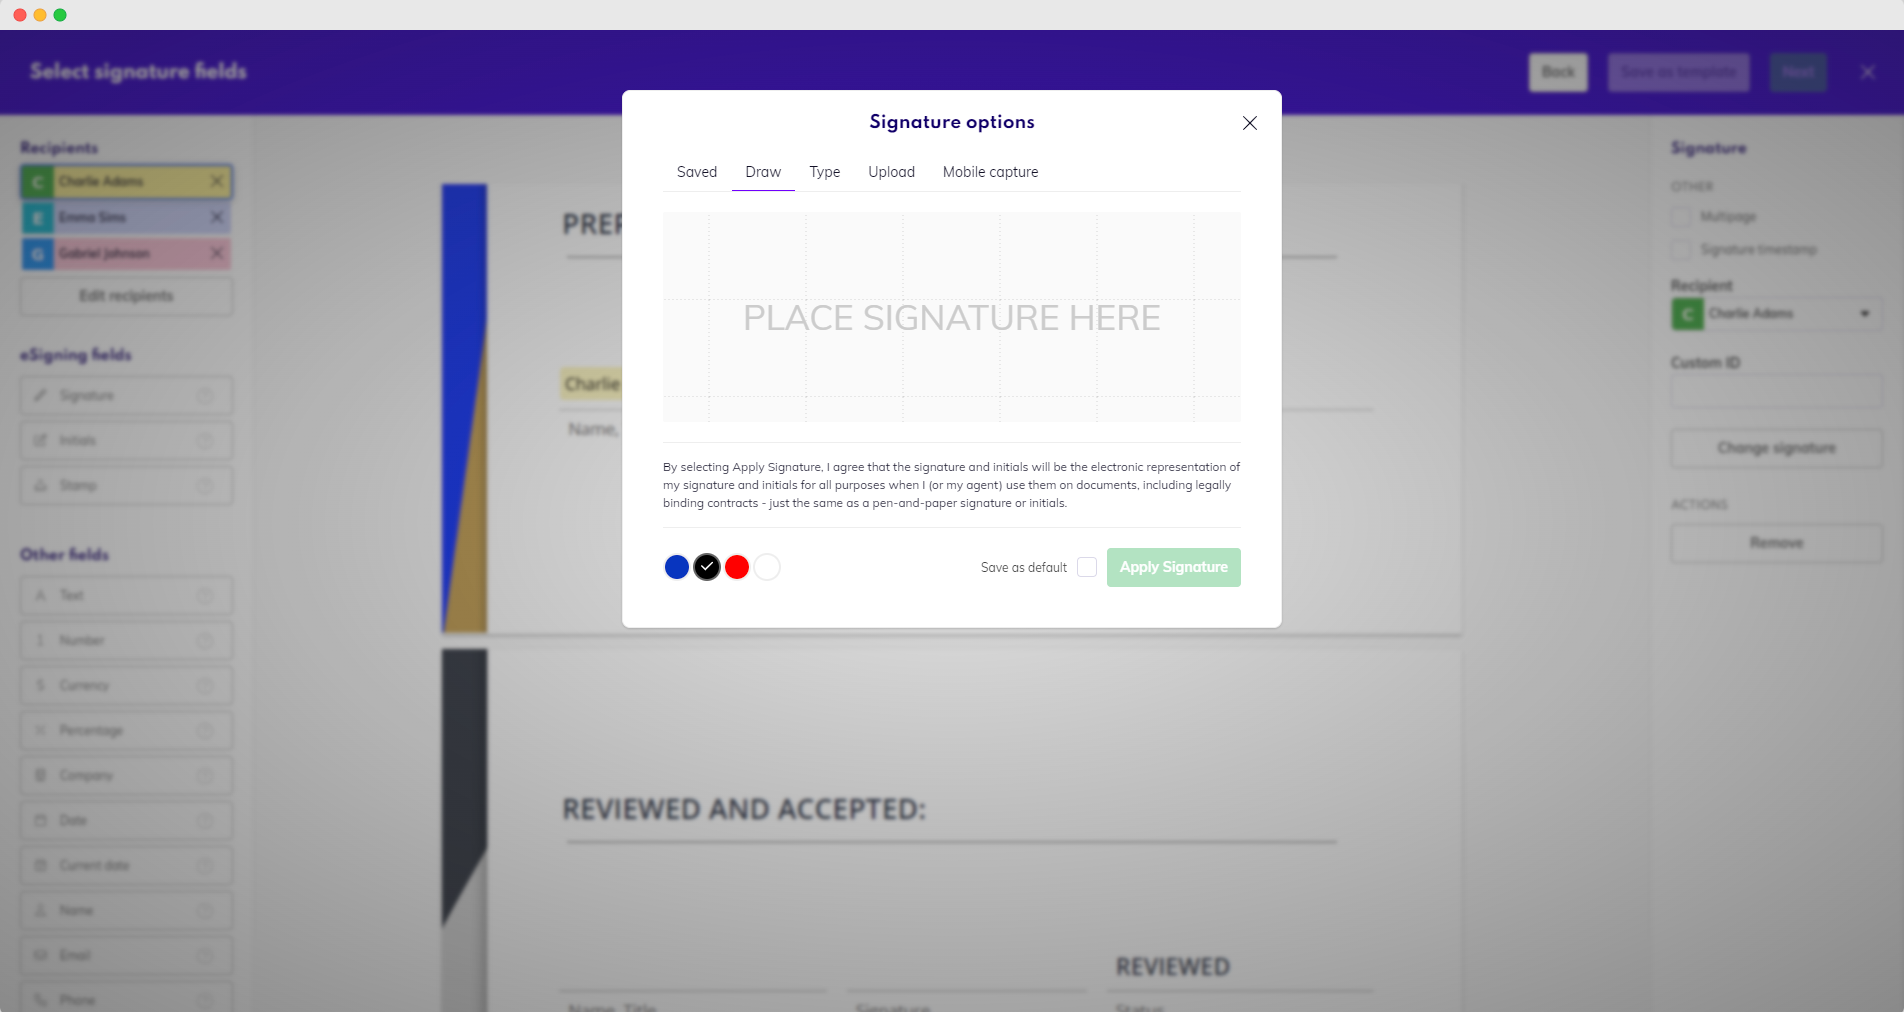
Create a signature
You have the option to either Draw, Type, Upload, use a Wacom pad or Mobile Capture to design your signature. The newly created signature can also be immediately saved as your default.
For Wacom pad signature, you need to have the pad configured with your account.
Initials
Your default initials saved in Preferences will be added to the document. You can change the initials by clicking on the signature field and selecting the Change signature option.
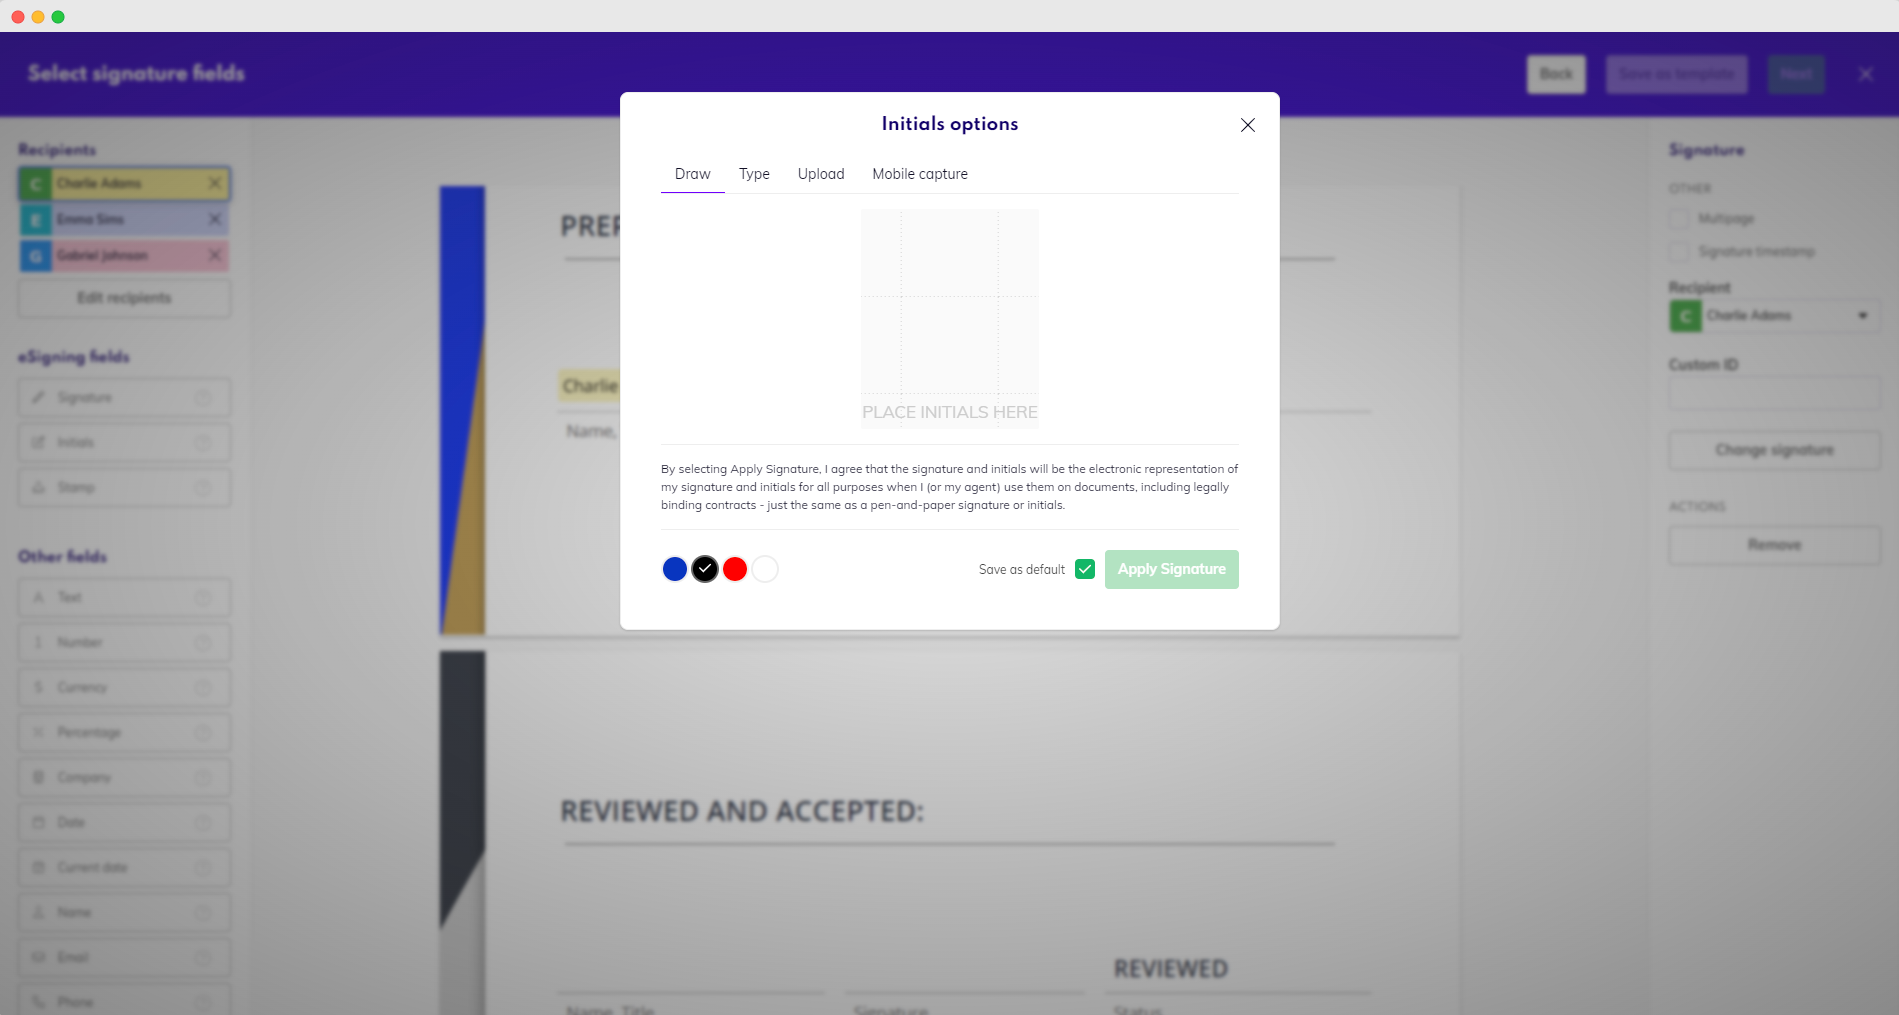
Create initials
You can either Draw, Type, Upload, use a Wacom pad or Mobile Capture to design your initials and place them on the document.
Personal stamp
The default stamp personal saved in your Preferences will be added to the document. You can change the stamp by clicking on the stamp field and choosing the Change stamp option.
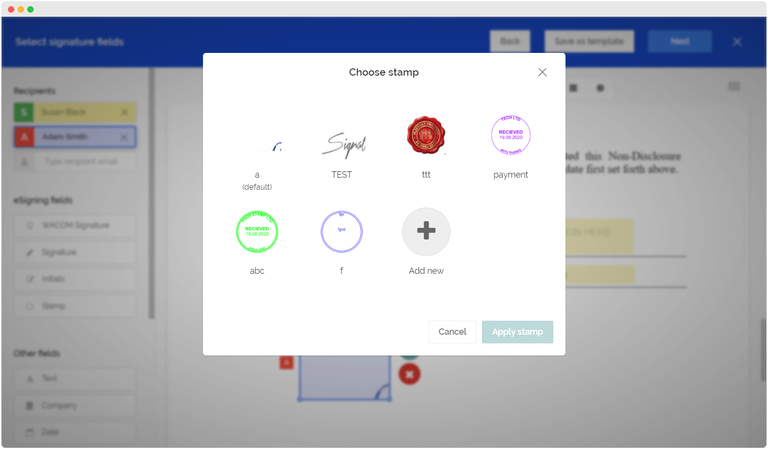
You can either choose from saved stamps or design a new one.
It is not possible to edit existing stamps in the eSigning mode.
To edit a stamp, go to Stamps in your Preferences.
Stamps
Organization stamp
Organization stamps are stamps that represent the organization rather than an individual user. It is up to organization’s admins who has access to these stamps. Users who themselves do not have rights to use organization stamps are still able to prepare the field for users that do have the right.
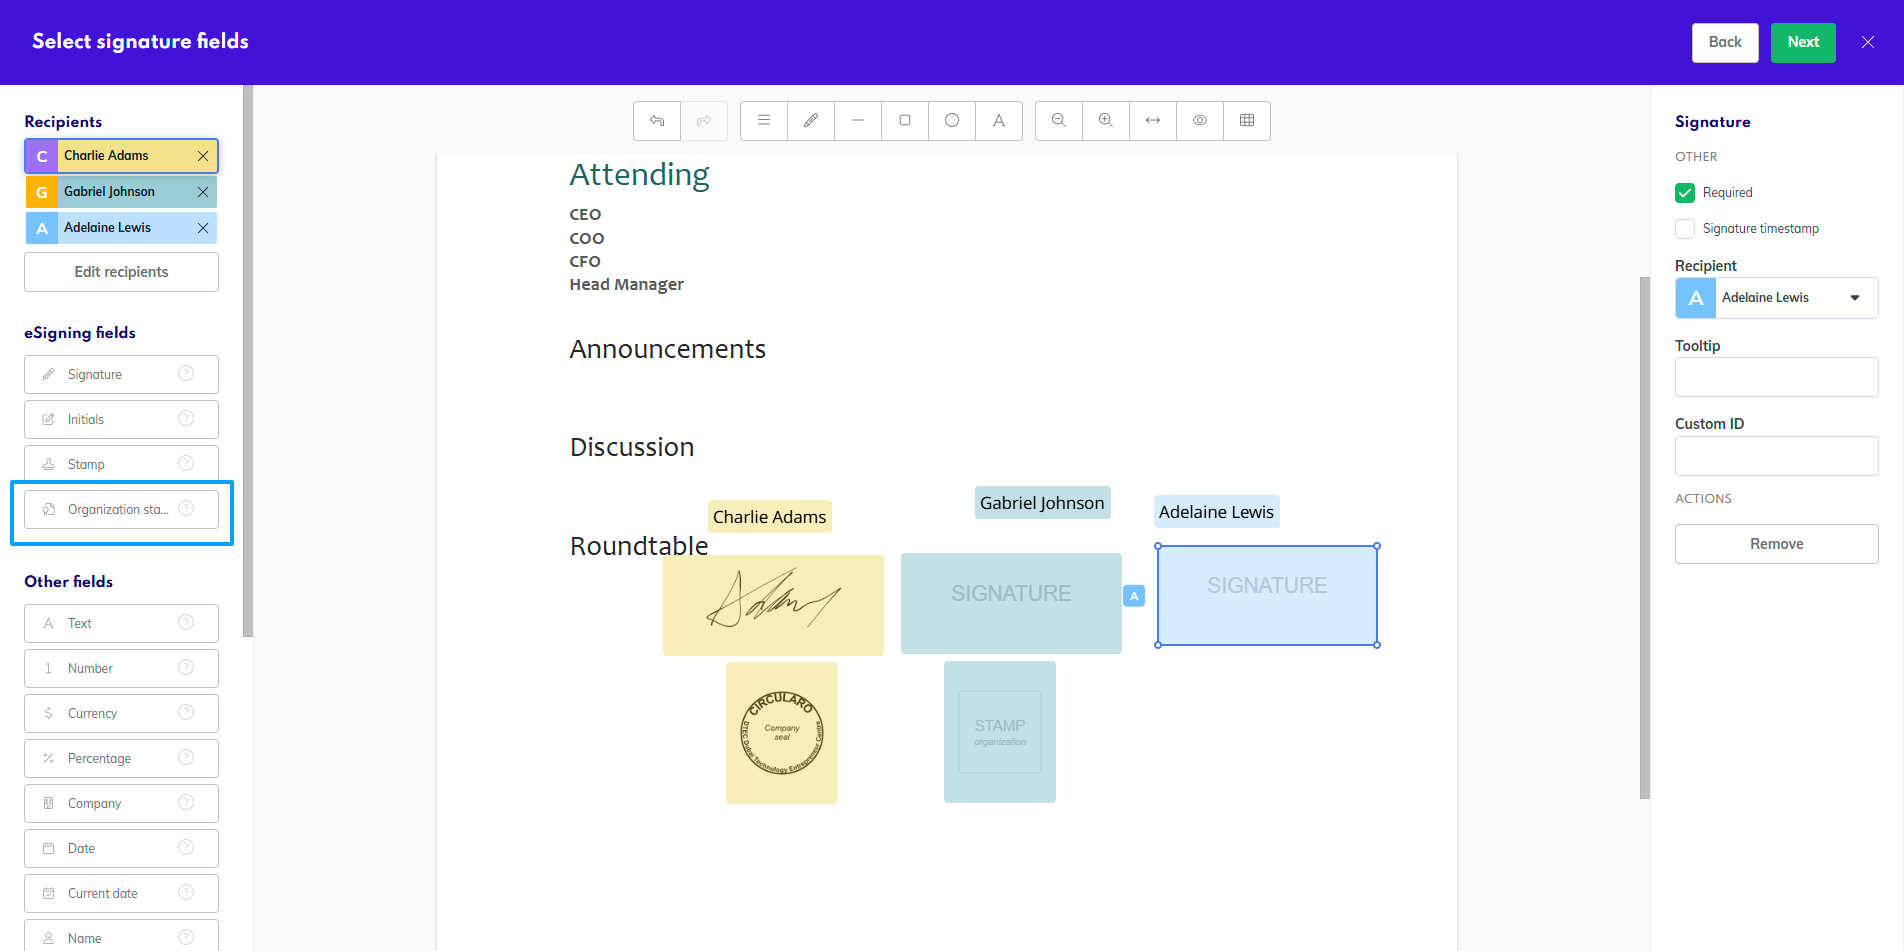
Fields prepared with organizational stamp
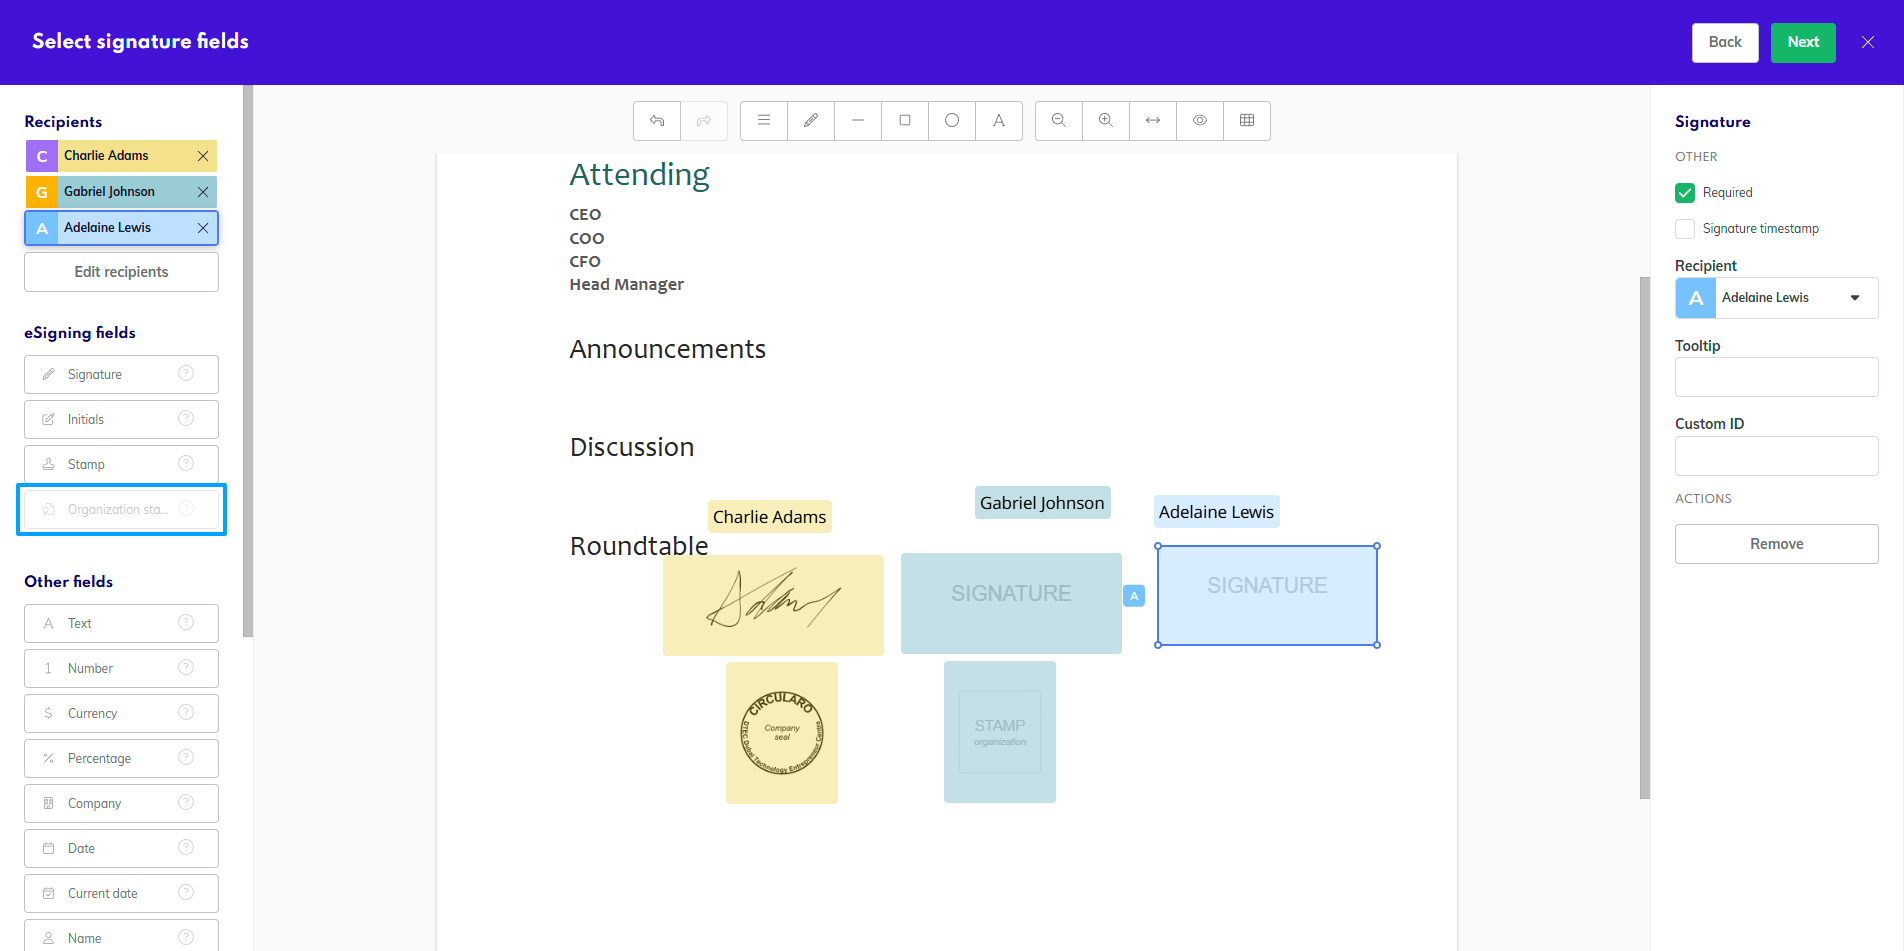
Example when user does not have rights to organization stamp
When preparing the fields, you can distinguish between the field for a personal and organization stamp by the text inside the field.
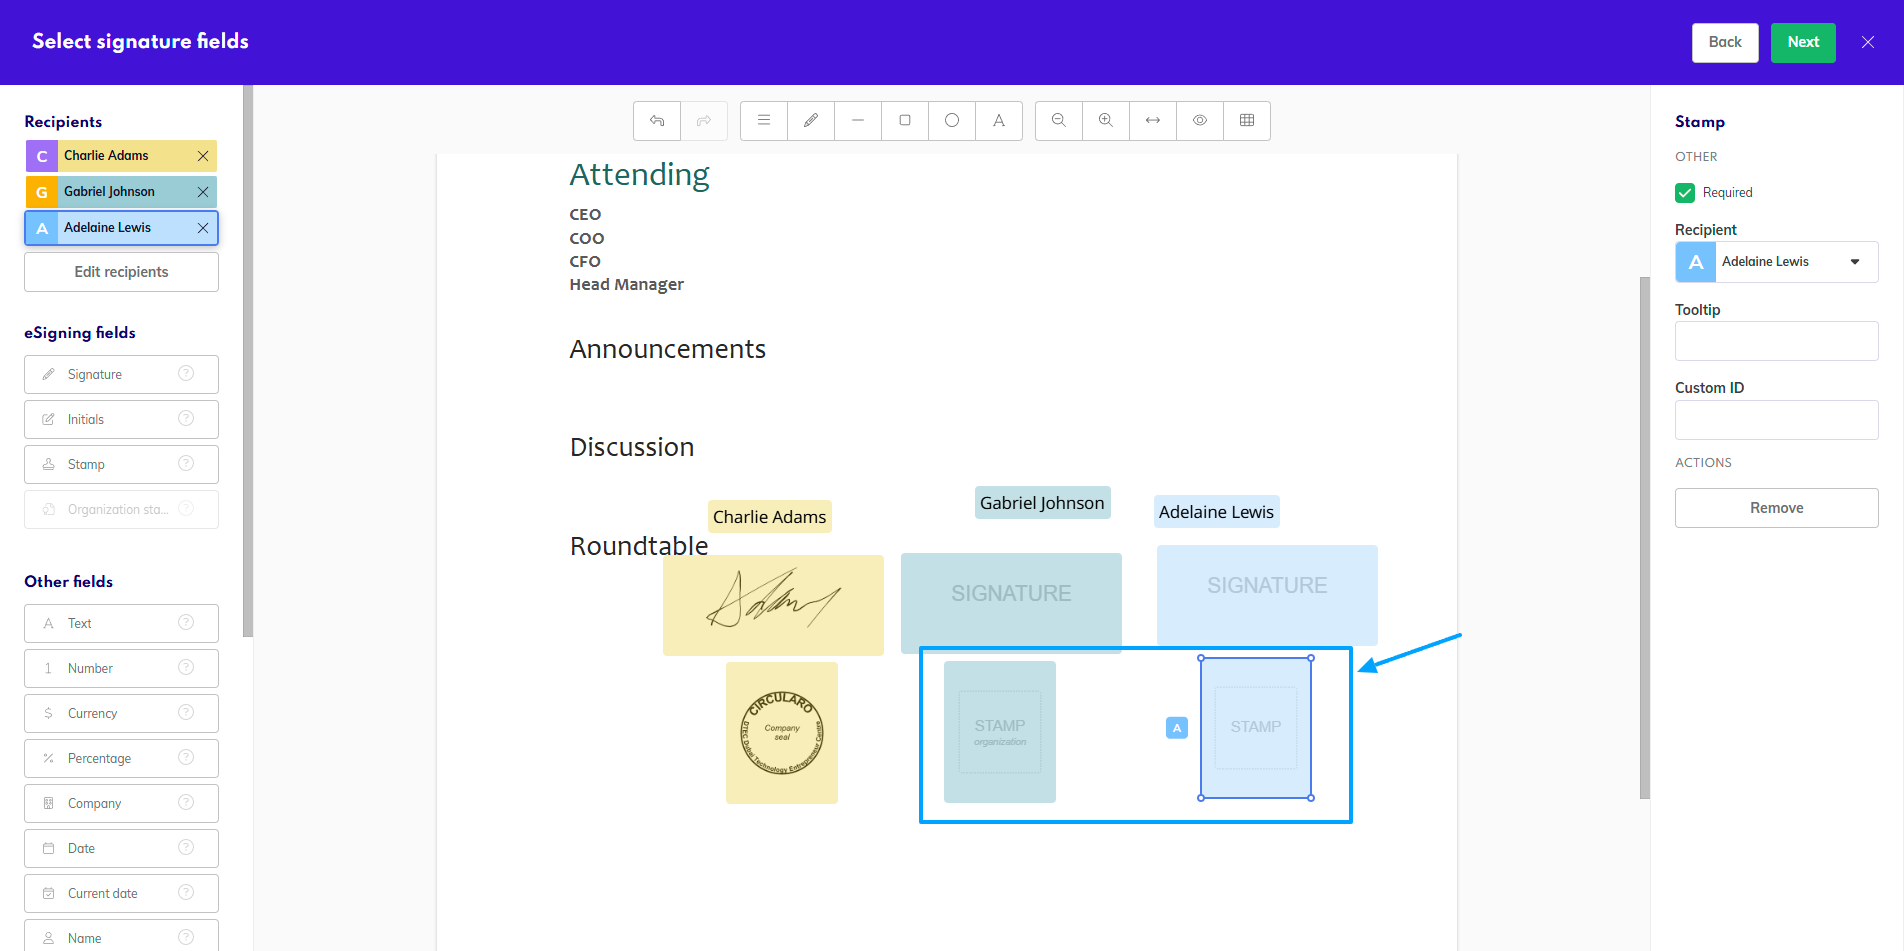
Organization and personal stamp
You can change the stamp by clicking on the stamp field and choosing the Change stamp option.
You can either choose from saved stamps or design a new one.
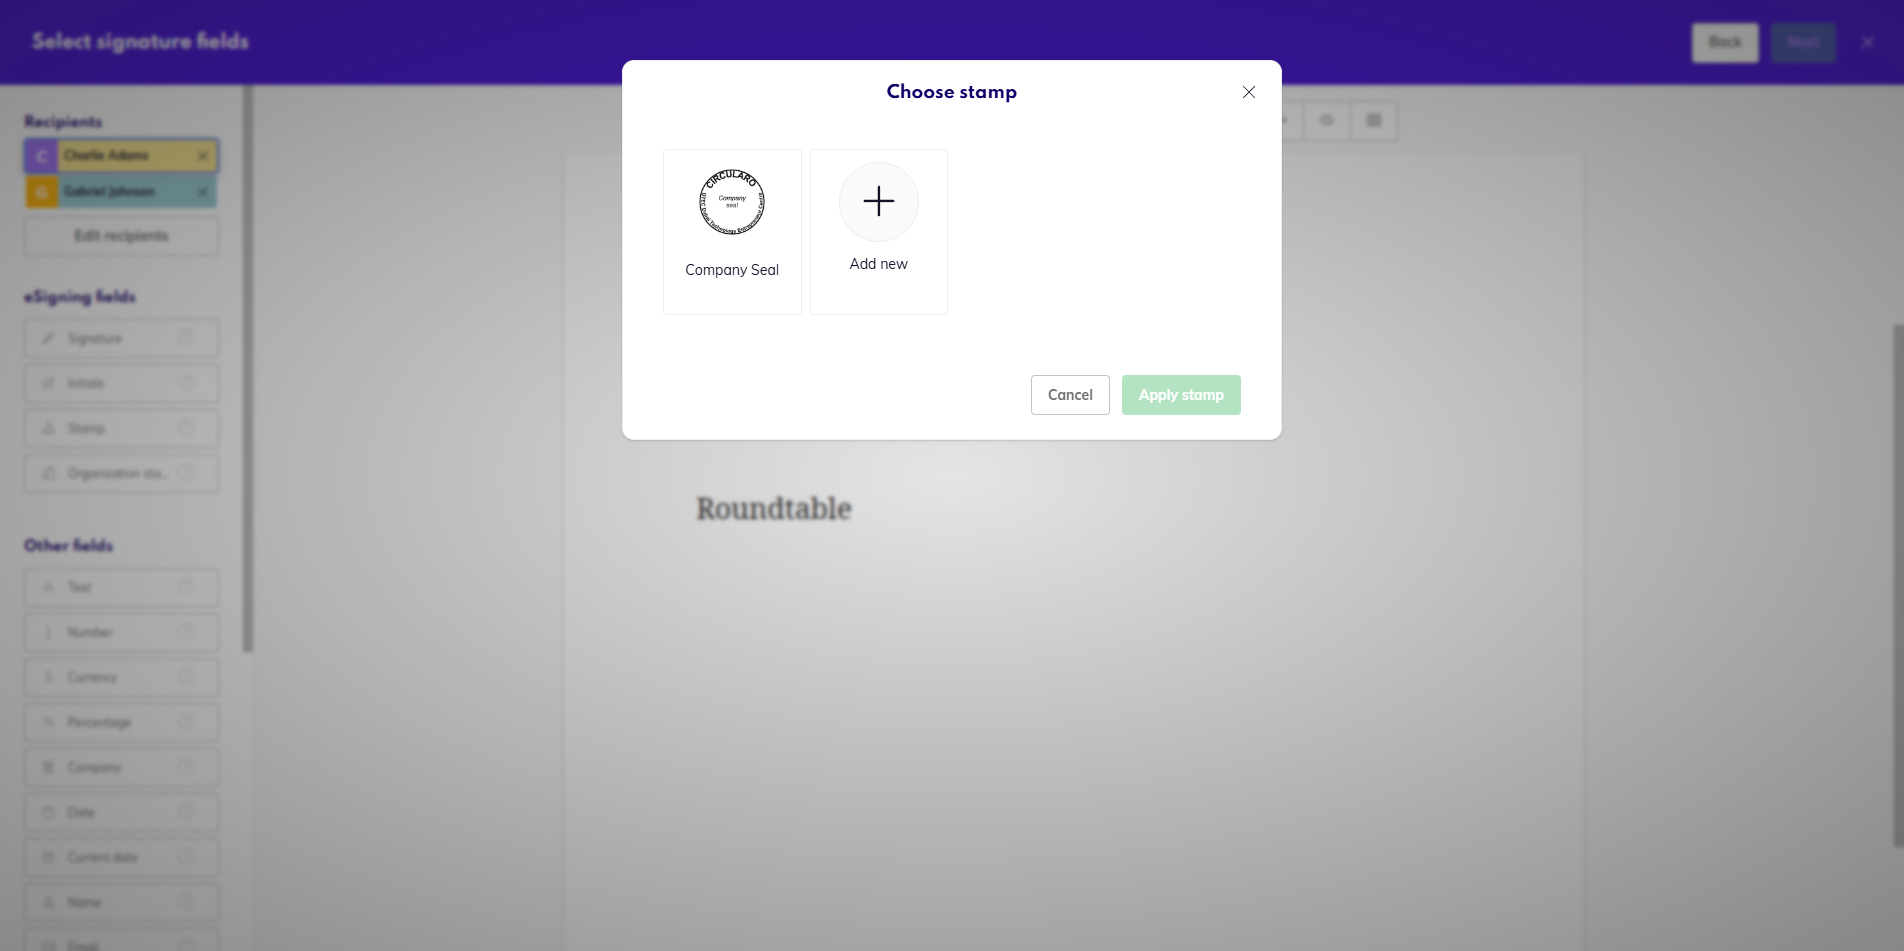
Use or create an organization stamp
It is not possible to edit existing stamps in the eSigning mode.
To edit a stamp, go to Stamps in your Preferences.
Important: when using the individual signature method, each signatory can be assigned a maximum of 10 signature fields (signatures, initials, or stamps). When using the composite signature method, the limit is a total of 1000 objects in a document - signature and other fields combined, but no specific limit for each recipient applies.
Learn more about signatures and stamps.
Basic fields
Aside from signing fields, Circularo offers many different types of fillable fields that can be placed on a document and filled in during the signing process to collect details from signatories that might be required to successfully complete the sign-off. They are divided into Basic and Advanced fields. Basic fields are those that are most commonly used on documents.
Some of these fields will already be pre-filled with information saved in Circularo.
For registered users, it’s the details they fill in about themselves in their Accounts. For external recipients saved as Contacts, their contact details can be pre-filled.
The content of pre-filled fields can be changed during the signing process by the recipient the field is assigned to.
Text - type in text of any length, multiple lines are supported
Number - A field that only allows numeric inputs. The desired value range can be further specified in the settings panel.
Date - select a date from the calendar
Name - full name (can be pre-filled)
Advanced fields
This section contains the rest of the available fields you can add to a document. Some of these may not show however, based on whether you are included as a recipient of the document, and your position on the workflow. For some to appear, you need to be part of the workflow (anywhere if the signing order is turned off, but the first recipient, if it is turned on - for example for Metadata or Link fields), or not be the first (for example for the Radio button).
Email - email address (can be pre-filled)
Link - insert clickable links leading to websites or other documents
Currency - A number field that includes a currency symbol of your choice.
Percentage - A number field that includes the % symbol.
Company - the name of the company the recipient works for (can be pre-filled)
Phone - phone number (can be pre-filled)
Job Title - their official job title (can be pre-filled)
Document ID - add a unique DocID containing a verification link anyone can use to check the authenticity and integrity of the document and the signatures within
Metadata - embed selected metadata directly into the document for improved transparency
Comb field - an adjustable, single-line text field for filling in box forms where each character goes in a separate box
List - create a custom dropdown menu from which the recipient can select one option (Only available when the person preparing the document is not the first signatory.)
Check - select values by ticking checkboxes (to ensure the recipient needs to only click the ones that apply, make the fields not required)
Radio button - create a number of unique options and let recipients select one of them to indicate their choice or answer (The Radio button is only available when the person preparing the document is not the first signatory or is not a signatory at all.)
Image - you or the recipient can upload an image
QR code - place a QR code on the document (not available for external recipients) Availability: Business and Enterprise
Fillable fields
Multiple fields can be selected at once by holding the Shift or Command key and aligned together horizontally or vertically on the document.
Customizing the field panel
You have the option to customize which fields you see in the panel, to only show those that you use often, and hide the fields that you don’t need.
To open the settings, click on the little gear icon right by the Signature fields.
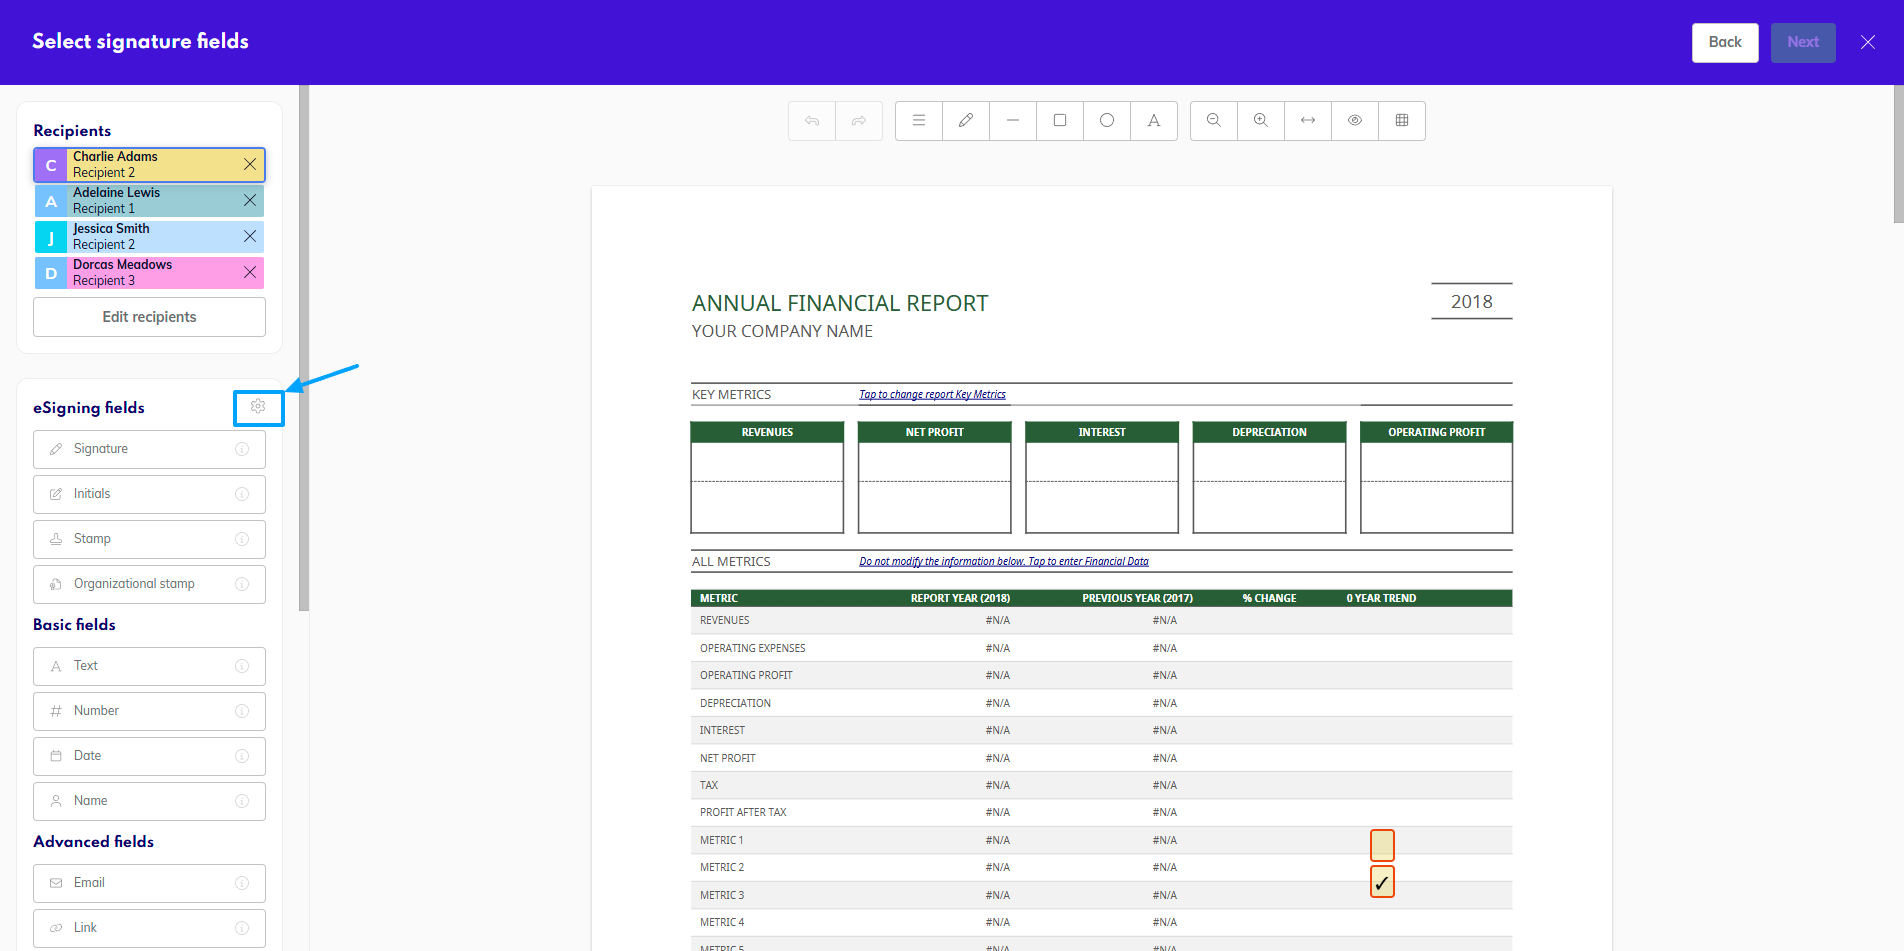
Access the field panel settings
Once opened, you can customize the order of the fields, by clicking on the dots by each field and dragging it up or down. Each field can only be moved within its category - Advanced fields cannot be dragged between Basic fields, etc.
Reorder fields
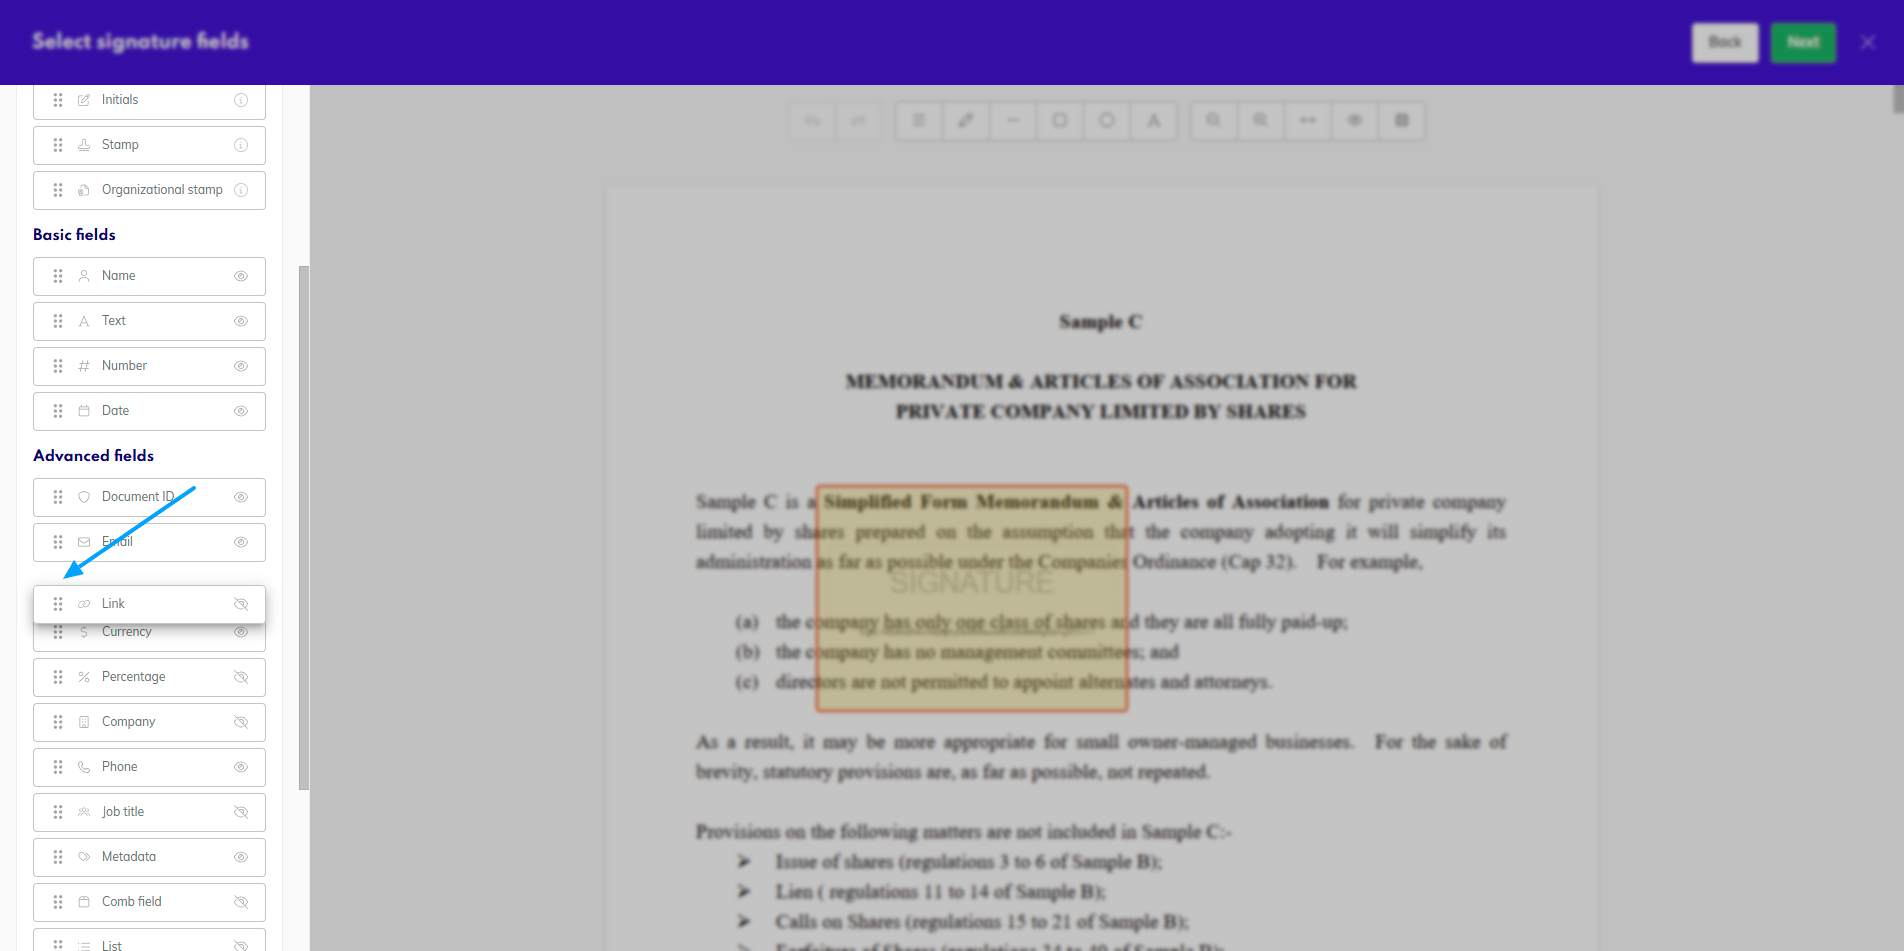
Each of the Basic and Advanced fields can also be hidden. This can be done by clicking the eye icon on the right side of each field. By clicking it again it will become visible.
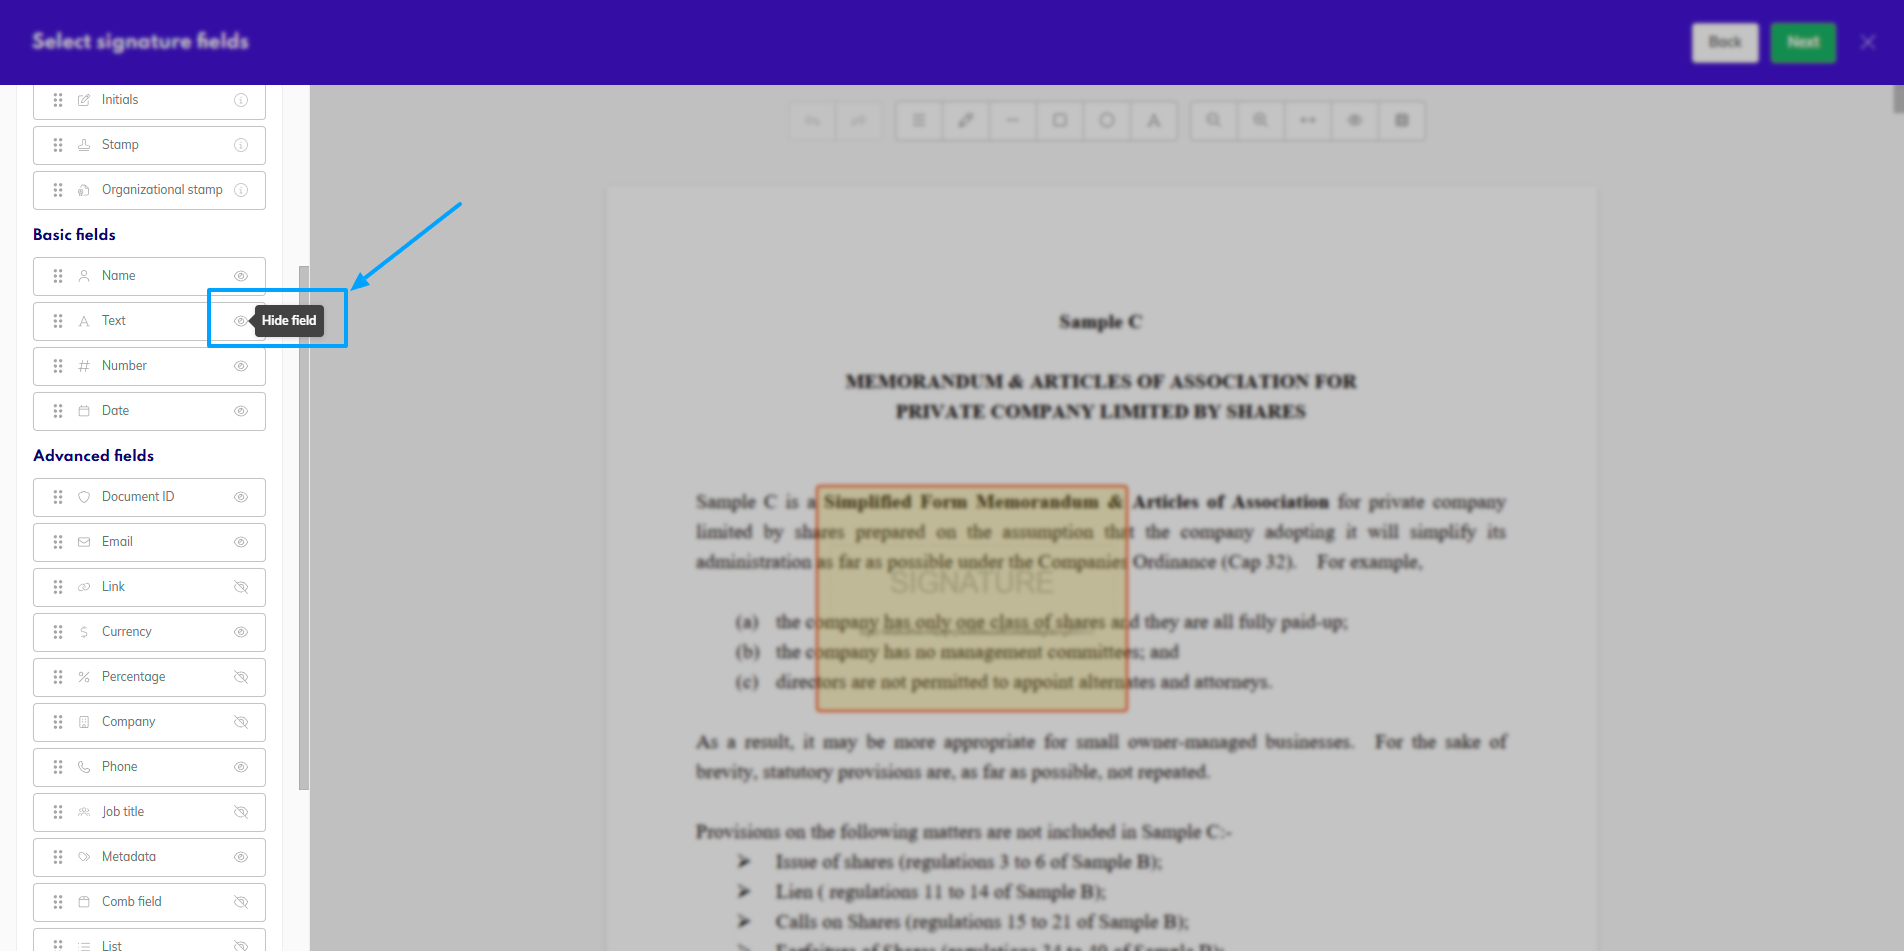
Hide a field
All changes are automatically saved, so once you are done, you only need to exist this view by clicking the X by the eSigning fields.
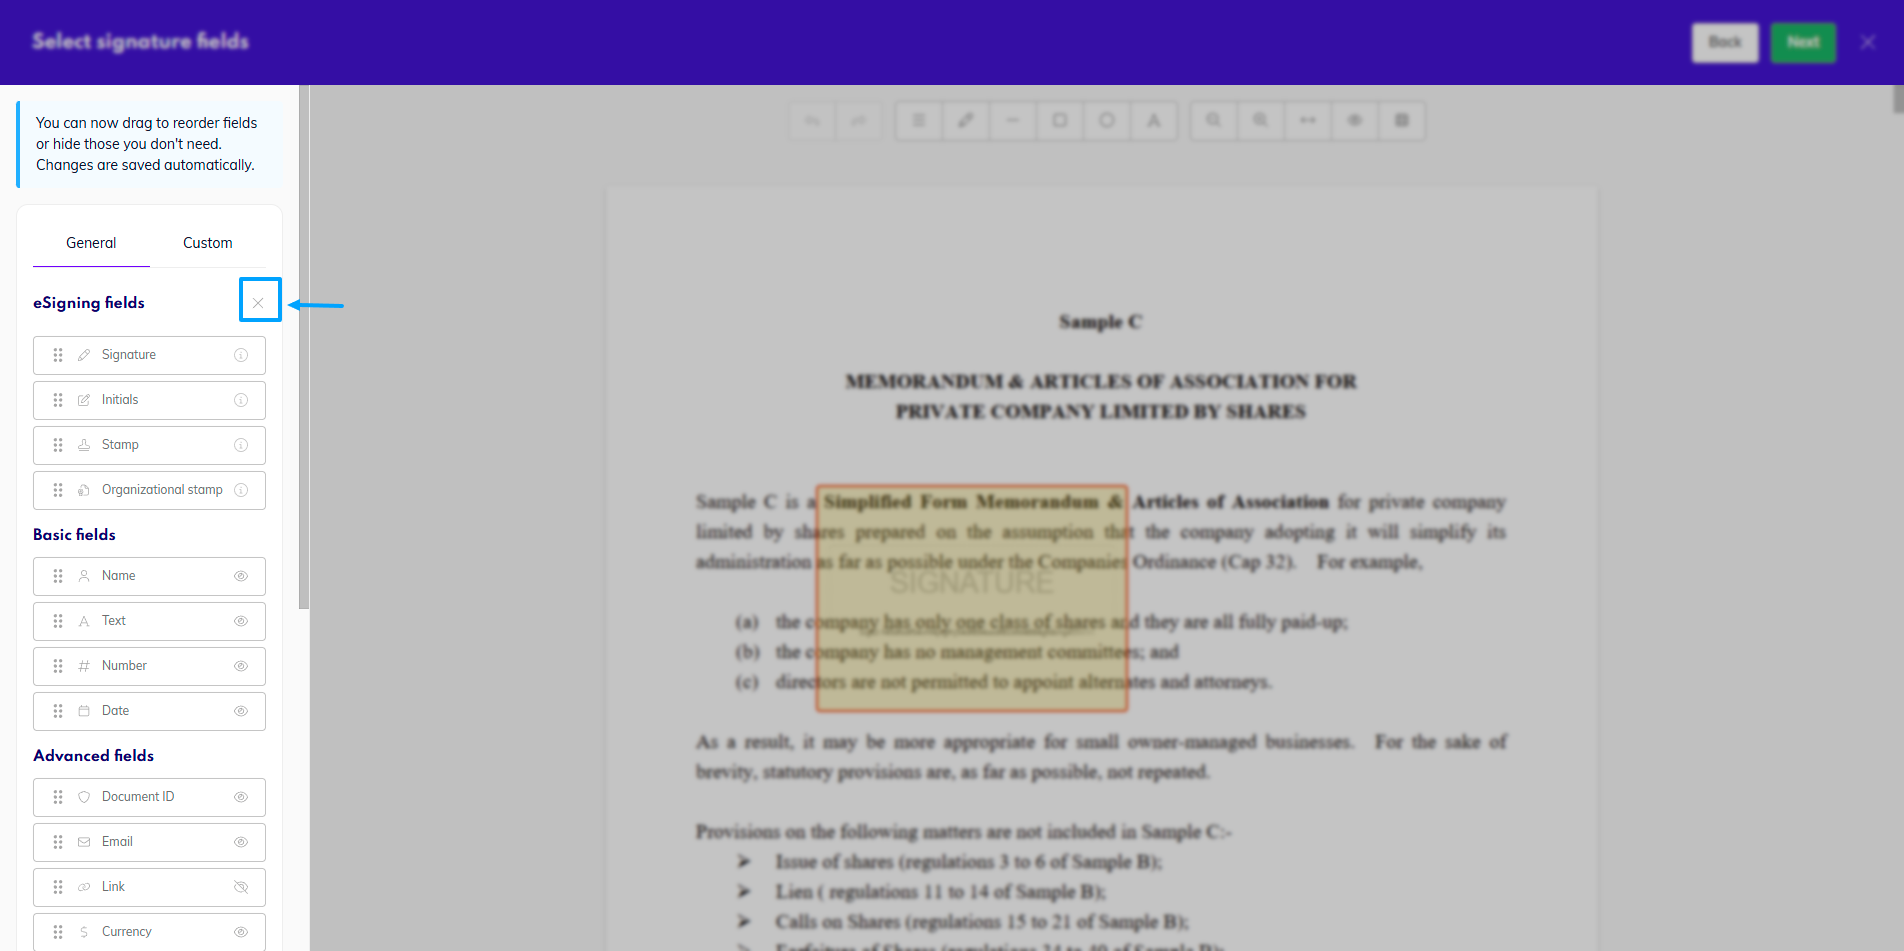
Leave edit view
At any point in time you can customize the fields again, or Restore defaults, which will revert all changes back to what was configured for the system.

Customized fields panel
Viewing placed fields
If you need to quickly go through the pages where a field has been placed, you can click on Toggle thumbnails at the top of the page with annotation tools. All pages with fields will have a little green flag on them- Signed and Annotated for fields belonging to the creator of the document, and To be singed and To be annotated for fields assigned to other recipients.
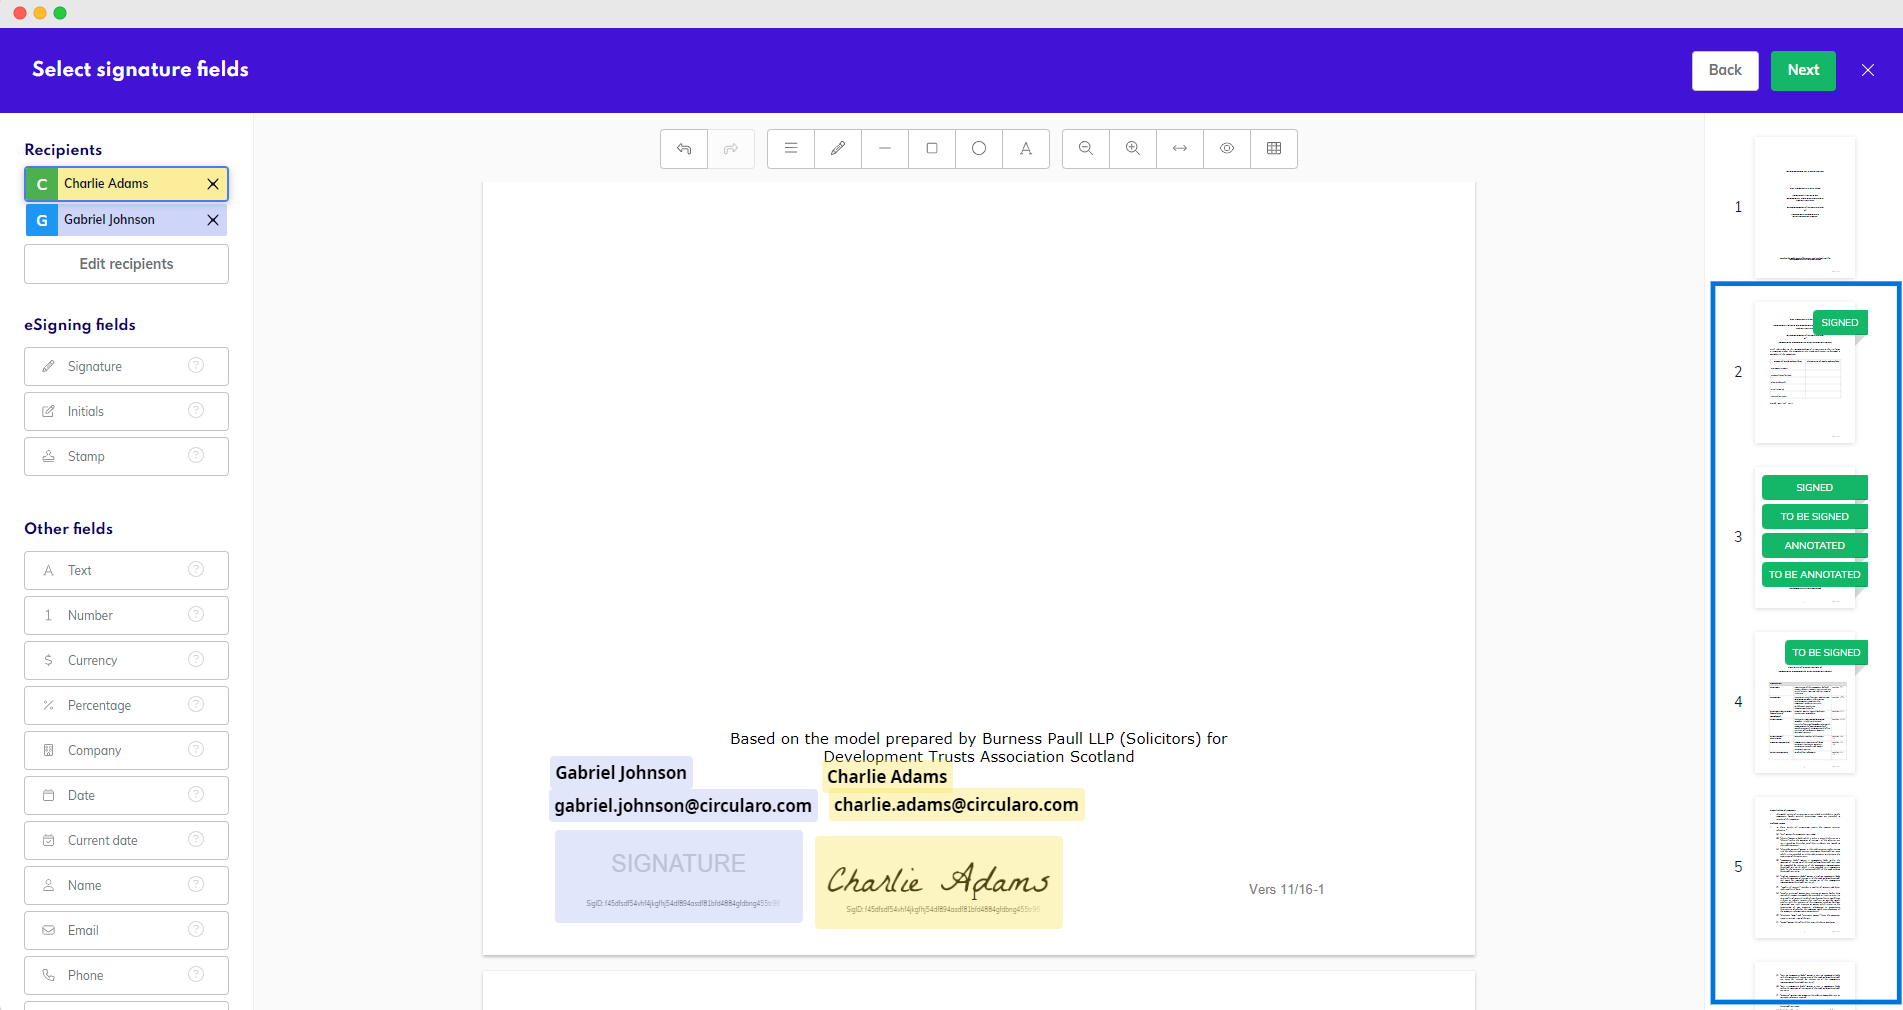
Document with annotated thumbnails
Recipients can also view these thumbnails during their signing.
Multiple fields vs multipage fields
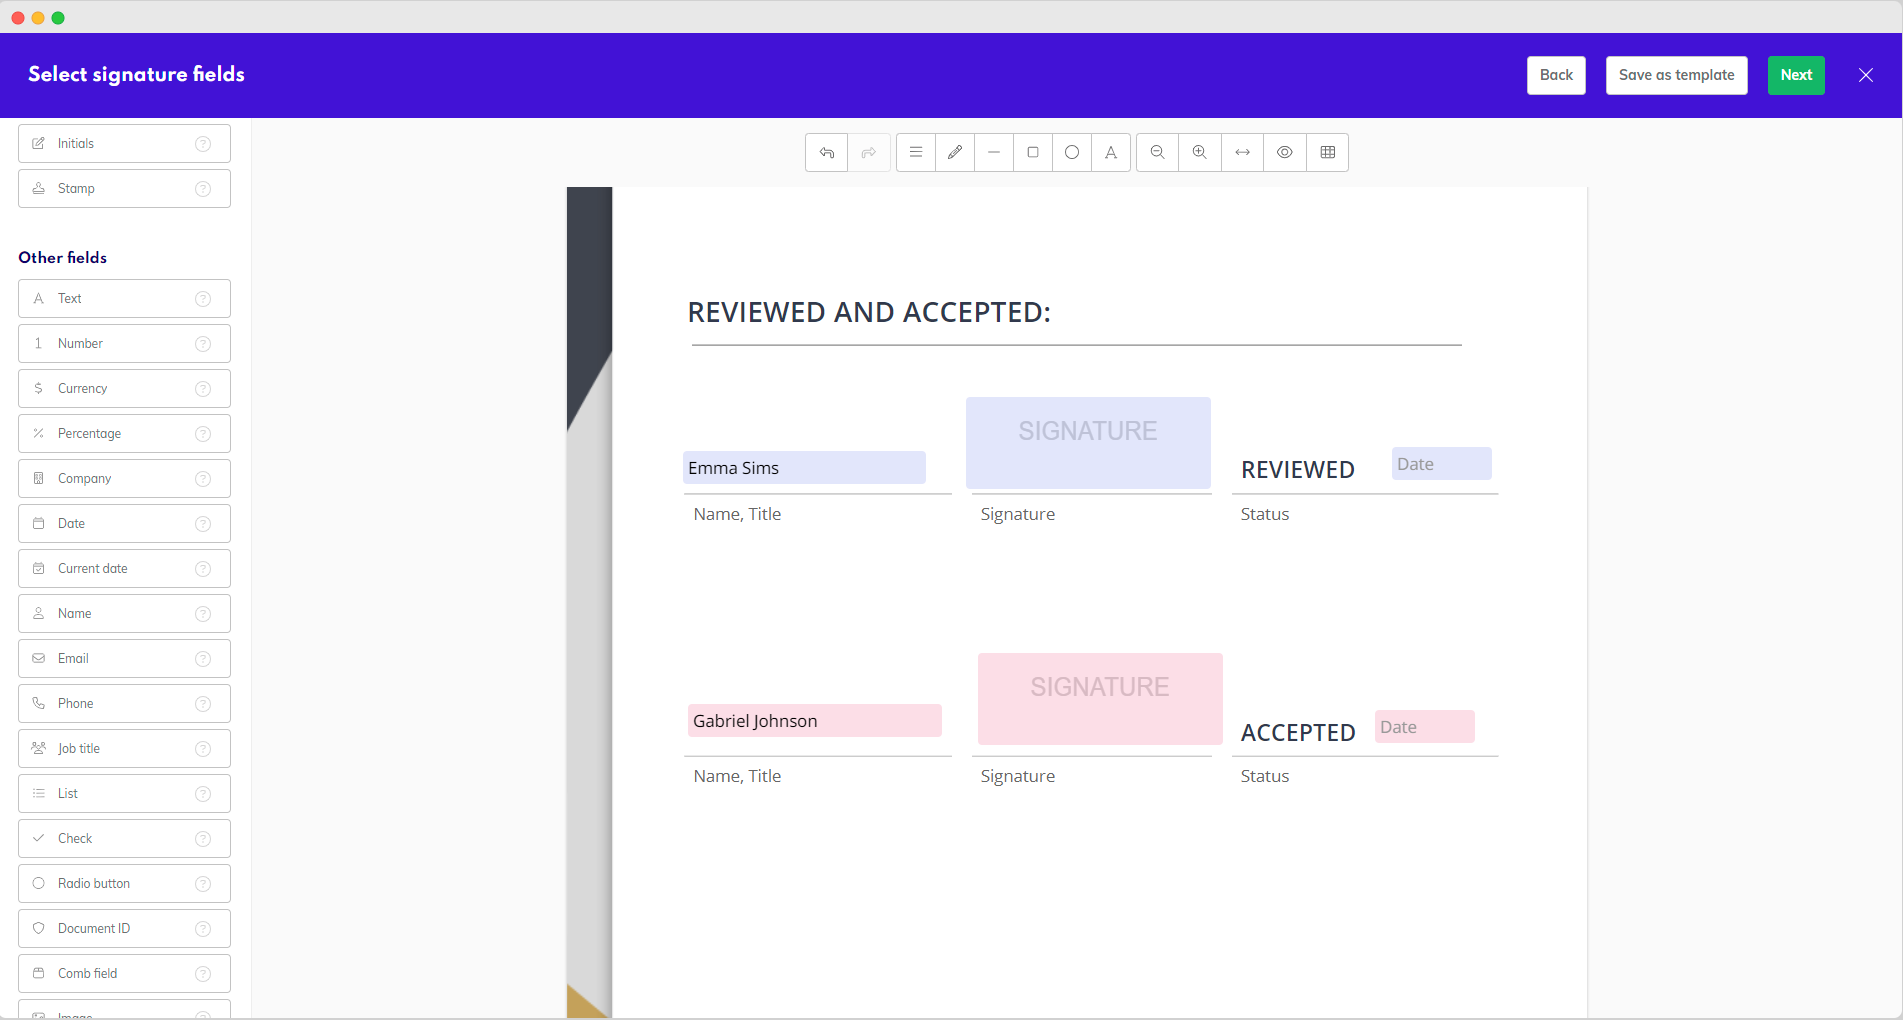
When you need to put a field onto a document several times, there are two options how to do this. You can put each field separately onto the document, each one exactly where you need it, or you can select multipage option in the settings panel of the field, which will replicate the field. You can set it to be on all pages of the document, or you can customize which pages should contain the field. When you select multipage, all the fields will be in the same position on all pages and moving one moves all of them.
The main difference between the two approaches is what happens during signing. If you place the fields multiple times, the signatory will be guided through the fields one at a time.
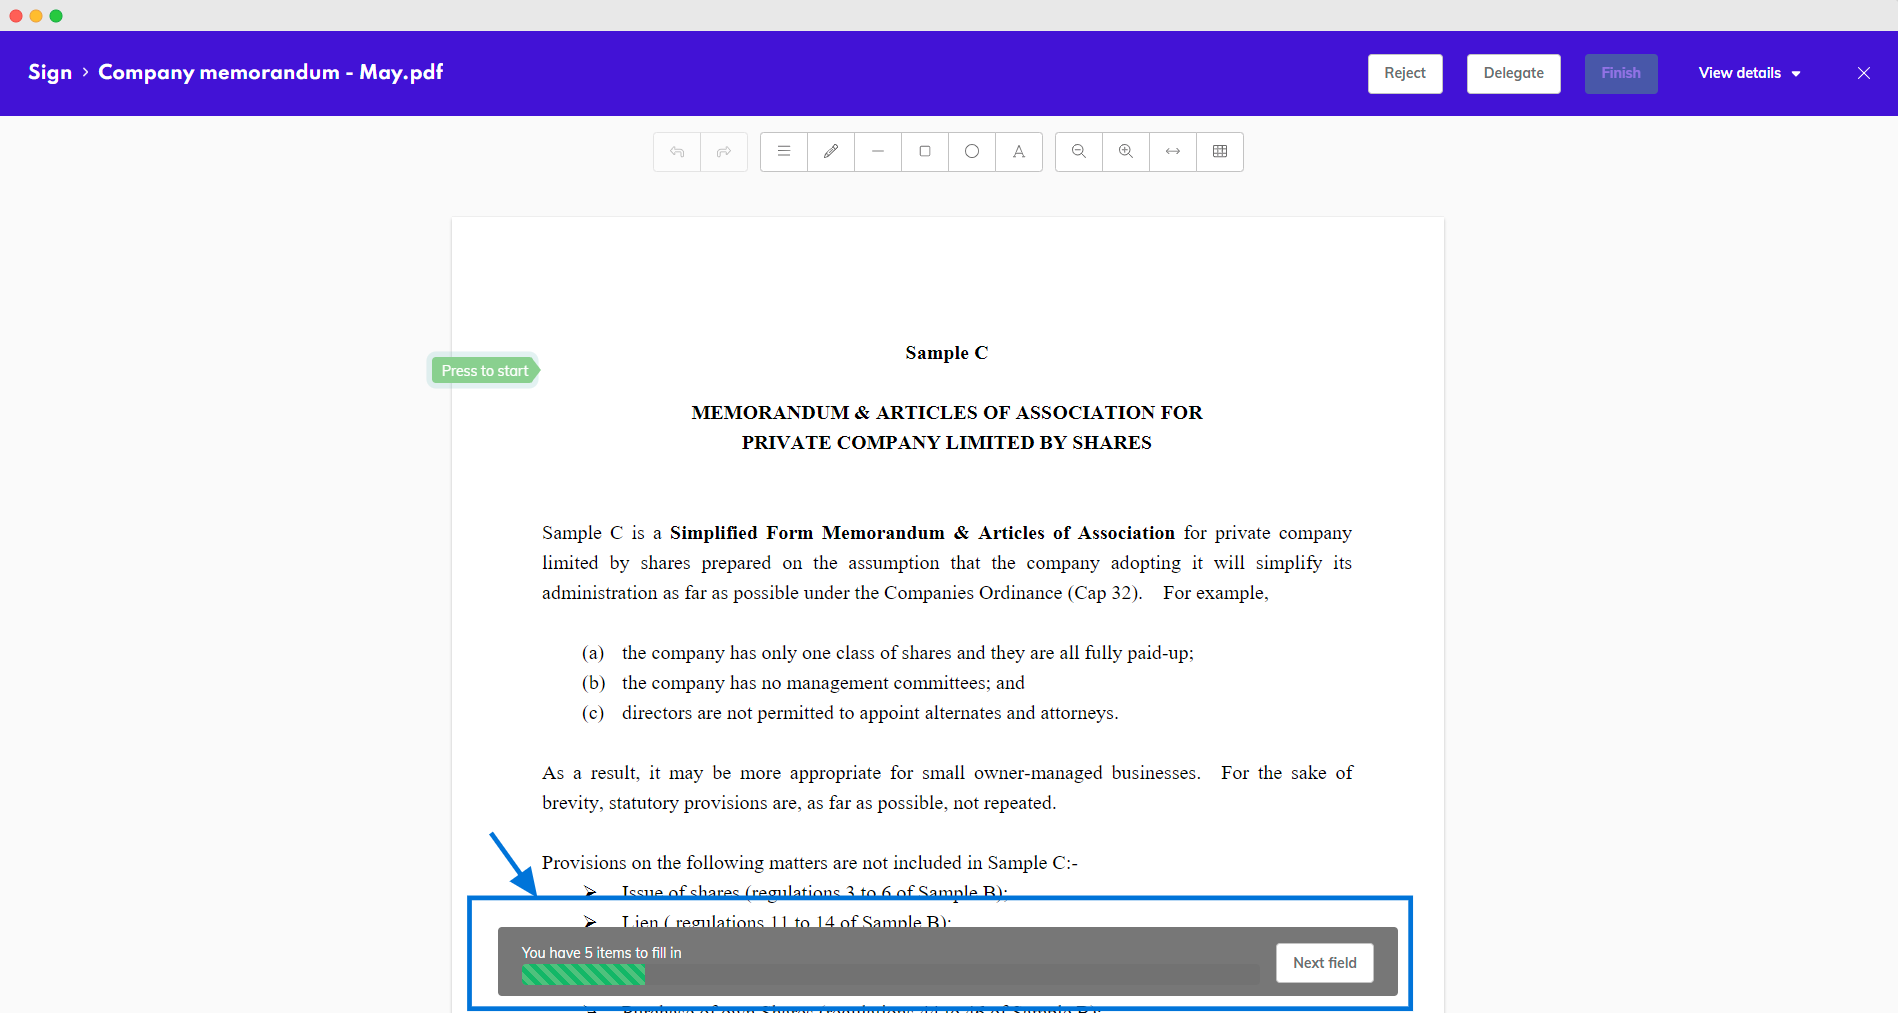
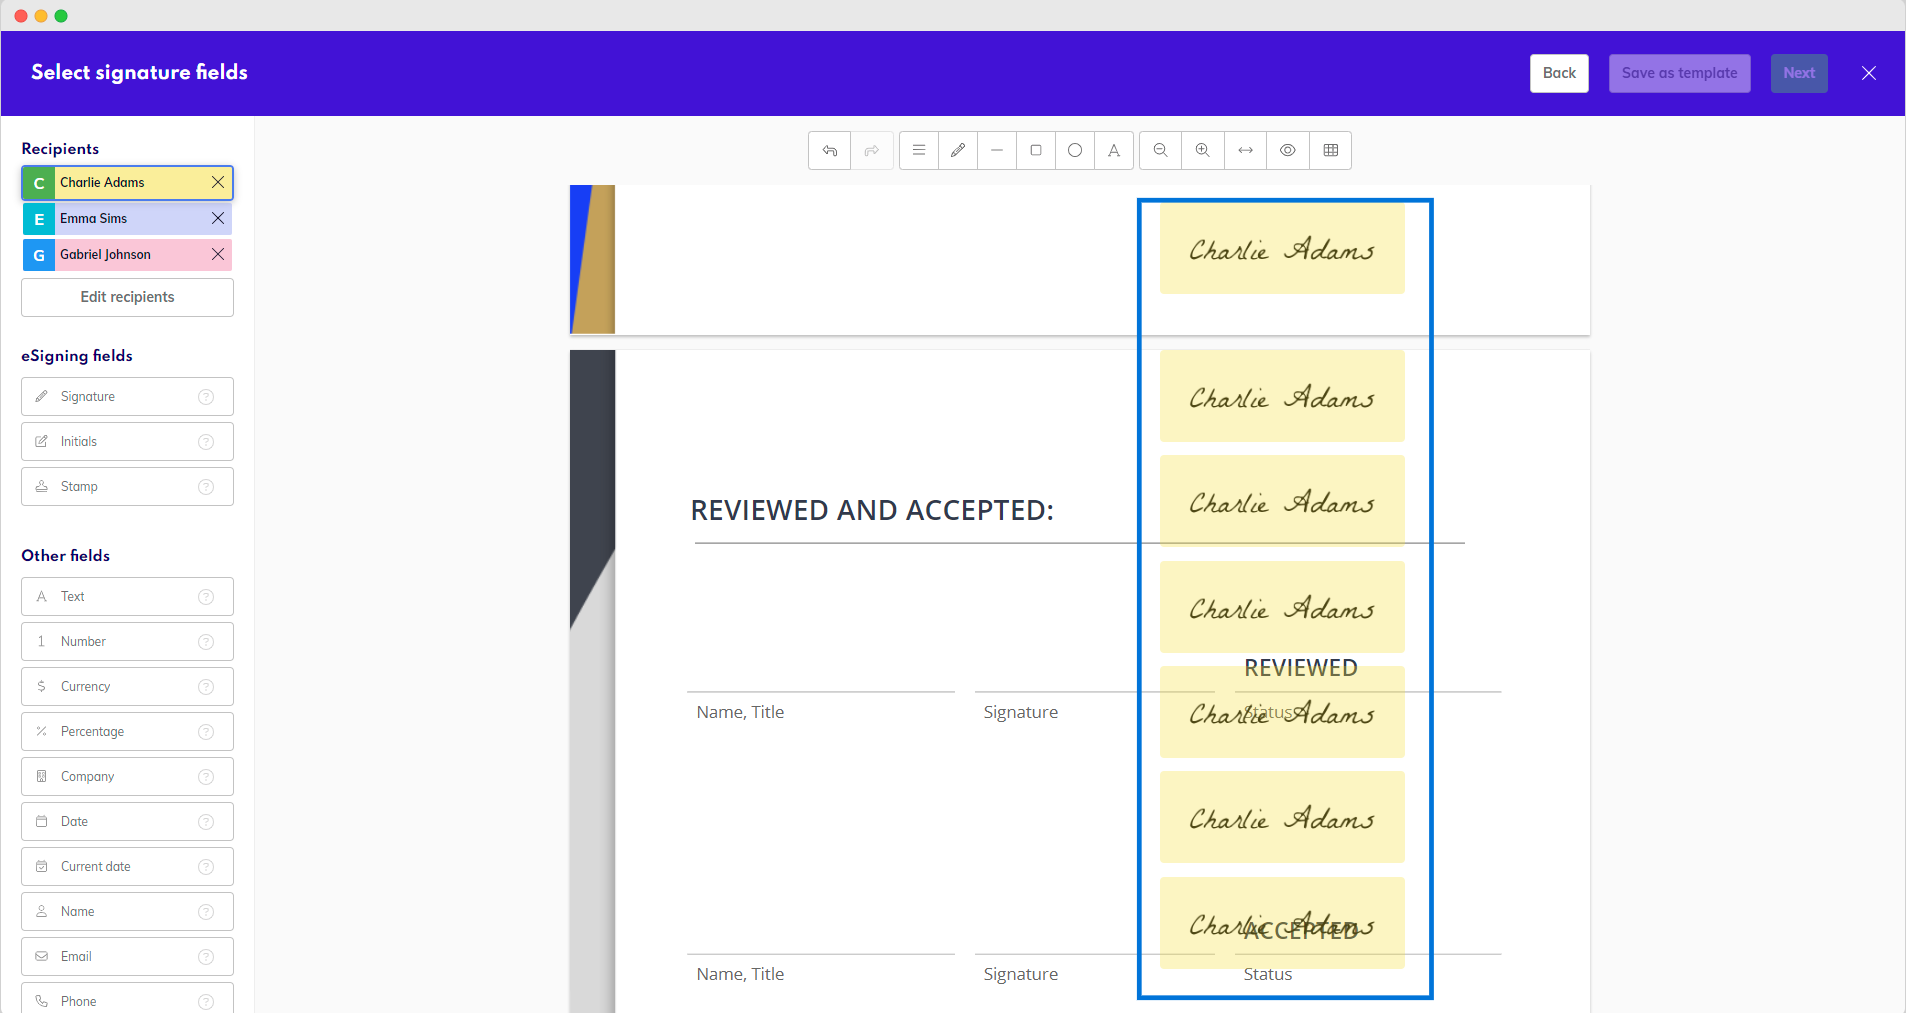
Document containing several individual fields
For each field, the information/signature needs to be manually input.
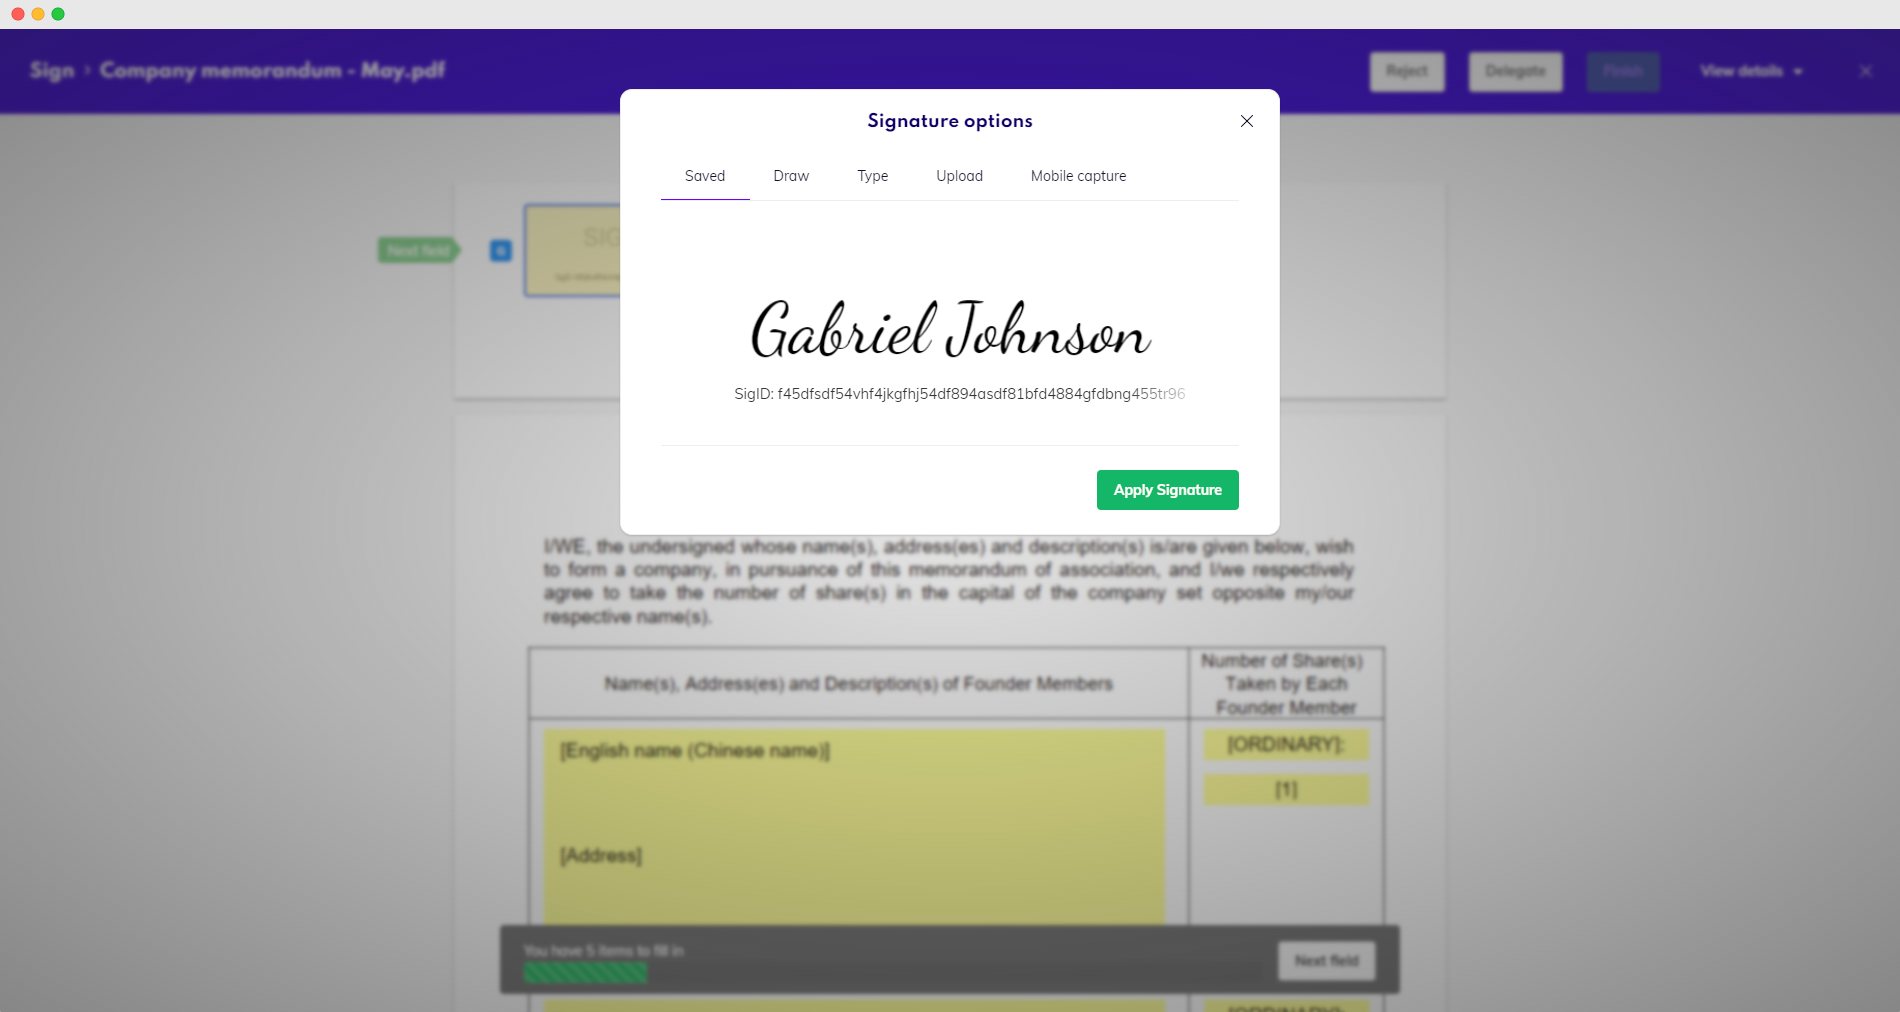
Inputting signature
This can be used to ensure the signatory sees all the parts of the document they place a signature in. Only after all fields are filled in can the signing process be completed.
If the fields are set to multipage, the signatory fills the first of those fields and in the rest of that multipage field the information is replicated. The guide of the signing process shows them only the first of the multipage fields and doesn’t show them any of the others.
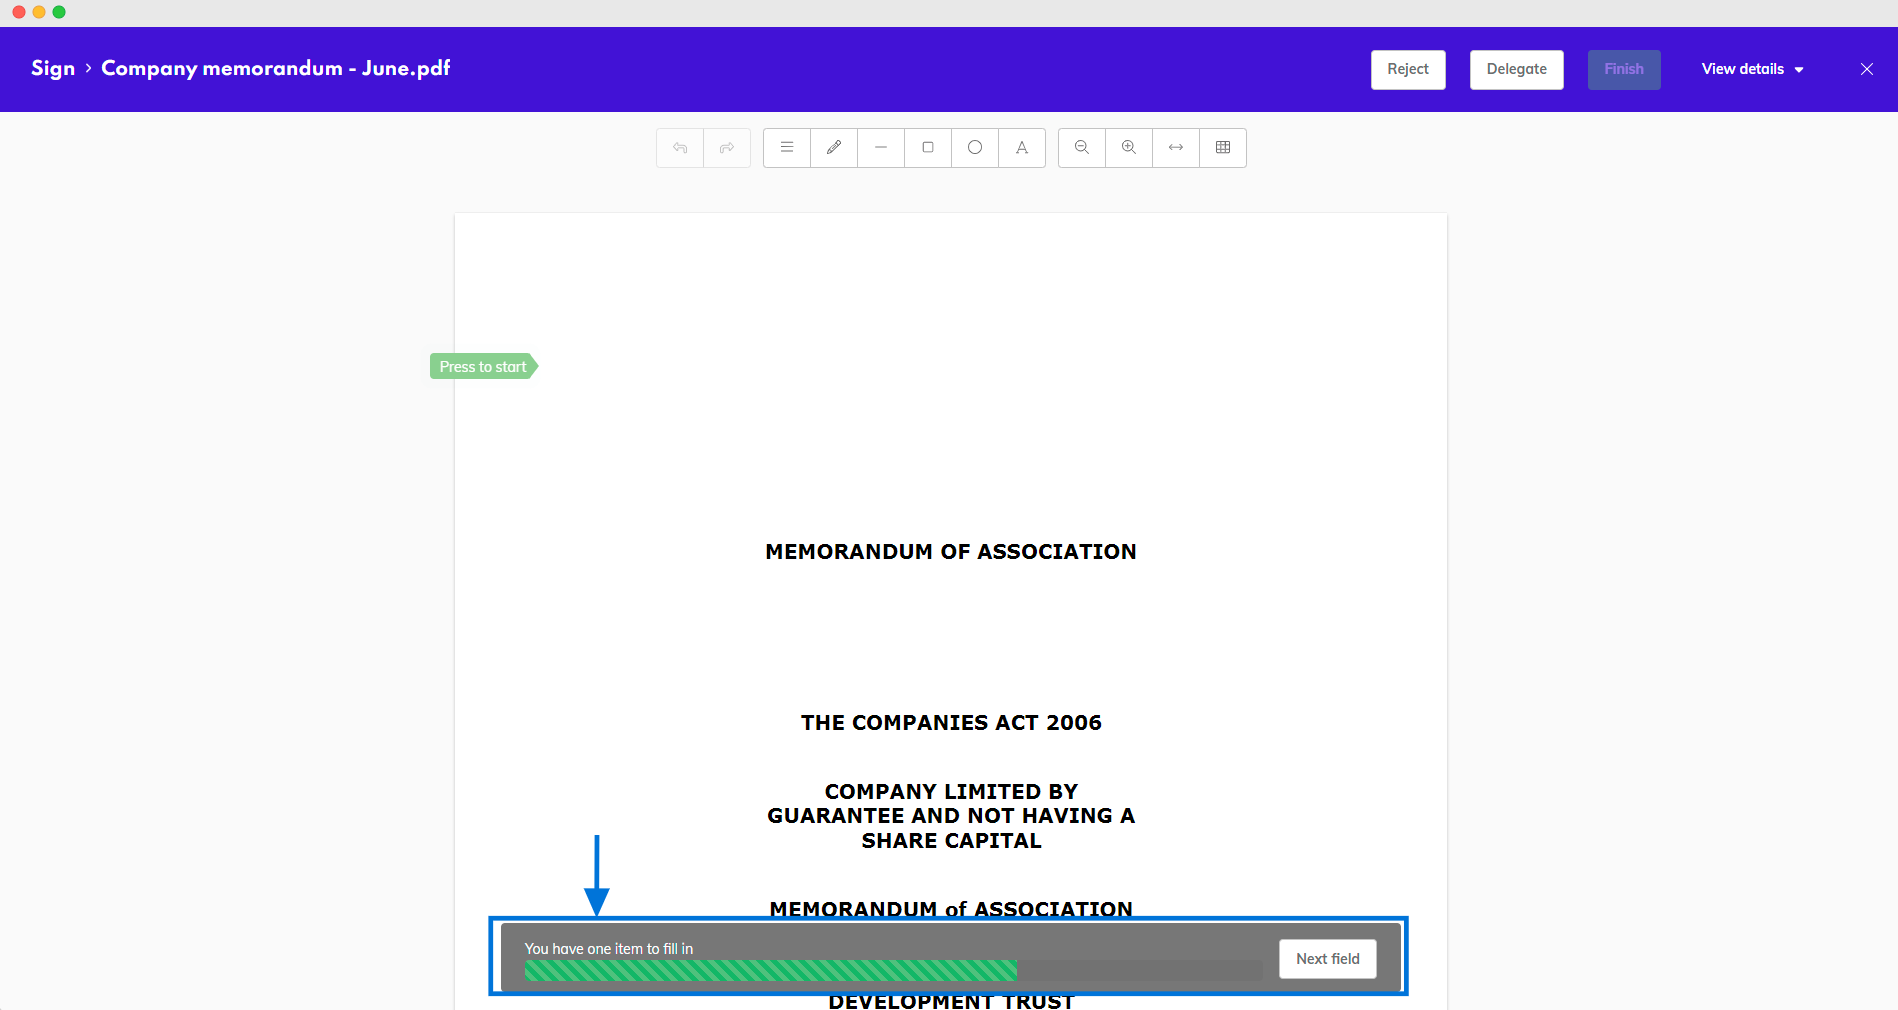
Document containing one multipage field
The signatory will thus not be guided through all places on the document containing this field, creating a possibility a signature will be placed somewhere the signatory would not wish to sign. The signatory can of course go through the document manually and see all the pages containing the field, but with long documents with many pages that can be cumbersome.
Field settings panel
Placed fields can be edited and adjusted in various ways. Once you’ve placed a field, click on it to open the Field settings panel on the right side of the screen.
Common settings
Text
Here you can set what the text in the field will look like, including font, alignment, color, and background color.
Layers
Layer multiple fields on top of each other and choose which ones you want to bring to the front or send to the back.
This setting is not available for Signature fields, as they must always be the top layer.
Multipage
Tick this box if you want to add this field to multiple pages. You can then set it to all pages or just specific ones.
Recipient
Reassign the selected field or a group of fields to a different recipient.
Custom ID
If processing the document via API, you have the option to add a custom field ID to be able to find and locate the field later.
Remove
Removes selected field or fields from the document.
Required
By marking a field as Required, the signatory has to fill it out before they are able to finish signing a document. All fields are marked as Required by default.
Required fields will have a red border around the field and tooltip that says “Required”. Optional fields will not have any border, and will have a tooltip that says “Optional”.
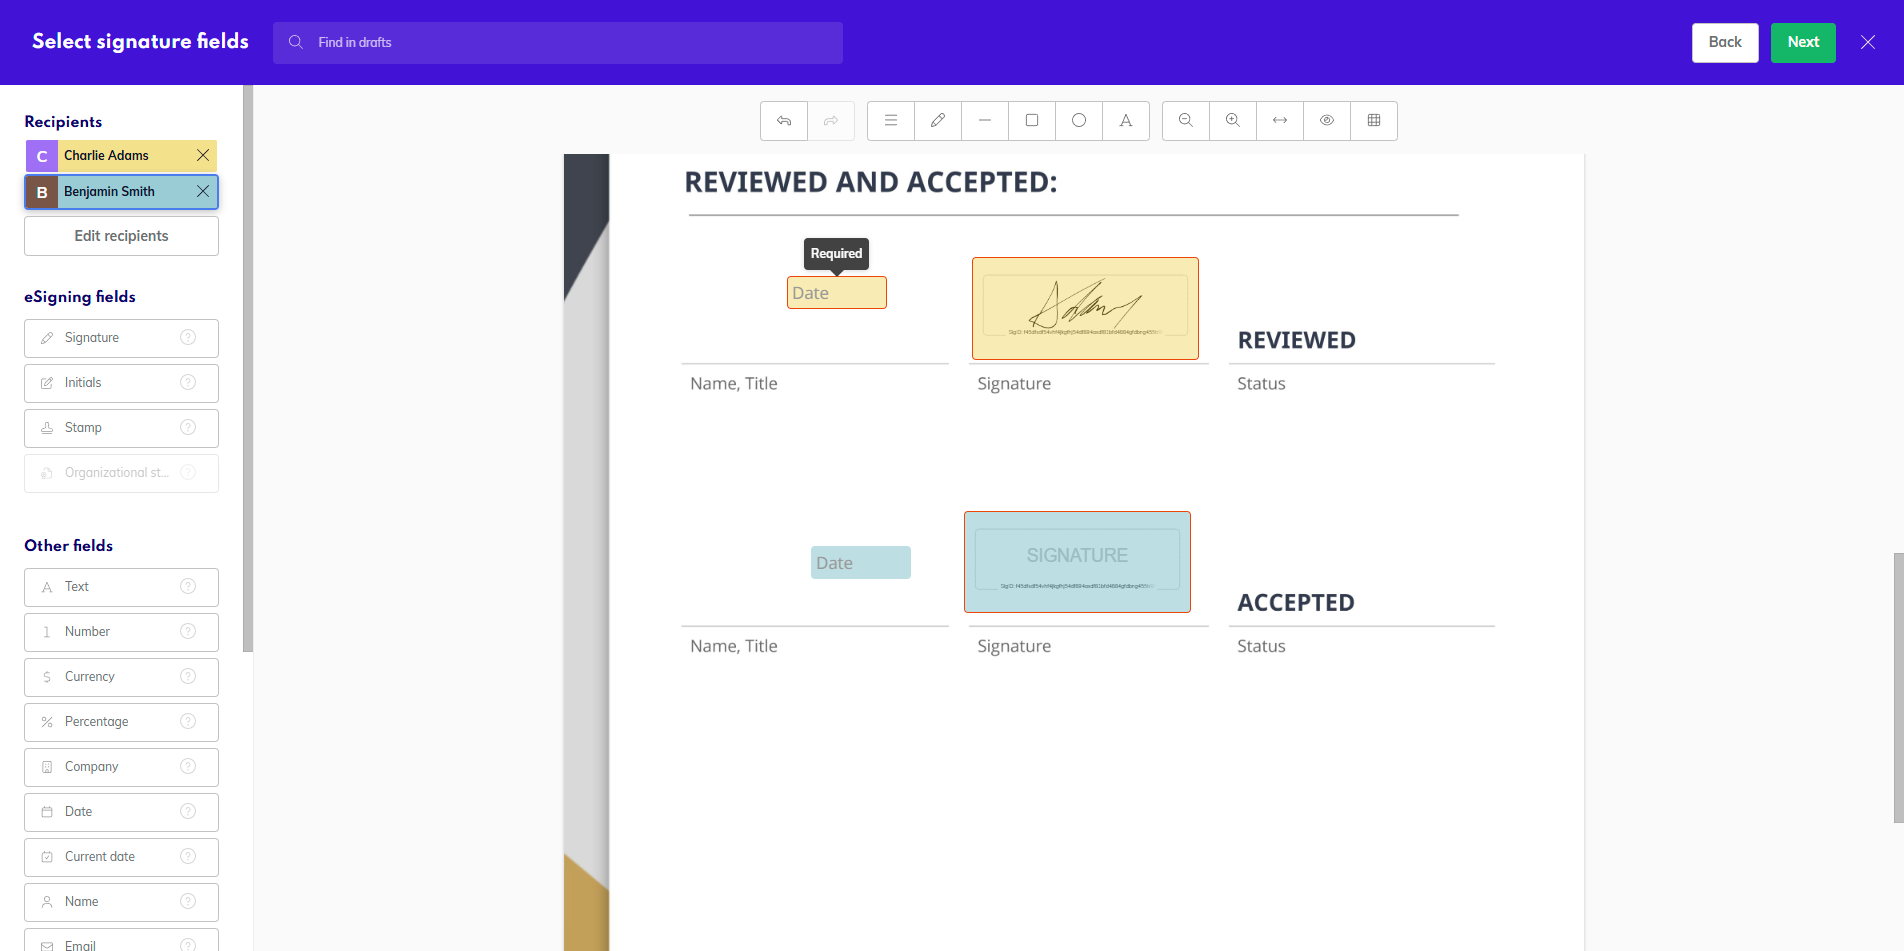
Required and optional fields example
Placeholder
Write custom placeholder text for the recipient to give an example of how to correctly fill in the field.
Tooltip
If placeholder isn’t enough, you can also create a custom tooltip with instructions on how to fill in the field for the recipient.
Required, Placeholder and Tooltip settings are not available for fields belonging to the preparator when the preparator is the first signatory in the workflow.
Field reassignment
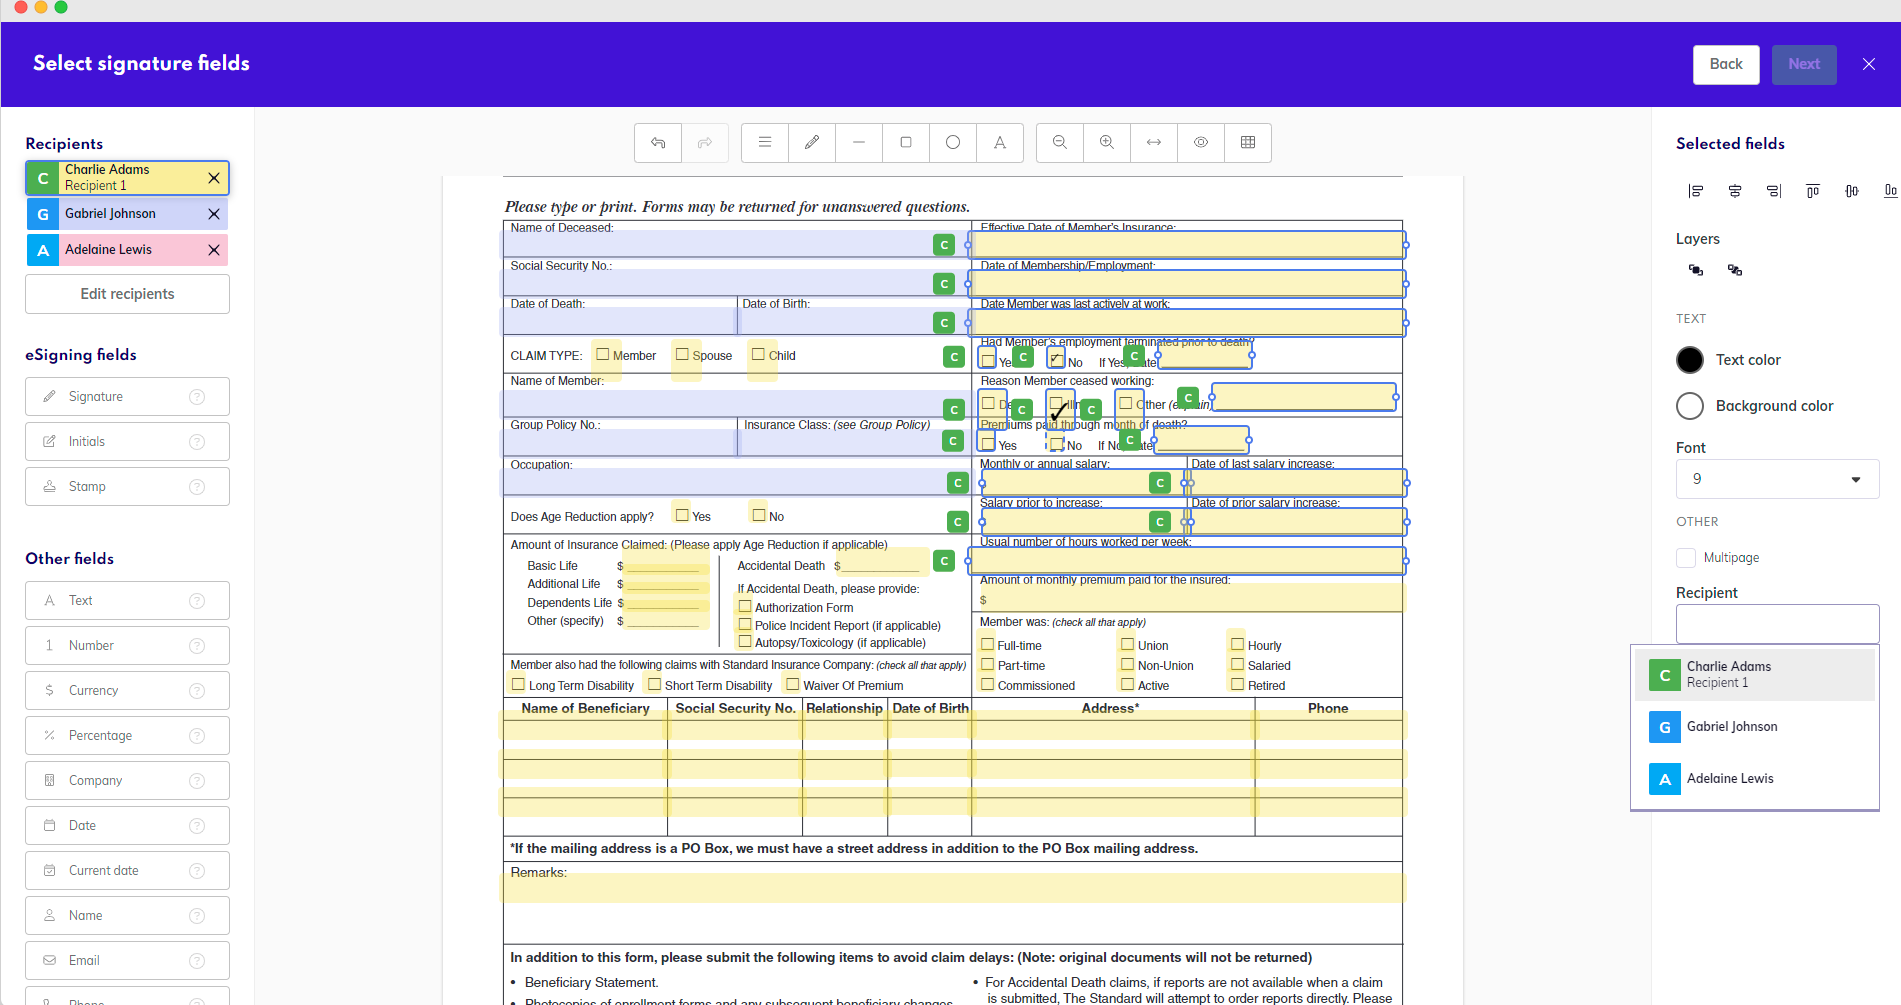
This feature allows you to select two or more fields at once and assign them to a specific recipient, which is especially useful when paired with the Automatic Field Recognition feature.
The recognized fields are all assigned to the first recipient in the recipient list upon recognition.
Using the Shift or Ctrl command key, select the fields you wish to assign to a specific recipient. Once you’ve selected them, on the right side on the menu, click on Recipient and from the dropdown of available recipients choose the intended one. The fields should turn a color that is assigned to the specific recipient (can be seen in the left top corner).
Field reassignment
Specific field settings
Certain fields have some more settings that can be adjusted.
Signature fields
Timestamp
Adds a timestamp to the signature field.
Change signature / initials / stamp
Redesign your signature, initials, or stamp. You can create your signature via a completely different method, change its color, size, etc. When it comes to stamps, you can either select a different saved stamp or create a completely new one.
Learn more about creating signatures and initials, or find more about stamps.
Numeric fields
The Number, Currency, and Percentage fields have several specific settings available:
Decimal
Tick this box to allow decimal numbers. In practice, this enables you to enter a dot (.) or a comma (,) into the field which only allows digits otherwise.
Separate thousands
When dealing with large numbers, you might want to check this box to minimize mistakes and achieve greater clarity (100,000 or 100 000 instead of 100000). You can also set which separator you want to use.
Min and Max values
Here you can set the minimum and maximum value for the field. The recipient will only be able to enter a value within the range.
Currency symbol
Enter the currency symbol you want to use and adjust its position before or after the amount.
Text field
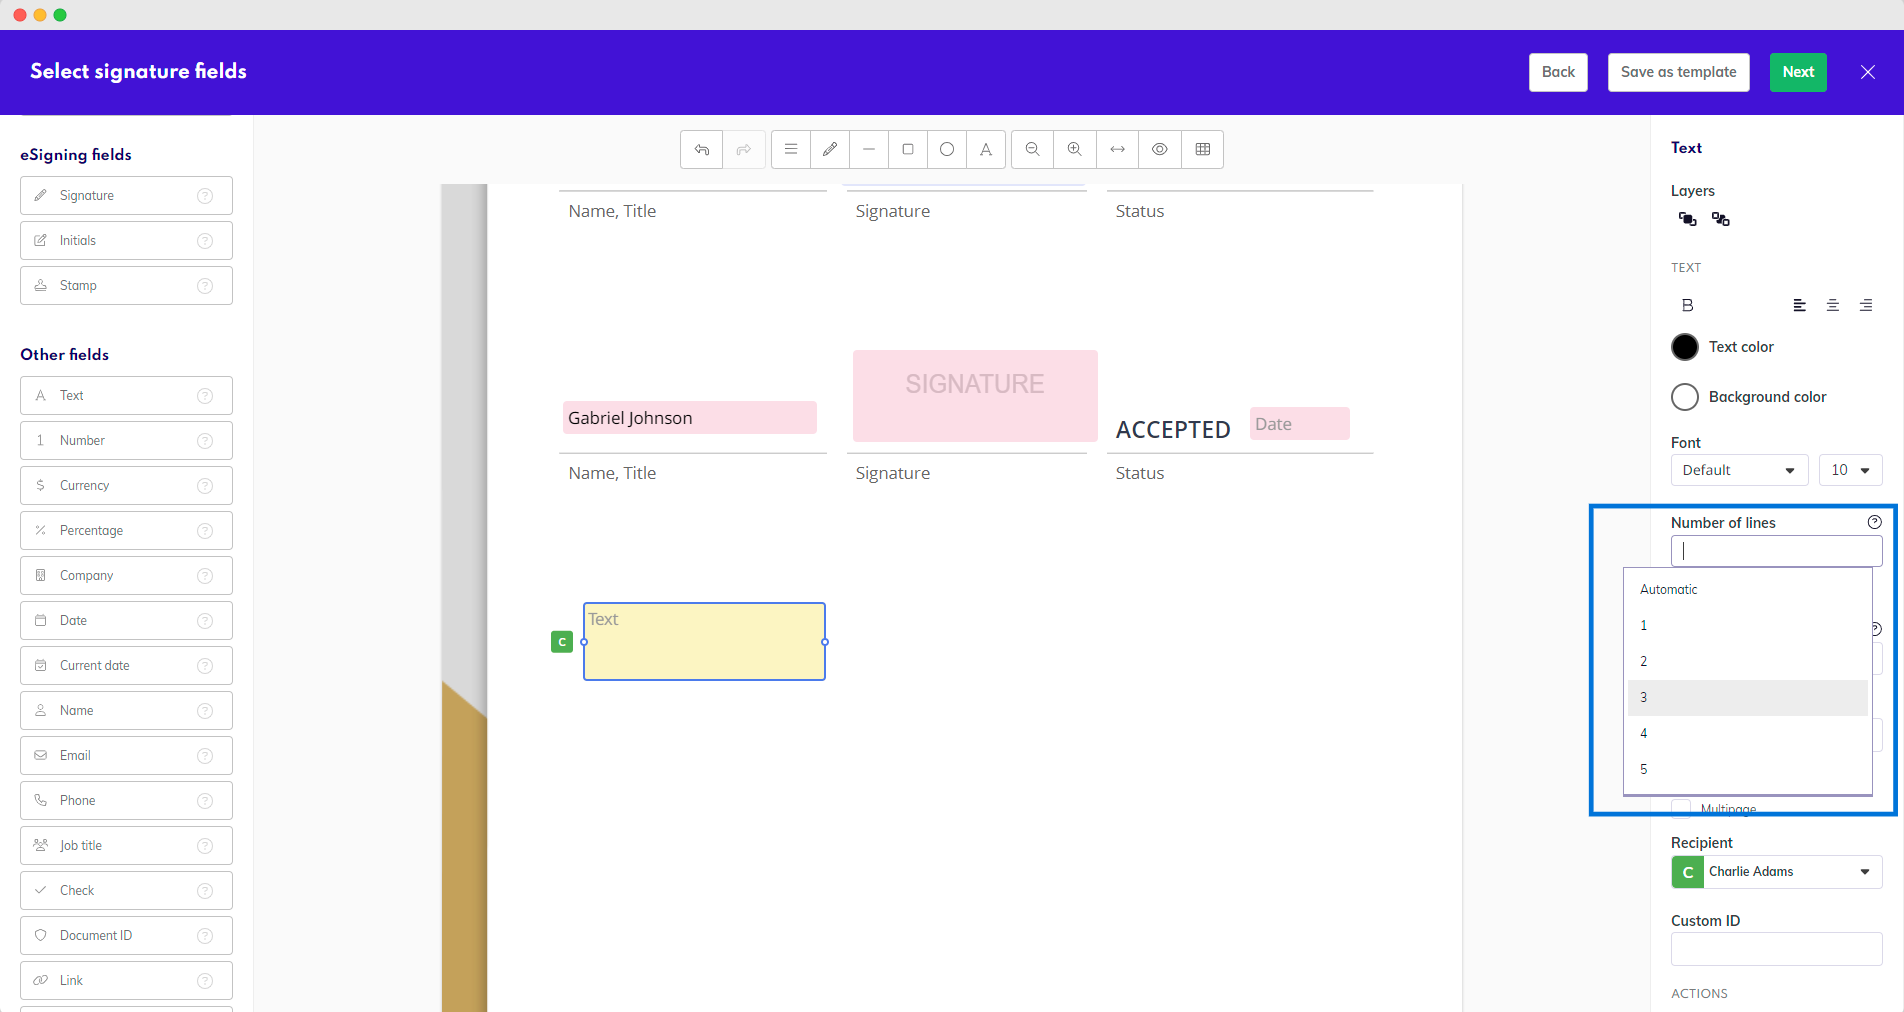
Number of lines
You can add multiple lines of text to the document by clicking on the text field and defining the number of lines on the top of the page. The textbox size will adjust accordingly.
This is useful when preparing the text field to be filled in by the recipient and defining the desired number of lines for them.
Text fields lines
Circularo offers full support for the Arabic language and left-to-right writing in text fields. It is even possible to add bilingual text that combines English and Arabic writing if needed.
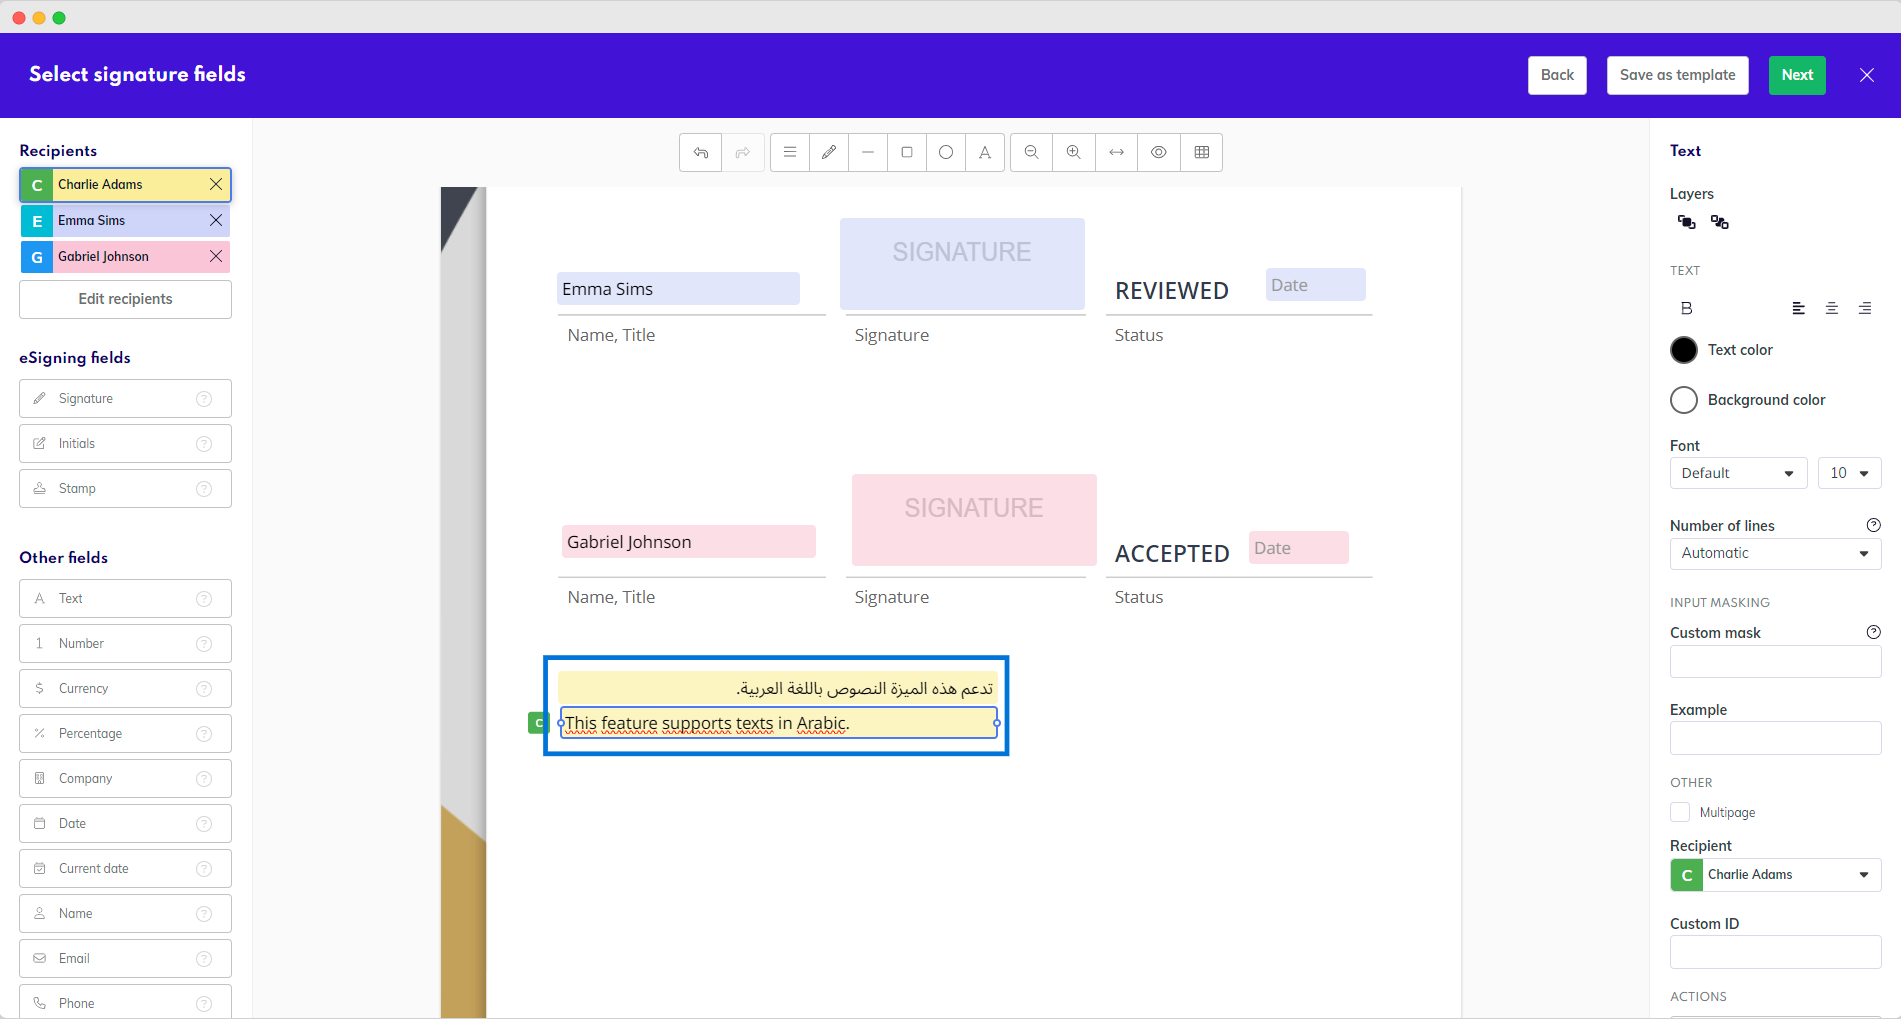
Bilingual text
Input masking
For fields that require a very specific format (such as ID numbers, bank account numbers, etc.), there is an option to add a custom mask to a text field, specifying the exact desired layout and distribution of alphabetic, numeric, and other characters for the recipients.
How to create a custom mask for a text field:
Find a Text field in the field selection and place it on the document.
Click on the field and find Custom mask in the panel that will appear on the right side of your screen.
Create the mask according to the instructions below
If you would like to provide an example of what should the recipient enter, fill the Example field with a hint
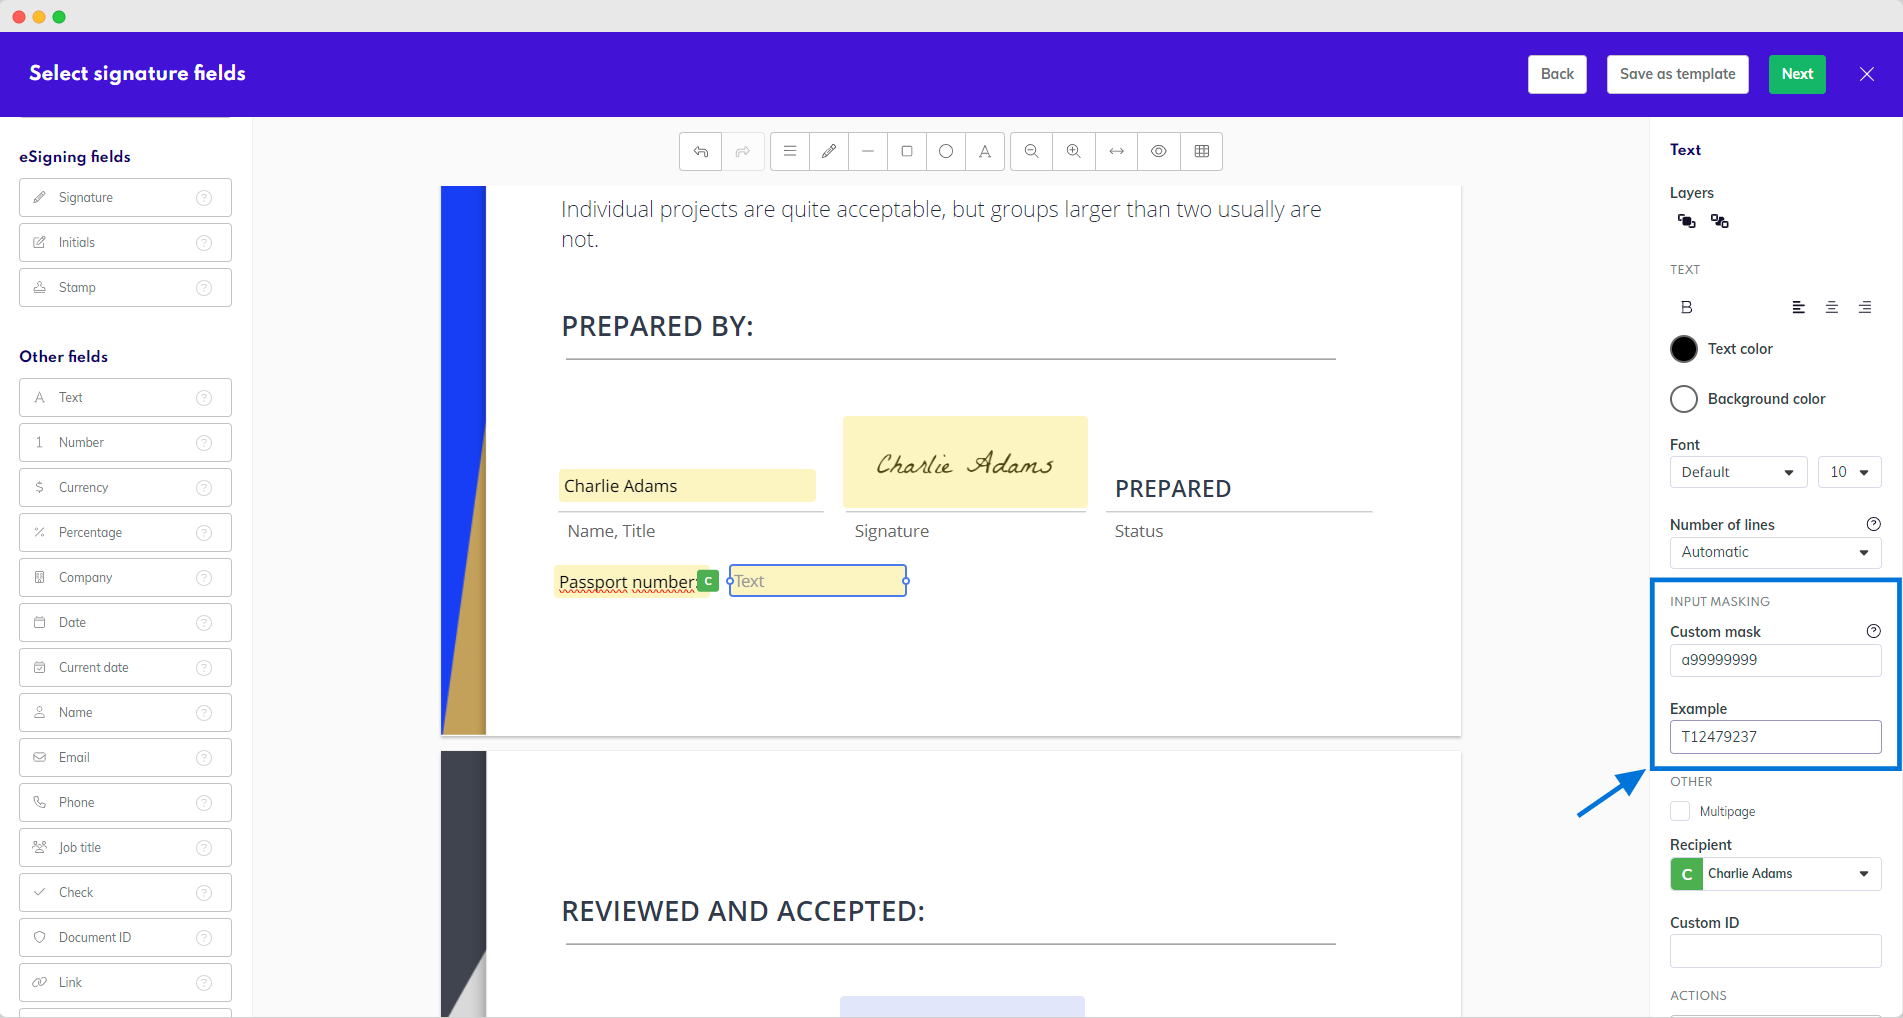
Custom mask
Input masking legend:
Use
ato represent an alphabetical characterUse
9to represent a numeric characterUse
*to represent an alphanumeric character (= can be a letter or a digit)Use
[ ]to make a character optionalOther characters (such as simple brackets, commas, or slashes) and spaces can be used to represent themselves
Example 1:
The new US passport number begins with a letter, followed by eight numbers, for example E94817893. To represent that, we would create the following mask: a99999999
Example 2:
Emirates ID number consists of 15 unique digits divided into groups. To represent Emirates ID, we would use the following mask: 999-9999-9999999-9
Example 3:
A Czech bank account number looks like this 000019-2235210247/0100. The first part is optional and many accounts don’t have it. The second part always has 9 or 10 numbers. The third part always has four numbers.
To make sure the recipient enters their bank details in the correct format, we would create the following mask: [999999]-999999999[9]/9999
Example 4:
The IBAN consists of up to 34 alphanumeric characters (minimum length is 5 characters), as follows:
country code using two letters,
check digits – two digits,
and
Basic Bank Account Number (BBAN) – up to 30 alphanumeric characters that are country-specific
In Ireland it looks like IE12 BOFI 9000 0112 3456 78 and in Switzerland like CH56 0483 5012 3456 7800 9
To represent an IBAN format that accommodates any country, we would create the following mask:
aa99 *[*** **** **** **** **** **** **** **]
Advanced input masking
Dynamic masks
Dynamic masks can change during input. To define a dynamic part use { }.
{n} => n repeats
{n|j} => n repeats, with j jitmasking
{n,m} => from n to m repeats
{n,m|j} => from n to m repeats, with j jitmasking
Also {+} and {} is allowed. + start from 1 and empty start from 0.
JIT masking - Just in time masking. The mask will only be visible for the user-entered characters.
Alternators
The alternator acts as an OR statement. The mask can be one of the choices specified in the alternator.
Example:
a|9 => a or 9
(aaa)|(999) => aaa or 999
(aaa|999|9AA) => aaa or 999 or 9AA
Grouping fields
During preparation, you can also group several fields together, to then manage them as if they were one field. You can move them, reassigned them, or edit their settings all at once. If one or more fields have a different individual setting from the other fields, for example marked as Required while the rest of the fields are Optional, they will keep this setting once grouped. If the setting is then changed for the whole group, it will overwrite the individual setting.
If the grouped fields are assigned to different recipients, they will remain as such, unless the recipient is changed, in which case all the fields will be assigned to the chosen recipient.
You can group fields by selecting several of them by clicking on them while holding the Shift button, or dragging your mouse over them.
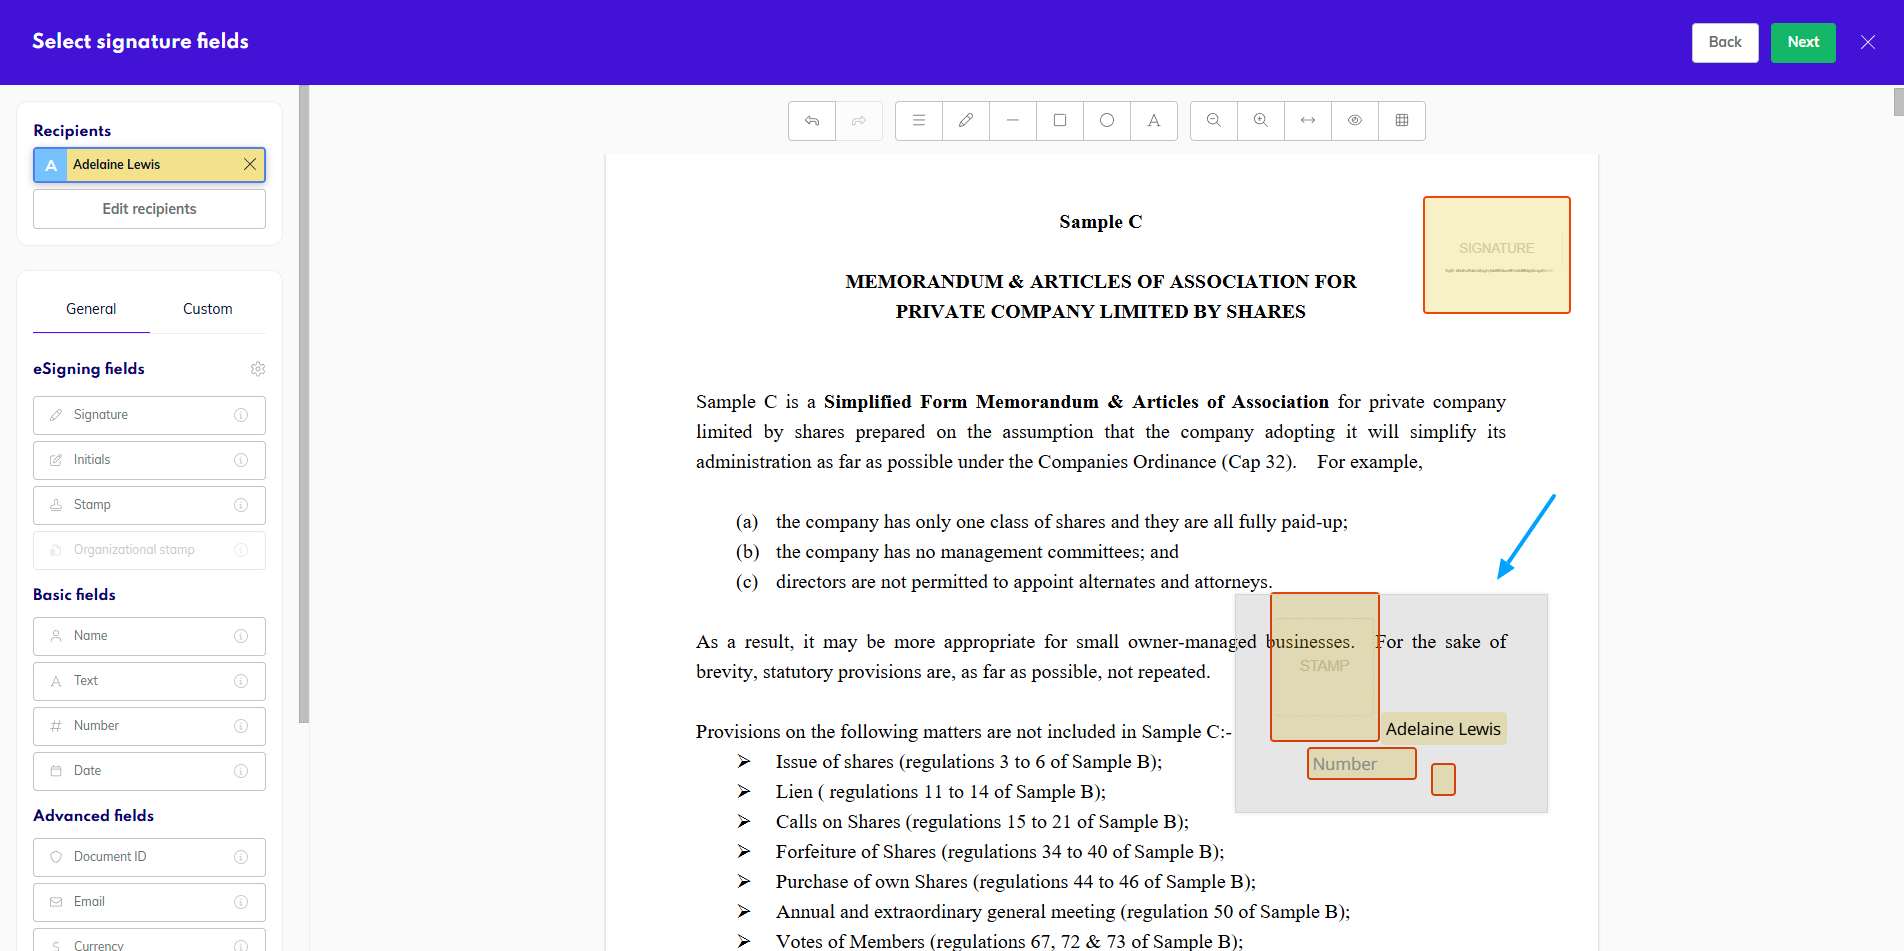
Select multiple fields
Once multiple fields are selected, you can use the button Group fields that shows in the right-hand panel.
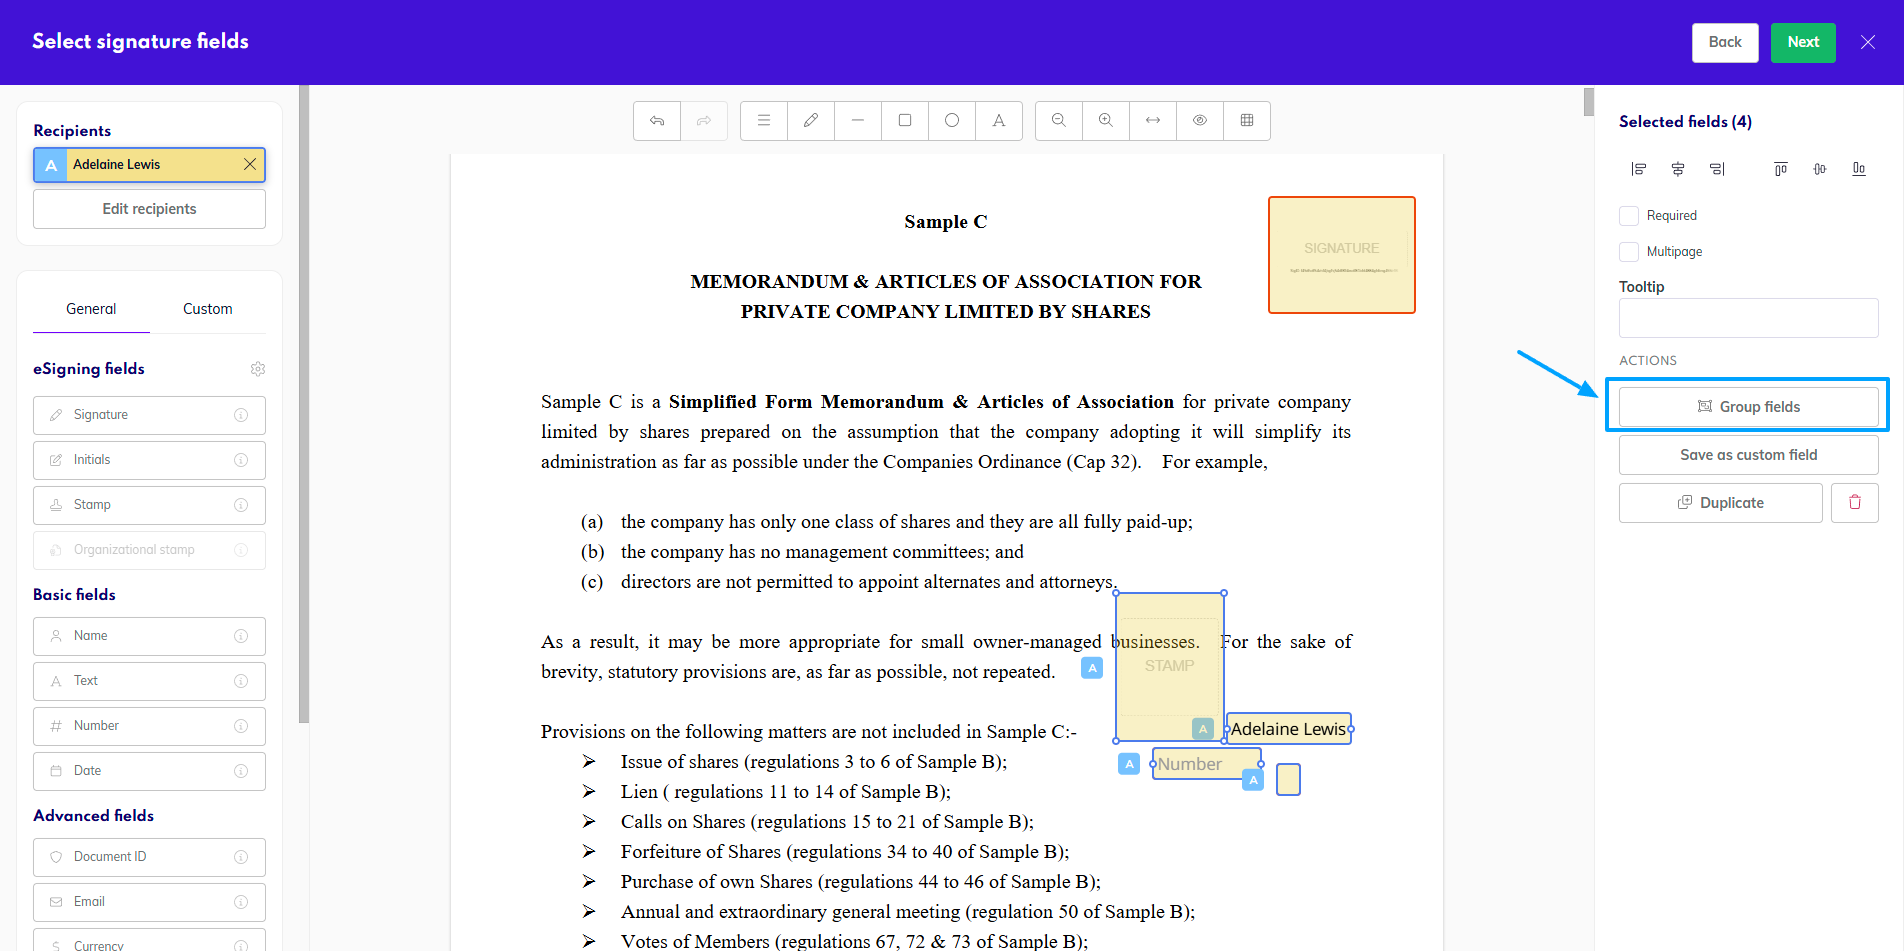
Group fields
You will also find the Duplicate button here, which is how you can quickly duplicate the same fields to reuse somewhere else on the document.
Fields can also be ungrouped at any point, in which case each field will be managed individually again.
Saving custom fields
You save a field with a specific setting (or several) or groups of fields as a custom field to be reused across different documents. For example, if your documents often have a group of a signing field, date, and name, you can save this group and later apply it to a document in one click instead of three.
Individual fields with settings that differ from the default can also be saved - for example a specific tooltip, a placeholder, or a mask. Or even several settings at once.
Select the field/s you want to save and click Save as custom field in the right-hand panel.
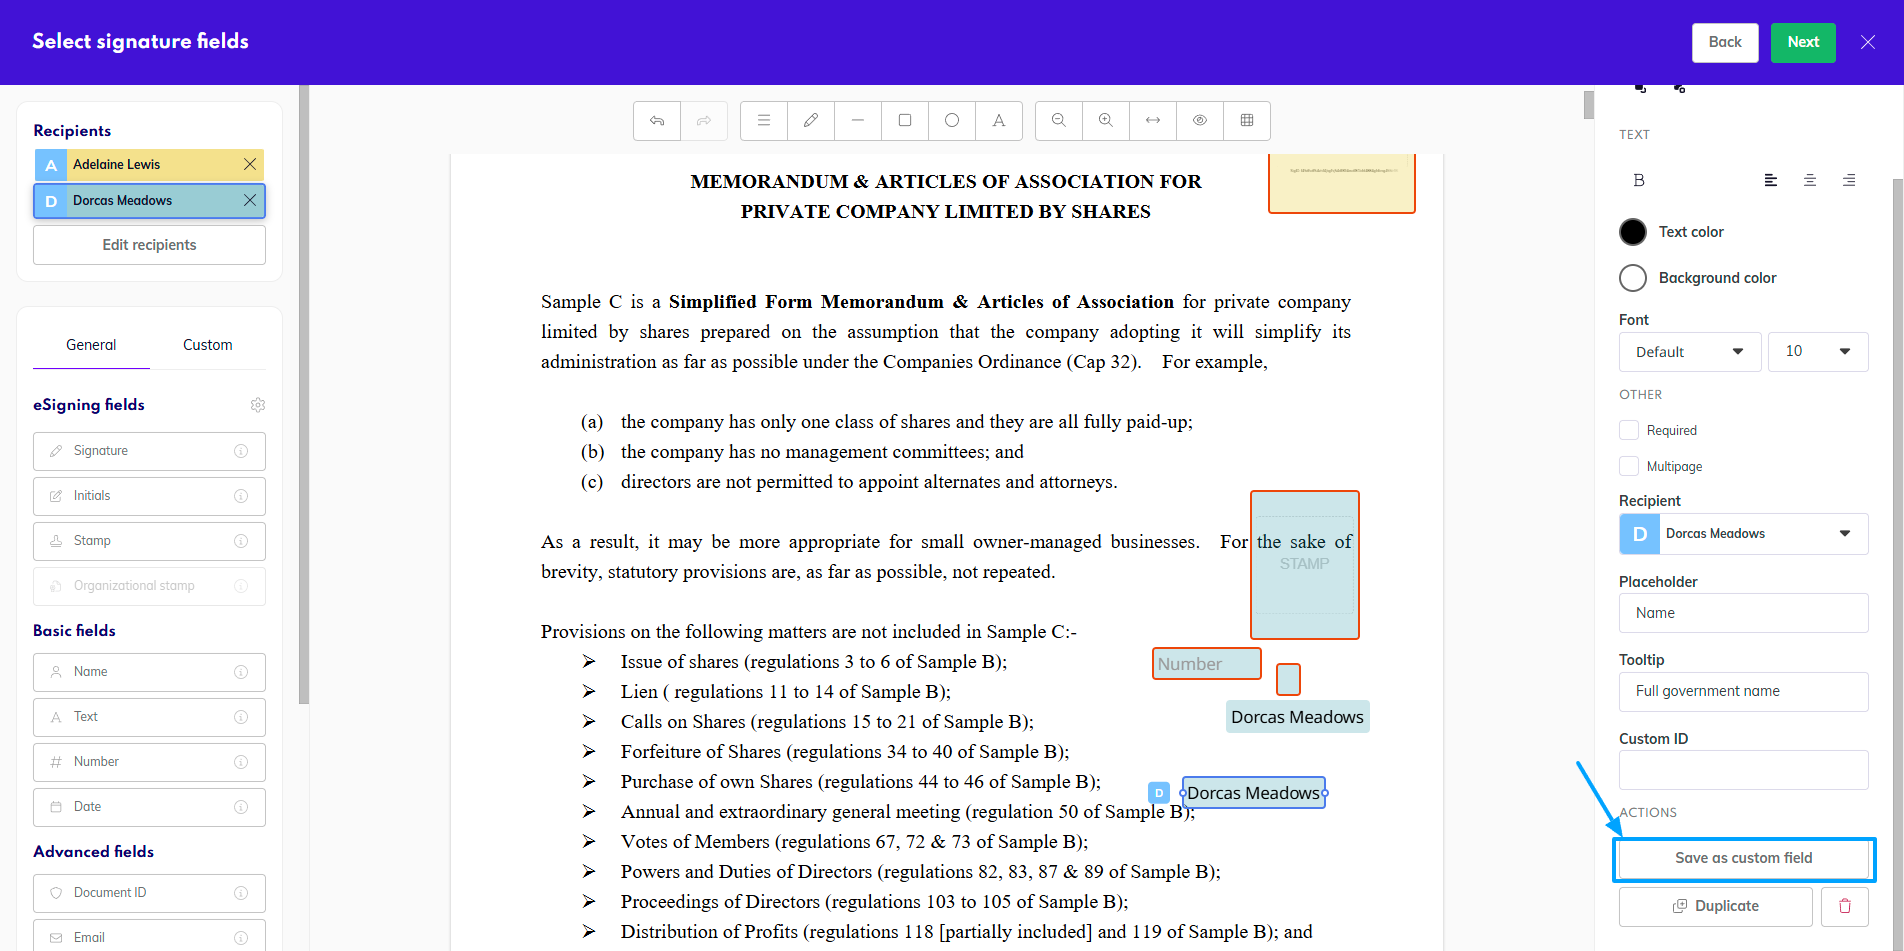
Save as custom field
Create a name for the field - cannot be the same as an already existing field.
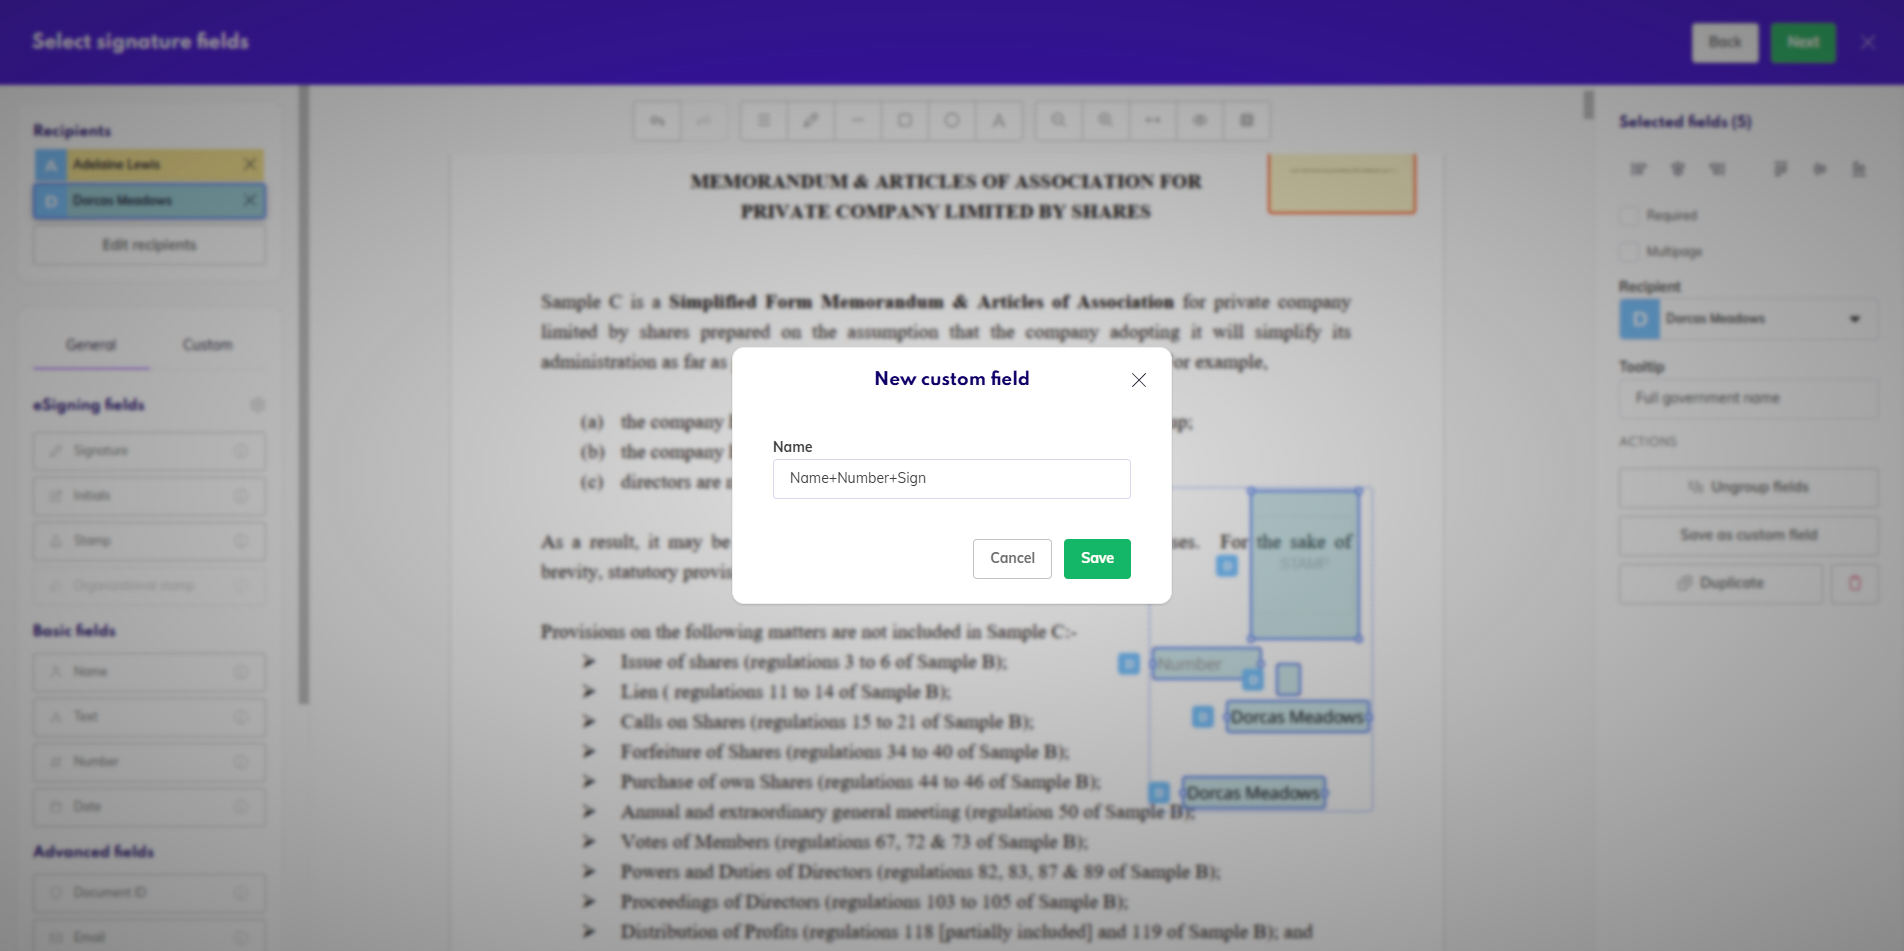
Name a new field
You will then see the custom field in the left-hand panel under Custom.
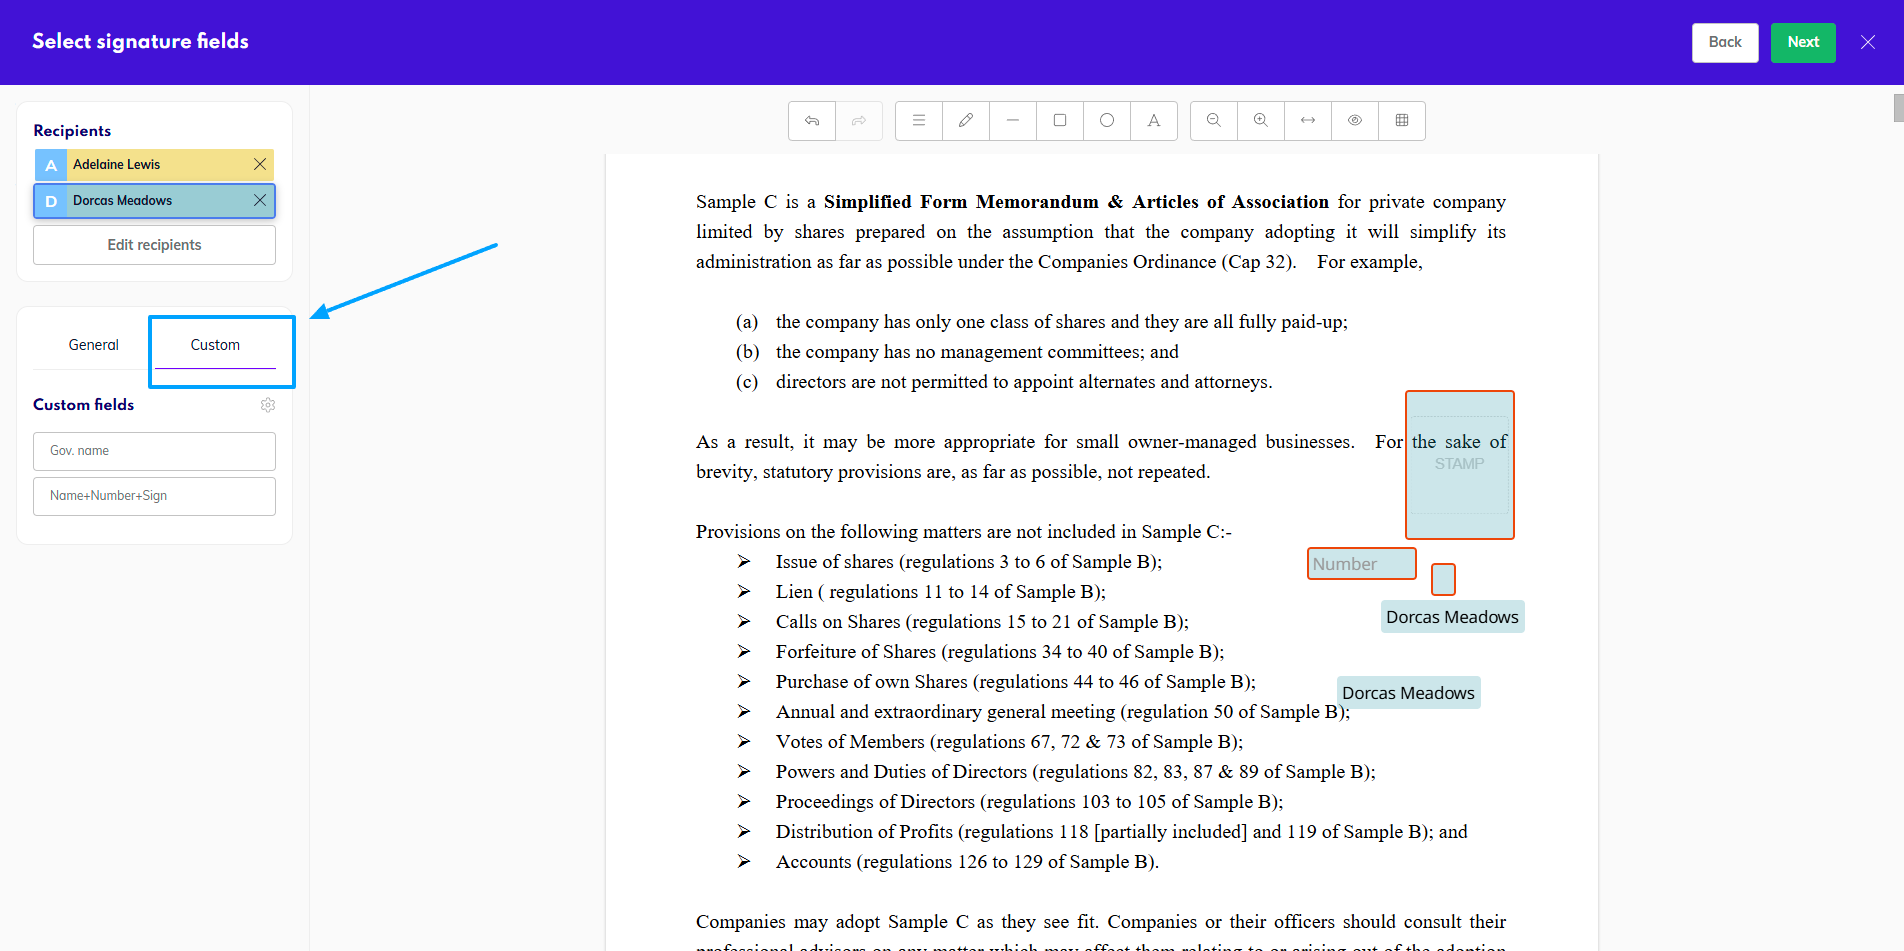
Custom fields in the panel
From here you can place the fields on documents. They will stay saved in your account and can be reused at will.
You can also reorder, rename or delete the fields when necessary. The management can be opened by the settings icon, same as when hiding or reordering default fields.
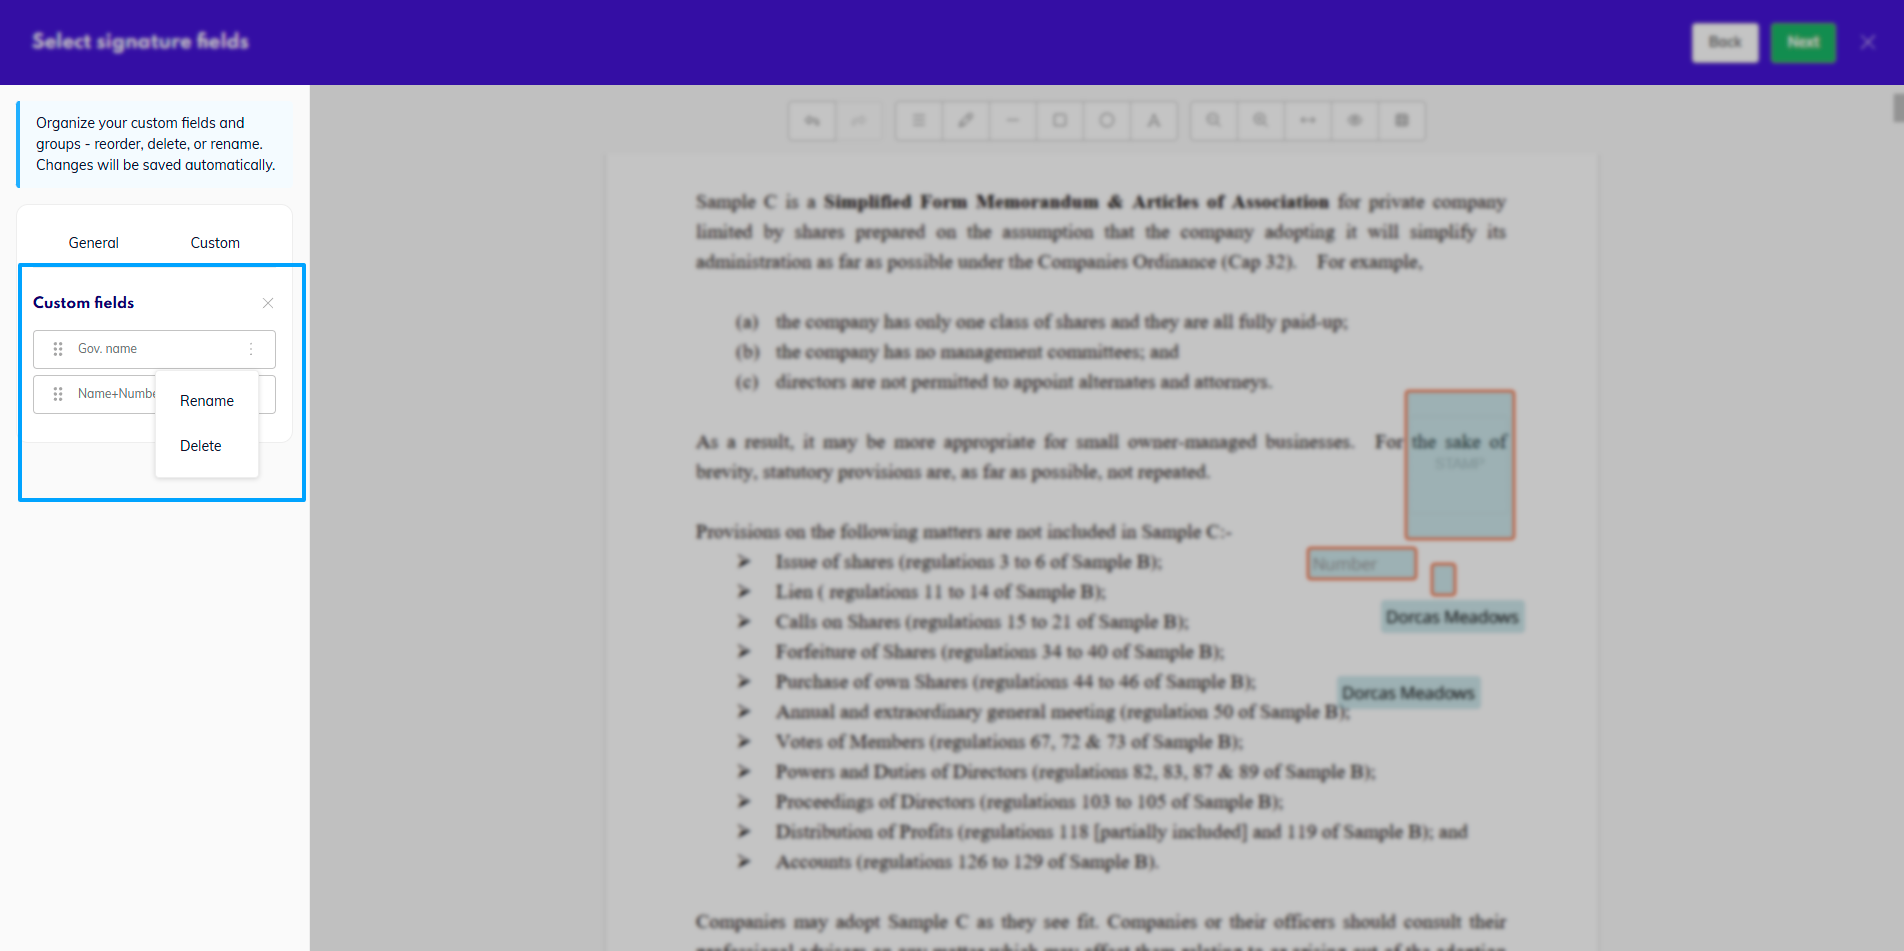
Edit custom fields
Managing files in multi-document signing
In the case of singing multiple files in one transaction, you might need to edit the files in some way, be it reordering the files, renaming them, or even deleting or adding new files. You can do this on the right hand side of the screen, where you will automatically see thumbnails of the documents. For easier work, you can minimize each document, so only their names are visible.
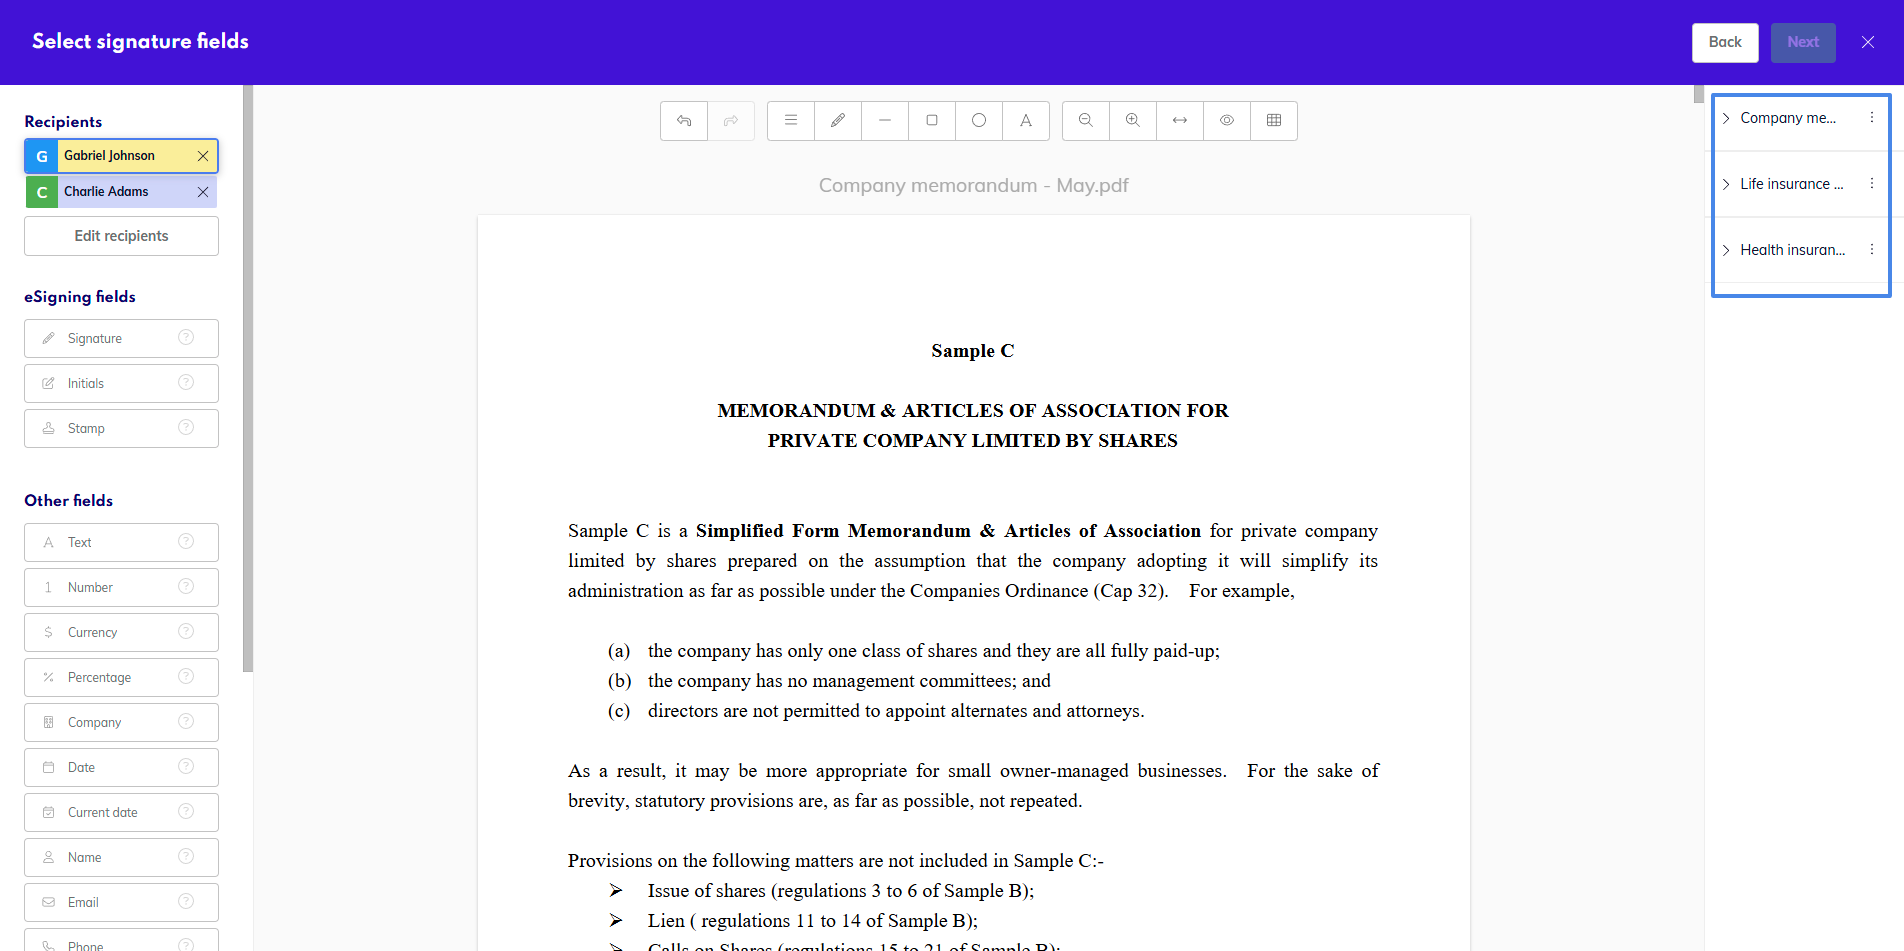
Multiple files in signing process
Adding files
At the very top you will see the button to Add files
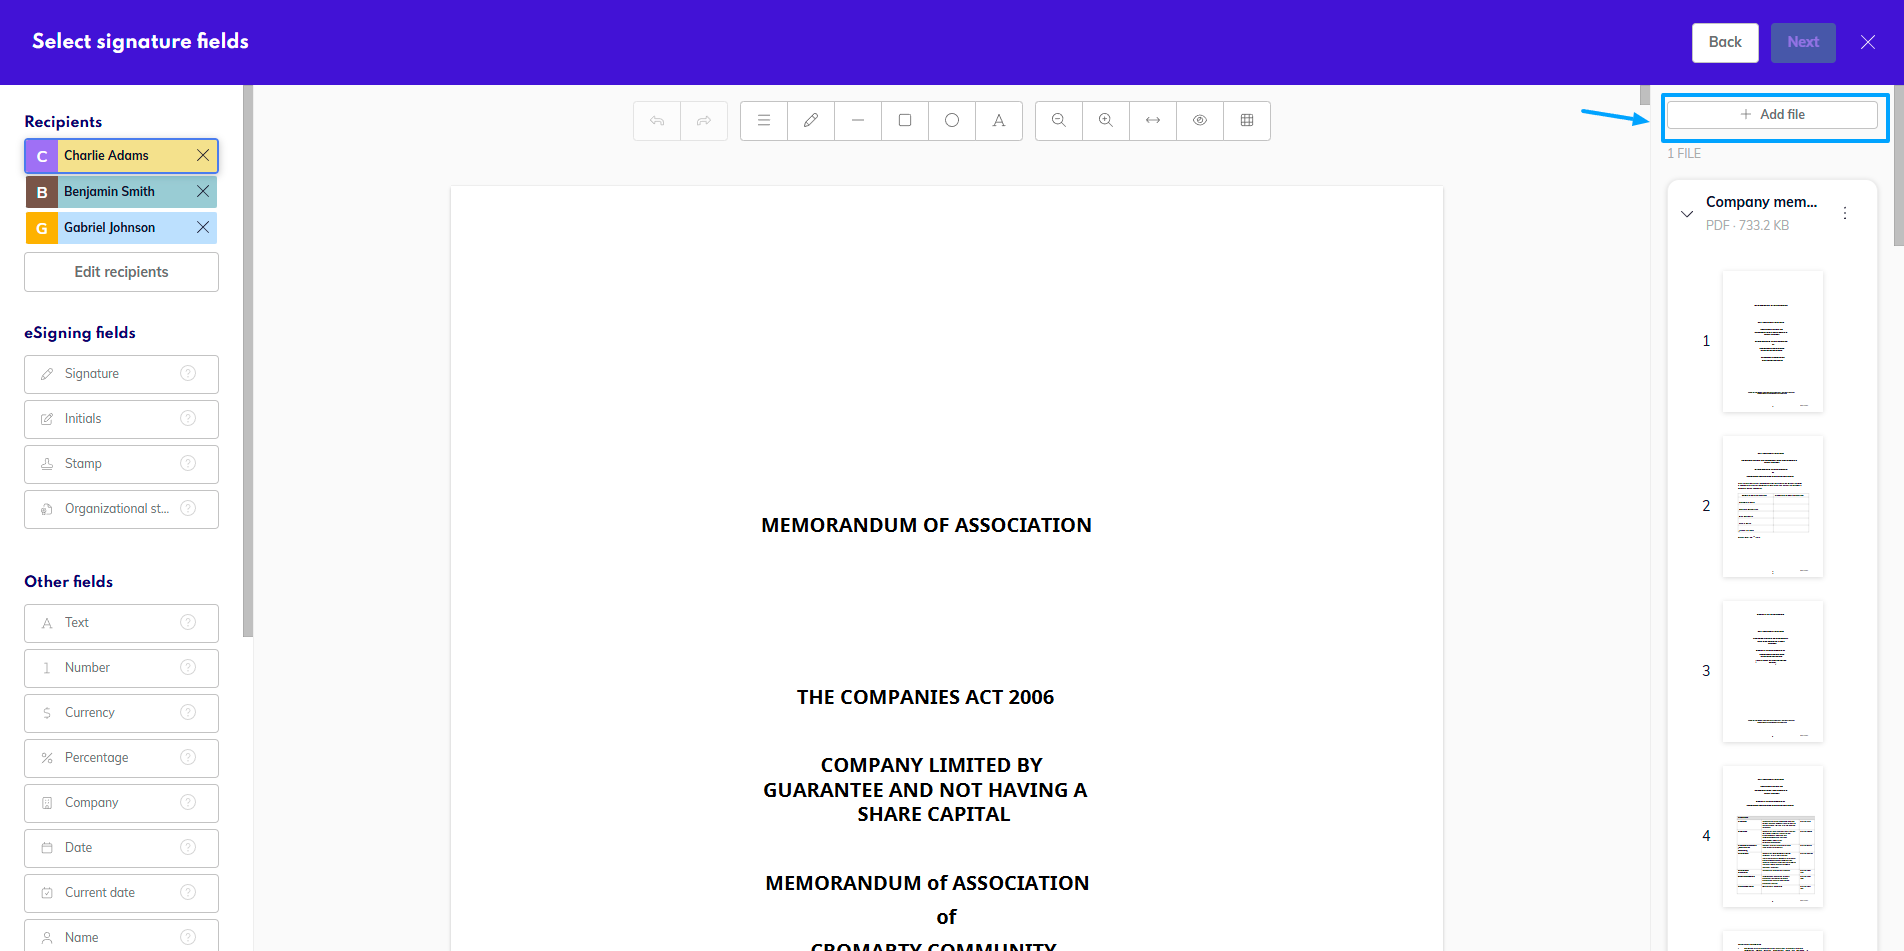
Add files
Here you can upload any additional files you need to - either from your device, or one of your connected cloud providers.
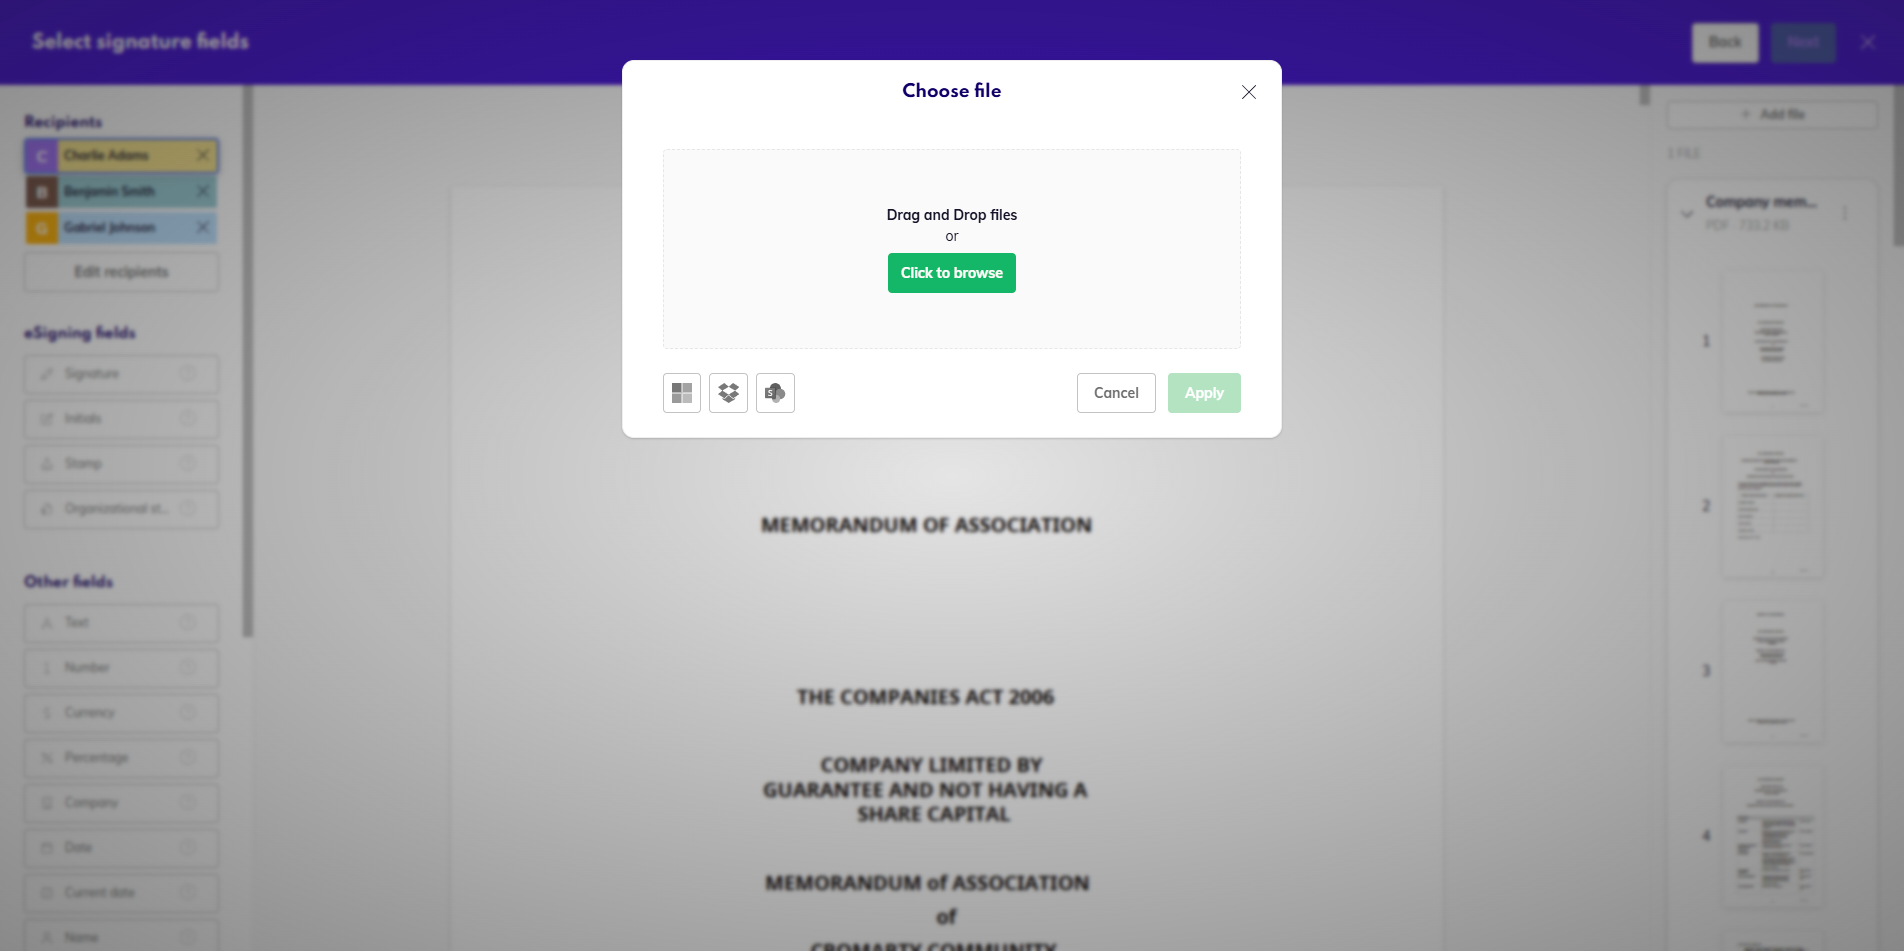
Upload new files
Replacing a file
You also have the option to replace an uploaded file with a different one - any signing fields already placed on the original file will be deleted and will need to be placed again on the new file.
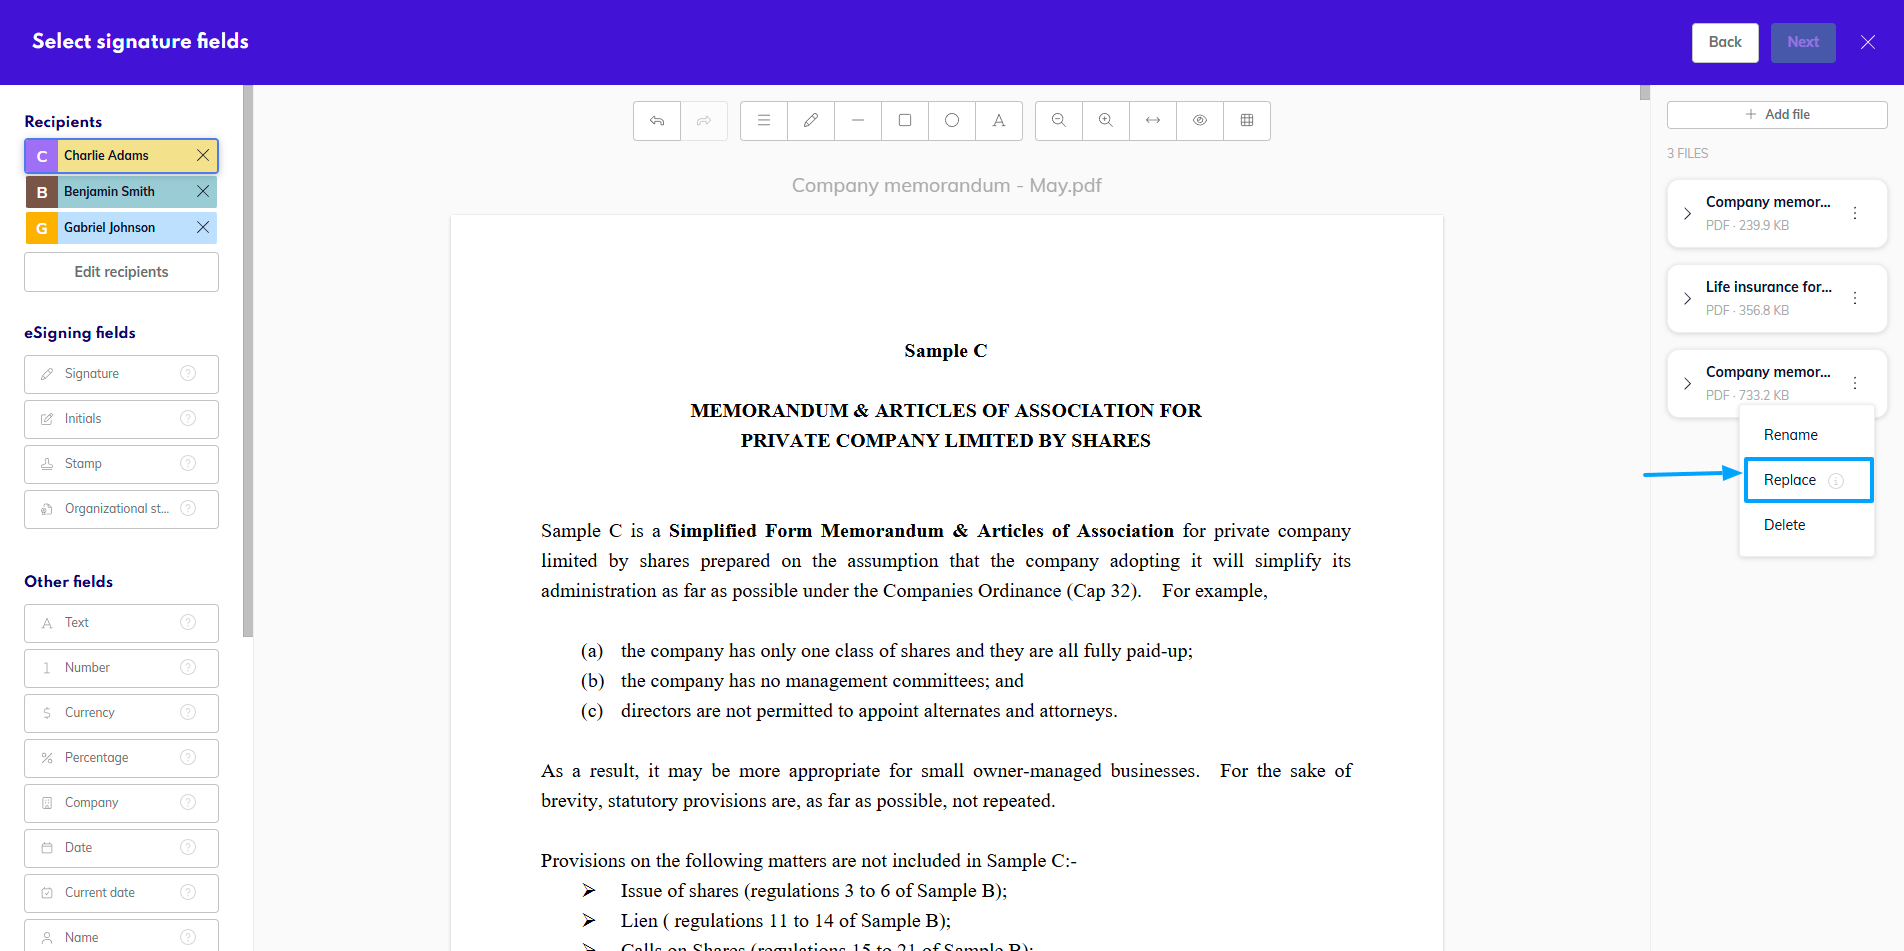
Replace a file
Renaming the files
Click on the three dots on the document whose name you wish to change
Select Change name
Rename the document
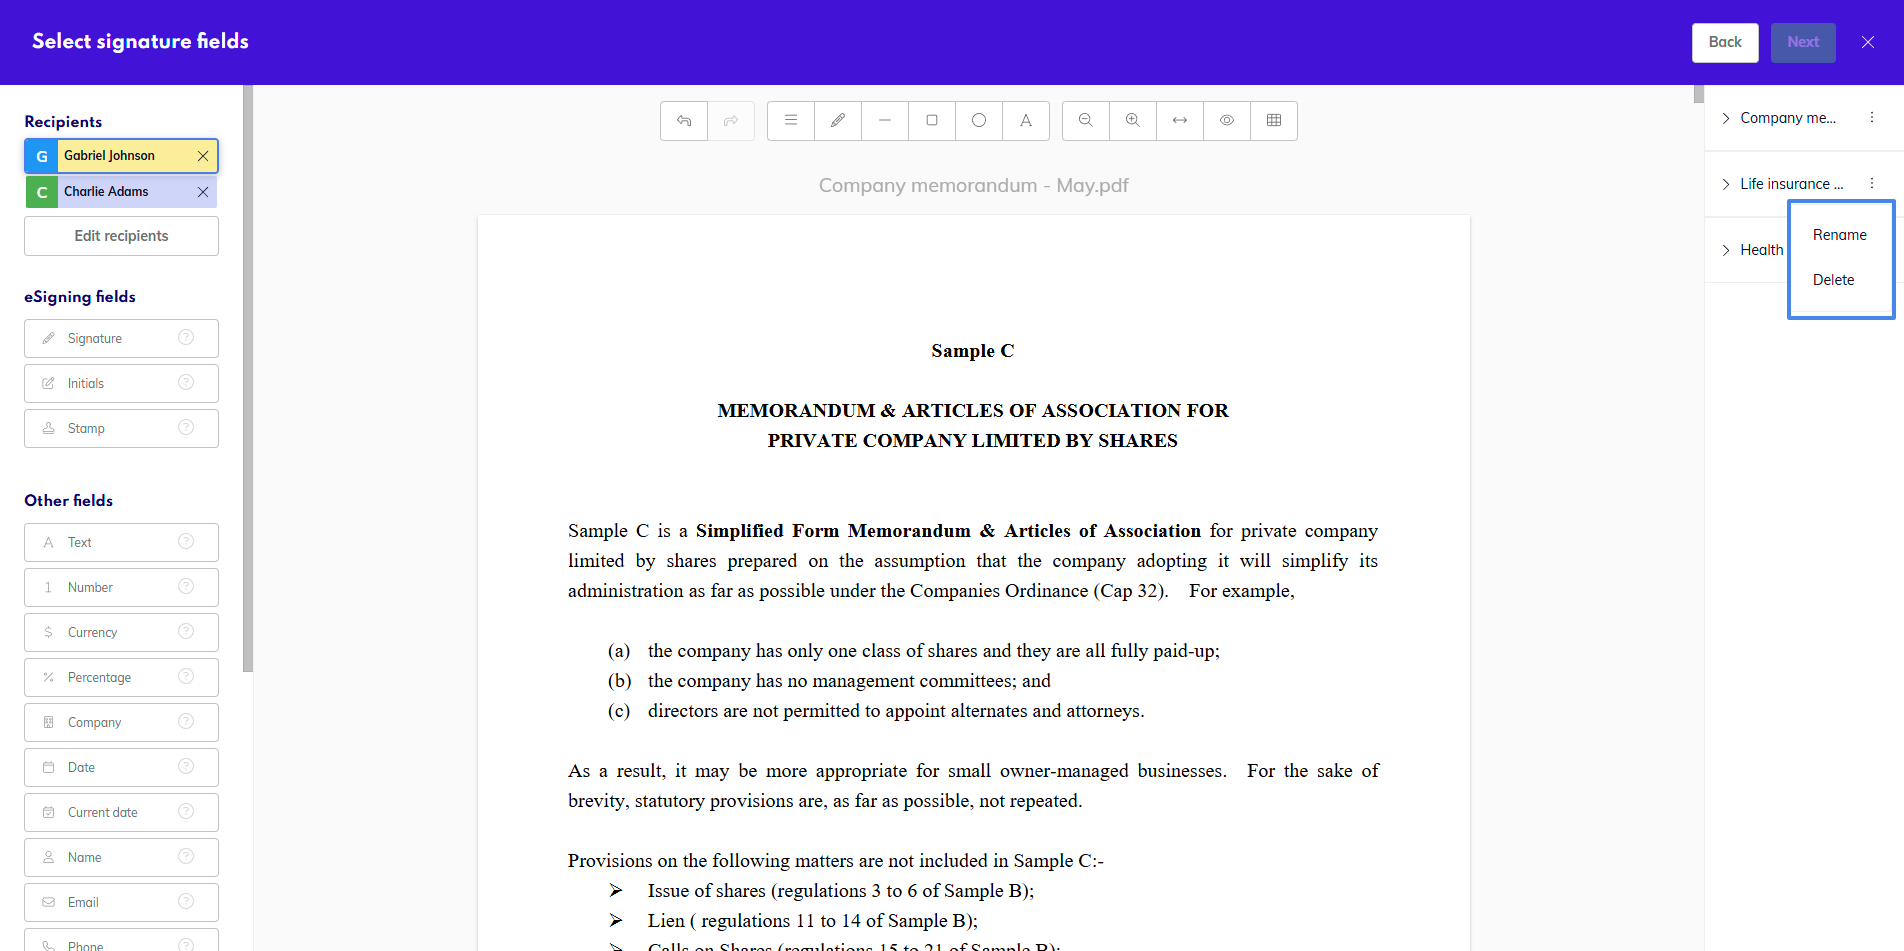
Rename or delete a file
You can also delete the file here if needed.
Re-ordering the files
You change the order of the files by simply dragging one to a different place in the column.
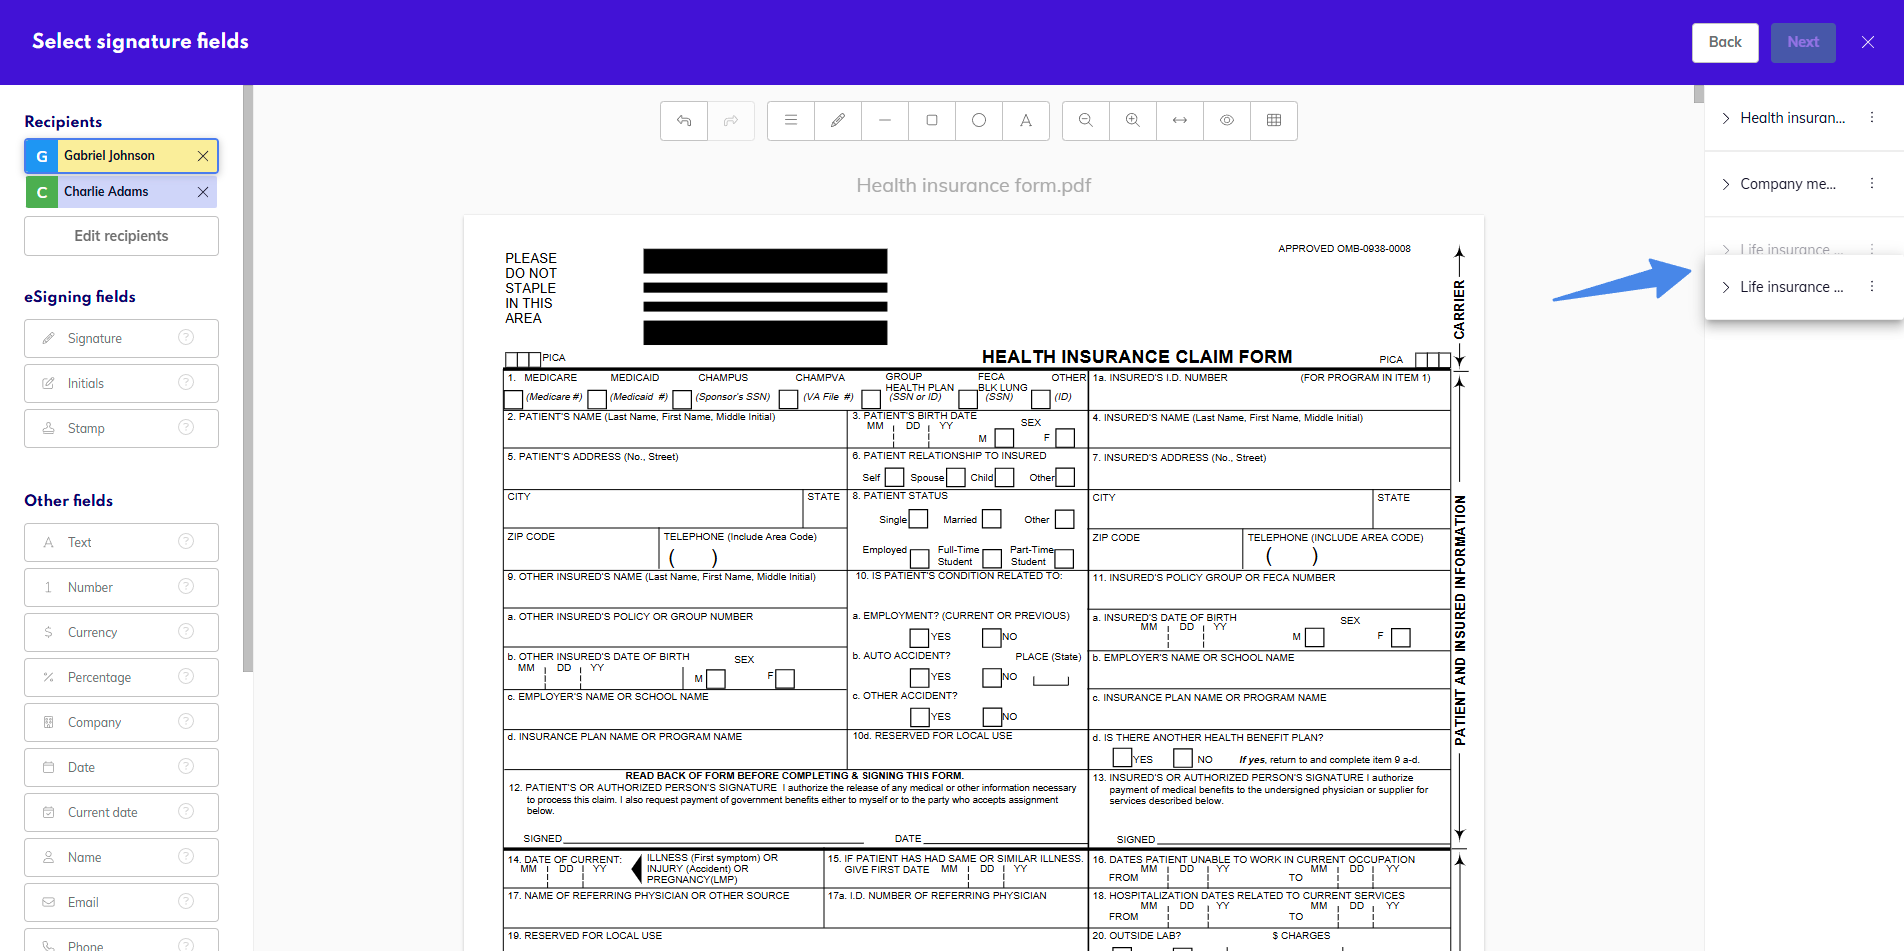
Re-order files
The document preview will reload to reflect the order change.